Without meaning to stray to far into truism territory, the core raison d’être of smartphones is that they are designed for many tasks. In a single, compact device you have a mobile phone, digital camera, PC, MP3 player, video player, travel guide, supermarket and any other service you can think of that works online.
Yes, your smartphone is a jack of all trades. But is it a master of any?
Dedicated point-and-shoot digital cameras and lower-end camcorders are surely facing a slow road to extinction, with many modern phones capable of shooting ridiculously high-quality photos and videos. But can your phone really do it all, from start to finish, without connecting up to your PC? Well of course it can.
Here, we take a look at some of the tools and techniques beginners can use to shoot, edit and upload videos from their Android smartphone.
How smart is your phone?
First up, this guide applies to any Android user, irrespective of their device of choice. And many of the tips may apply across the smartphone realm too, though we’ve focused on Android here to keep things a little more contained.
However, the quality of your smartphone will have a big bearing on the quality of the video you capture. There are tools that can help enhance poorly captured video, but there’s no substitute for good equipment in the first instance – so the likes of the Oppo Find 7, Acer Liquid S2, LG G Pro 2, Samsung Galaxy S5 or the OnePlus One will all serve you well here, each capable of shooting video in up to 4K resolution.
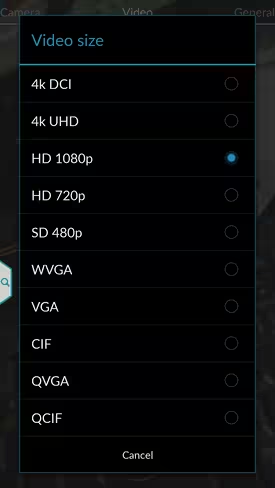
That said, 4K isn’t really necessary to capture high-quality video, especially when you consider that most TVs and monitors still aren’t 4K compatible anyway. Most recent mid-to-high range Android phones will offer something in the region of HD 1080p, which is more than adequate.
But as a general rule of thumb, the better the quality of smartphone you have, the better quality lens and camera it will have for capturing video. This will usually be reflected in the price too, but not always, as we’ve seen with the $300 OnePlus One which has a better-than-average camera for the price.
Shooting
Shooting is the most crucial stage of the video-creating process. If you capture the video correctly, you have all the time in the world to mess around with editing to get that bit right. But if the source material is wonky, well, you will be seriously hamstrung further down the line.
First up, what camera should you use? The camera on your phone, sure, but what app?
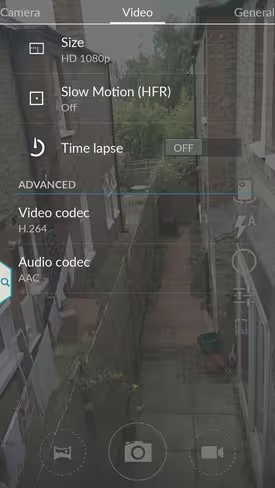
Chances are, the video camera app that came bundled with your Android device will more than suffice. Most of the third-party video-recording apps out there simply link to your device’s bundled camcorder – and remember, they’re both using the same underlying hardware anyway. Though often they may have a few nifty features thrown in for good measure, such as touch-to-focus, image stabilizing, and other configurable settings as with the Camera ICS app. For most people though, the camera that comes with your phone will be absolutely fine for shooting.
Tricks of the trade: Knowing your 5 enemies
If you didn’t study film-making at university, there’s probably a good reason for that. But there’s five simple things worth considering when shooting that can make all the difference between the following post-viewing statements: ‘that was woefully-amateur‘ and ‘wow, that’s not bad…what did you film this with?’
This is far from an exhaustive list, but they’re probably the most basic and simplest factors that can elevate ‘awful’ to ‘not bad at all’ when creating a home movie.
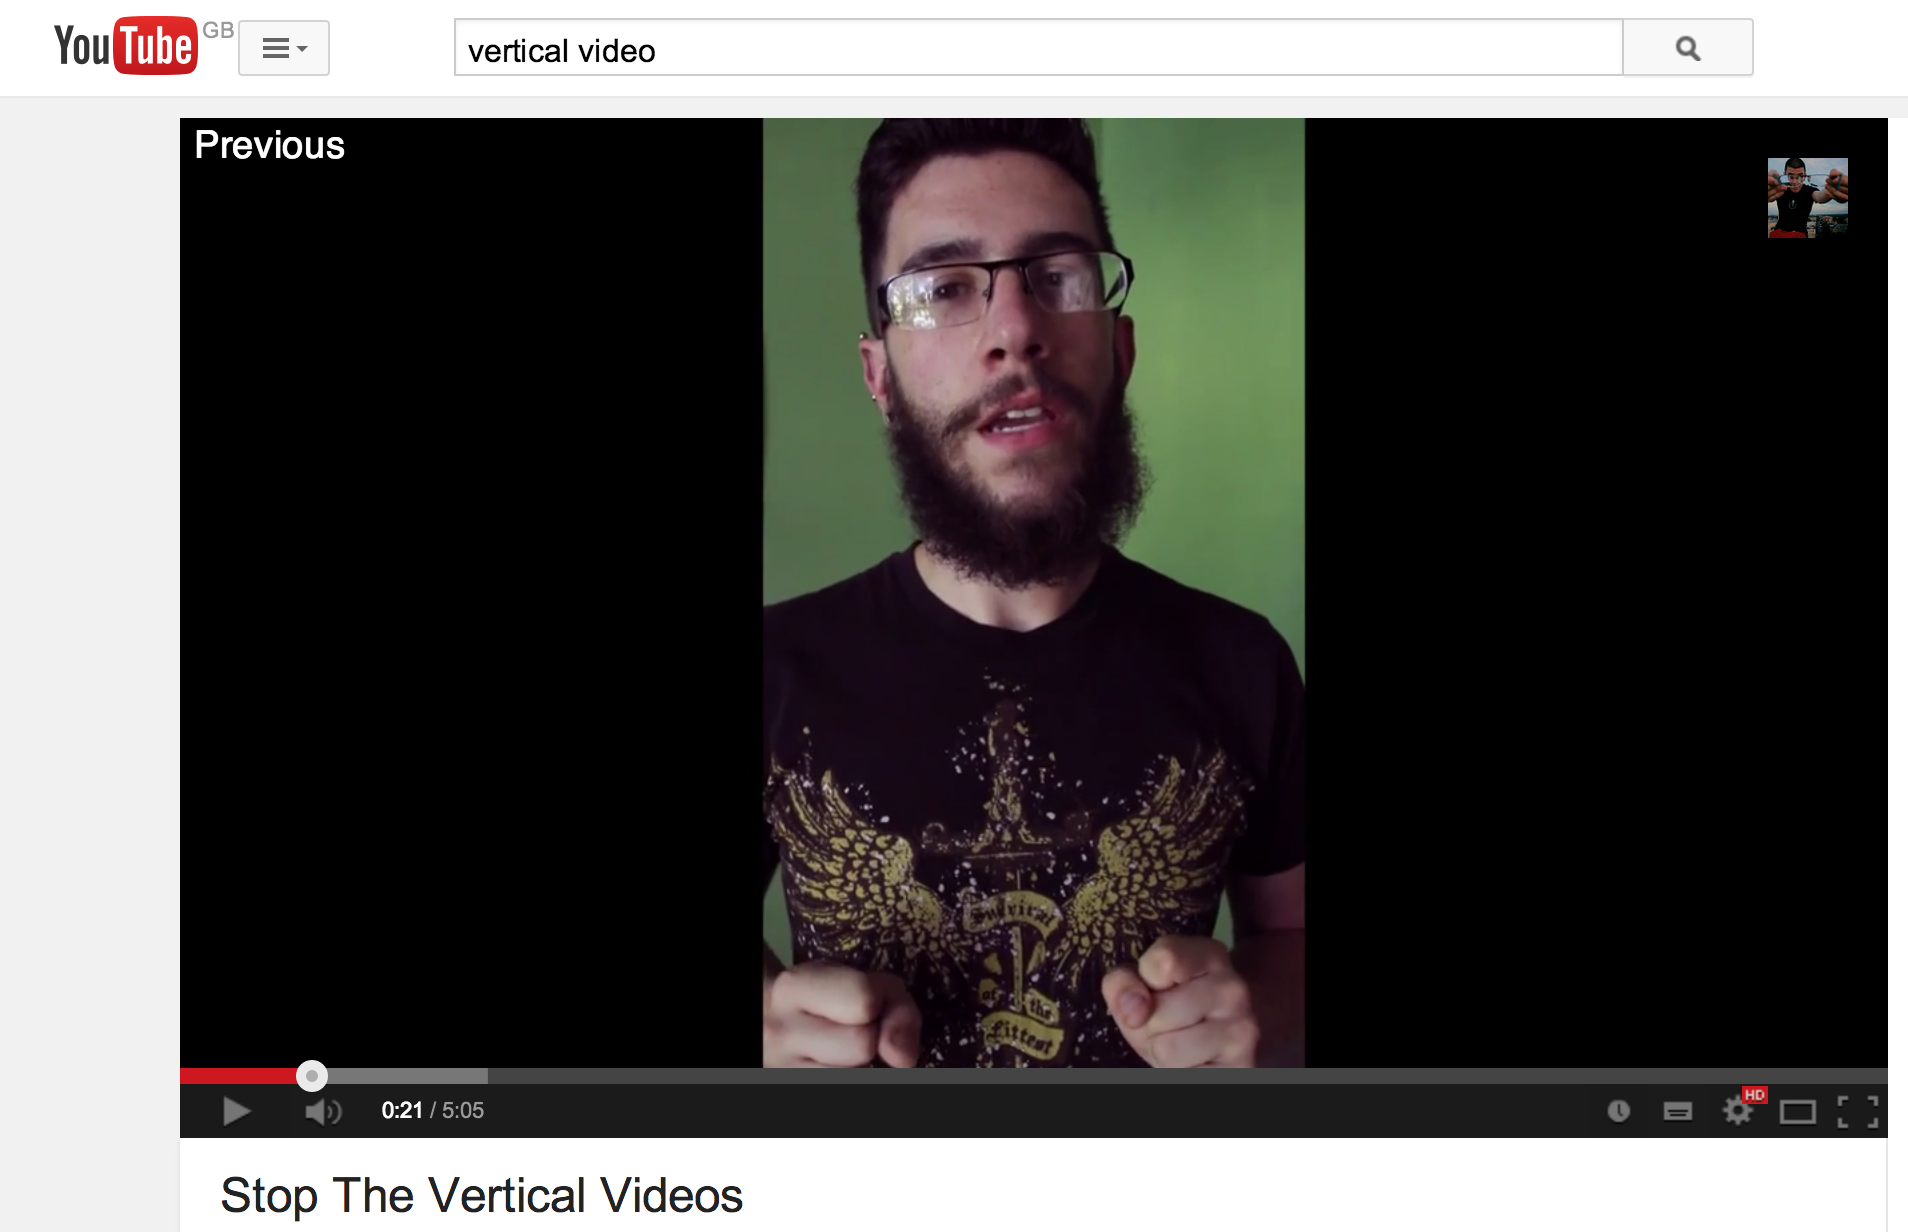
Orientation:
The simplest rule-of-thumb is to ensure you always flip your phone and film in landscape mode. While filming in portrait can be fine for viewing back on your device, if you want to avoid those dreaded black bars down the side of your skit on YouTube, treat portrait like the plague.
Lighting:
Among the biggest tell-tale signs that a video has been shot by an amateur is the lighting. Even some decent dedicated video cameras don’t perform well under standard room lighting, so it goes without saying that many smartphones will struggle in dimly-lit places too.
There’s no need to become an expert in lighting or buy expensive lamps to make your skits look ‘Pro’ (though this will of course help) – simply avoid back-lighting the subject (e.g. a person standing against a window with the sun shining in), unless you’re genuinely seeking the silhouette look. And if at all possible, use naturally lit locations to film, such as outdoors or near large windows. Position the subjects of your filming so that the camera is nearest the window and it captures the light shining on to the subject.
It doesn’t have to be natural light of course. If you do have a very well-lit room from electric lighting, it can work just fine. Try some test-filming first to see what it looks like when you play it back.
Audio:
Horrible, tinny audio can bring an otherwise good video down more than a few notches. If you plan to dub some music over the top of your moving images, then it doesn’t matter one little bit. But if the background sound is important, then there are a few things you can do to ensure it’s passable.
The location of your filming is everything when it comes to filming without an external mic. Avoid tunnels and echo-y rooms for starters, while wind is notorious for killing nice sounds you want to capture. If you’re interviewing a person, or want to capture quality speech, it helps if you’re situated as close to the subject as possible.
Steady:
If you’re planning to create a Blair Witch Project-style docu-drama, this one may not be a concern. But the human hand’s propensity to jitter like a jitterbug when holding a phone aloft is well known, and it should be avoided if possible.
There are small techniques you can adopt to minimize shaking. For example, always hold the camera with both hands, and keep your elbows as close to your body as possible, preferably rested on your waist – this provides the necessary support your arms need.
If you’re filming something static, for example an interviewee, then you may as well invest in a cheap smartphone tripod, such as the Joby Gorillapod. Tripods are worth their weight in gold in film-making, and the small investment is worth it.
Style:
We’re perhaps moving into slightly more ‘technical’ territory here, but these are still pretty simple rules to adhere to. The digital zoom on your phone is probably crap, so don’t use it. If you do need to capture something close up, glide in gradually on foot – while remembering to try and keep the phone as steady as possible.
You could also strap your Gorillapod tripod to a trolley, kids’ scooter, bike or anything with wheels and move that closer to your subject. If it’s a long way away, you can create cross-fades and transitions later in the editing process so the viewer doesn’t have to sit through the full ‘zoom’ in.
It’s also best to avoid too much panning – that is, moving your camera from side-to-side. In fact, any jerky movement that shifts the viewers’ eyes too much and too quickly is best avoided. But equally, it can be all-too-easy to create boring footage by never alternating your shots – try different angles, juxtapositions, and framings. And remember, any ‘transitions’ between scenes can be edited later to make them more seamless.
Storage:
If you’re an app-happy, snap-happy smartphone user, then you may not have much space to play with on your smartphone, and this can be a problem for mobile videographers.
Obviously, how much storage you need will depend on what you’re creating. Anything less than 10 minutes, and you should be fine with a spare 1GB of space (depending on the resolution you shoot at). For example, one minute of footage at HD 1080p uses around 150MB, but ramp this up to 4K UHD, and it uses around 450MB per minute.
If you’re buying an Android phone with the knowledge that you will be using it a lot for creating videos, then it’s definitely worth considering which device you go for. The OnePlus One and HTC One both have 64GB versions, and are good for this reason alone.
The flagship Samsung Galaxy phones are open to external storage via a micro SD card, however with Android KitKat, restrictions were put in place for writing to SD cards, which effectively renders it useless for saving video. There are workarounds, but these involve rooting your device and using a third-party app to fix the issue – all a bit of a headache you’ll no doubt agree.
Bottom line: Unless you’re creating a 2-hour long Hollywood epic, you should be fine for most use-cases with up to 1-2GB of local storage. Alternatively, if you don’t need to edit directly on your device, you can upload your clips to a cloud-based service such as Dropbox and edit on your PC.
Next page: Editing and publishing
Editing
There’s quite a few decent video editing apps on Google Play, and more than a few shoddy ones. Here’s three of our favorites though, each bringing something a little different to the video editing mix.
KineMaster
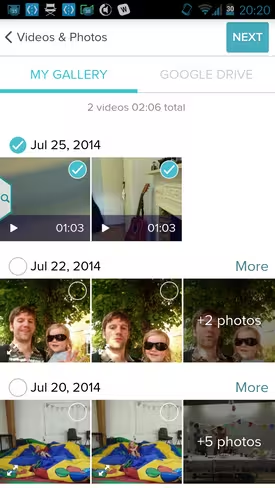
KineMaster is one of my favorite editing apps at the moment, as it offers quite a good selection of tools to edit, tweak, trim, combine, enhance and otherwise bring a little magic to the movie-making mix.
You can drag-and-drop any clip or photo from your gallery, shift them around, throw some titles and transitions in, play around with the color saturation and more. You can even record your voice over the top, which is useful for narration.
You can share your handiwork across all the usual social channels, but importantly you can save it to your device to publish anywhere you please afterwards – including YouTube, of course.
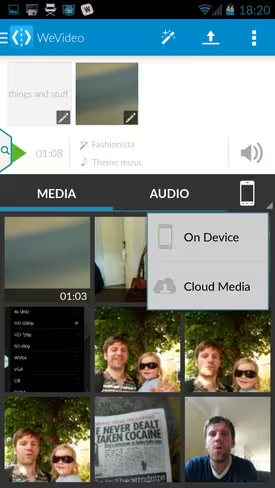
WeVideo
We’ve covered WeVideo in the past, and it really is a neat service for editing all your videos together. You can pull in videos, photos, themes, add titles, and then publish in HD, while sharing them to social networks, uploading to YouTube or saving to your gallery to do with what you please. Within the app you can trim clips too, add effects, throw some music into the mix and generally make them pretty cool.
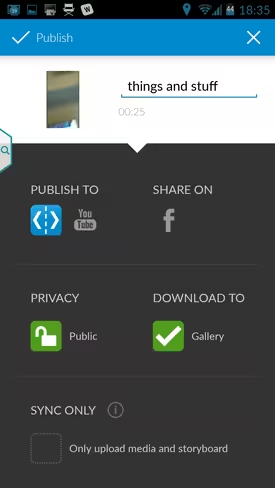
However, there is a downside. For each video, you’re restricted to 480p video quality, which is also branded with WeVideo. To get a 1080p incarnation and remove the branding, you’ll have to upgrade and pay from around $2 to publish each video, or commit to a monthly plan which starts at a mere $3. That said, you’ll be hard-pushed to find a cleaner, simpler interface to work with than WeVideo.
➤ WeVideo
Magisto
Magisto probably isn’t for movie-makers who like granular control, but it’s still a neat alternative anyway. You can upload a collection of video clips (and photos) and have them transformed into a slick home movie. Indeed, it automatically selects the most compelling moments and weaves them into a story, with customized styles and music.
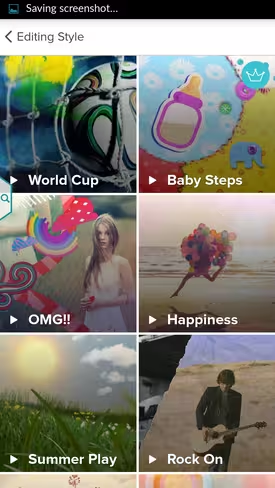
While anyone can share their handiwork to their social networks, only Premium users can download movies to do with as they please – this cost $5/month or $18/year. You can also purchase single downloads for $0.99 if you don’t want to commit.
➤ Magisto
Publishing
Some of the aforementioned editing apps let you publish from within – either to their own dedicated platform or directly to YouTube. But we’re running with the assumption here that you want to play the finished article back on your device before committing to uploading it.
To publish to YouTube, you’ll need to have the YouTube app installed on your phone and be logged-in. Then you just go to your gallery, or wherever the edited video is on your device, click the file and hit the ‘Share’ button. From the list of apps, choose YouTube. You’ll then be given the choice to title it, include a description, tag it, and make it private/public.
YouTube’s upload limits shouldn’t hinder most users, but if you do wish to upload videos longer than 15 minutes in length, you will have to verify your account. But it’s all free, which is why it appeals to so many people.
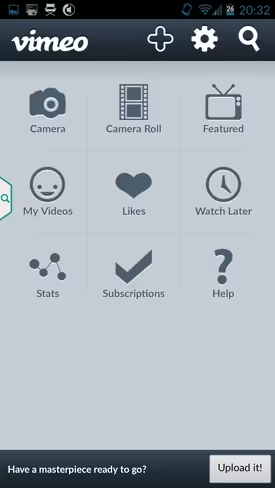
Online video doesn’t start and stop with YouTube. Vimeo has blossomed into a fantastic alternative for creatives to share their work, and you can upload up to 500MB a week for free, a figure that can be bumped up to 5GB a week under a Vimeo Plus subscription, costing $9.99/month or $59.99/year. This should be more than enough for most mobile videographers and, to be honest, the free lower tier should be plenty for many people too.
Vimeo for Android lets you upload your skits directly through the app, and is a pretty pain-free process.
Of course, you don’t have to upload directly from your device. If you simply want to carry the file with you on a memory stick, or burn it onto a DVD, or otherwise save it for later, you can upload it to any cloud-based storage service. Dropbox is particularly popular, and should suffice for most of your video storage needs, but Google Drive is equally good for saving your large files.
Cloud-based storage services are actually great for another reason too. If you’re creating lots of videos but don’t want to publish them yet, you can push them all off your device and into a giant hard-drive in the sky, while still being able to stream them to your device directly from their servers.
This is just the very basics of getting started on your road to mobile movie-making on Android. If you’re prepared to invest in additional accessories, external mics and lighting are good bets for sure, and the more you make videos on your phone, the more you’ll understand what works, and what doesn’t.
Don’t miss: How to make an impact with slow motion video
Image 1 Credit – Shutterstock | Image 2 – Shutterstock | Image 3 – Shutterstock
Get the TNW newsletter
Get the most important tech news in your inbox each week.