
Welcome to TNW Basics, a collection of tips, guides, and advice on how to easily get the most out of your gadgets, apps, and other stuff.
You might have noticed that we have some pretty bad ass header images on our articles at TNW.
Take this one.

Or this one.

Or maybe even this one, for example.

People seem to really like them.
I have to say, the @thenextweb images accompanying their stories are always a highlight of my @Twitter feed 🤣 https://t.co/dSP6fMDqef
— fiiv (@mtimofiiv) May 2, 2019
But as with all great artwork, these images don’t make themselves. It might look like it occasionally, but trust me when I say we work really hard on these. I suspect most of us won’t be fully appreciated until we die.
One of the biggest challenges we face when creating these works of art is removing the background from images, so we can use them as layers to construct our masterpieces.
In this guide, we’re going to take a look at some methods we use for removing backgrounds from images so you too can become an image wizard.
Method 1. Use a free app in your browser
There are several tools you can use online for this task, and they’re mostly pretty good at tackling it in one step. Remove.bg is one of the quickest methods for removing the background from an image. It’s web-based so you don’t need any specialist software, and it does all the work for you.
Head to Remove.bg, upload your image, click go, and let it do all the heavy lifting. Then just click on download, to get a new background-less copy of your image.
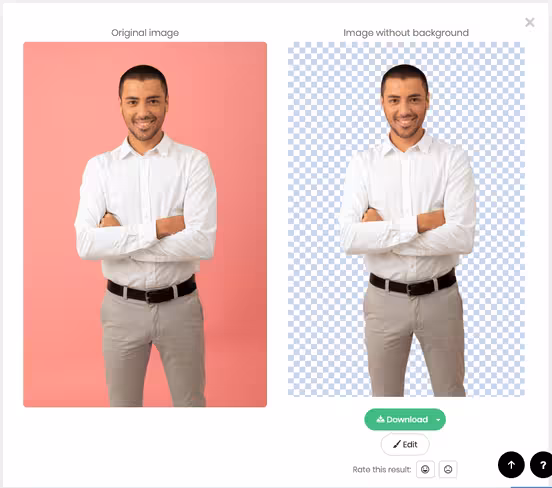
The only issue is that it will downscale your image, so the output quality won’t be as high as the input image. In my experience, the low res output is more than enough for face-swapping, Photoshop fun times, though.
You can download as many low resolution “previews” as you want, but full res images cost about 20 cents a piece. Honestly, this app is so good, and so fast, if you’re in a hurry and need a high-res image it might be worth paying.
There are a bunch more such tools online that you can use for free, including this Adobe Spark one, and Removal.ai.
Method 2. GIMP
Gnu Image Manipulation Program or GIMP for short, is an open-source image editing program, oh, and it’s free! Given that it costs nothing and is available on various platforms, it’s pretty great. It’s got tons of features, and supports every file format I can think of, I’ve certainly never been left wanting more.
All those complex features come with a learning curve, though. Removing a background with GIMP will yield better results, but requires more skill.
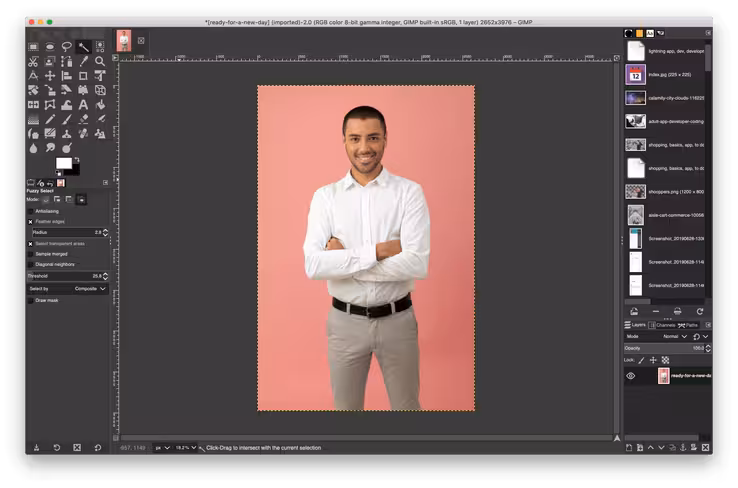
First off, open your image in GIMP.
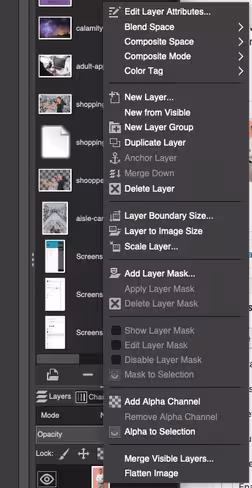
Once you’ve done that, you want to add an alpha channel. Basically, this adds a transparent background behind your image so when we come to remove the background, there’s something there, albeit see through. Add the alpha channel by right clicking your image in the “layers” menu on the right.
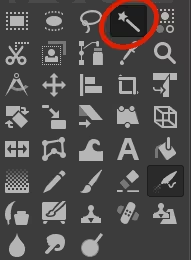
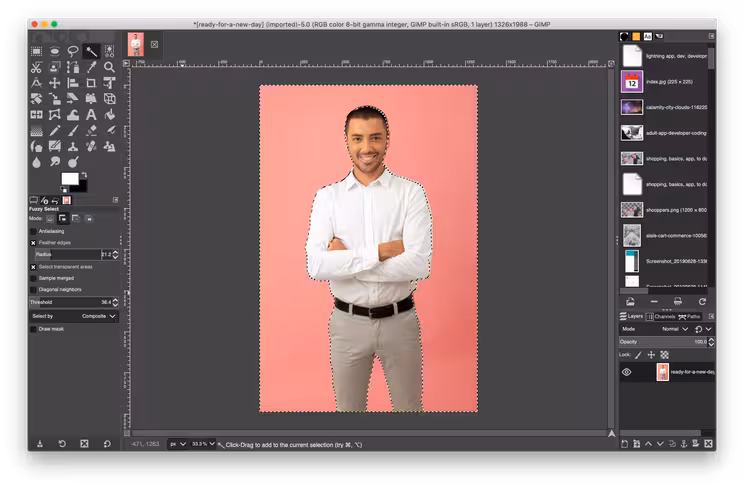
Next, you want to use the fuzzy select tool, it looks like a magic wand with star on the end. Once you’ve done this, click on the background of the image, and it will select the background based on the most common color. (It should be noted this technique works best when the backgrounds are a uniform color, so your mileage may vary.)
Use the fuzzy select tool to select the parts of the background that you want to remove. You should get the special “marching ants” again, to signify the edges of your selection.
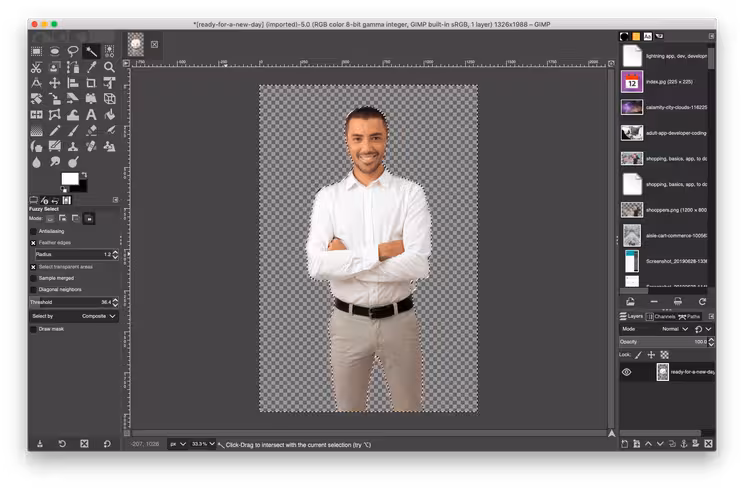
Then it’s as simple as clicking delete on your keyboard – no, not backspace, the actual delete key. You’ll then be left with the cut out figure and a transparent background. Save the image, and away you go.
Method 3. Adobe Photoshop
By far the ultimate photo-editing tool is Photoshop. Of course, this one comes with the most substantial cost too. That said, it’s a professional tool and in the hands of a good user it will give excellent results.
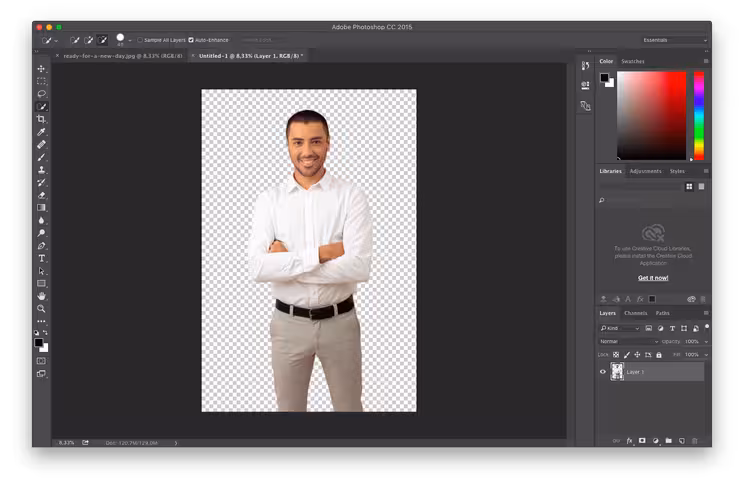
Firstly, open your image.
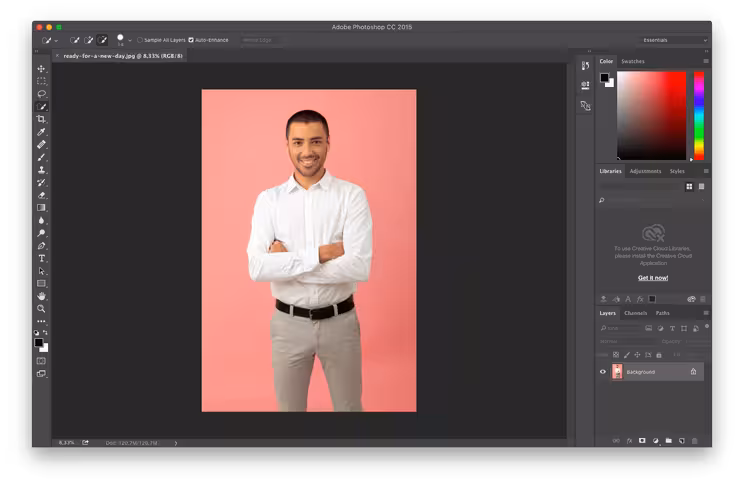
Then choose the quick selection tool, it looks like a paintbrush with a dotted circle. (It’s fourth from the top in the toolbar on the image above.) Then use this tool to select the object or person you want to cut out of the image.
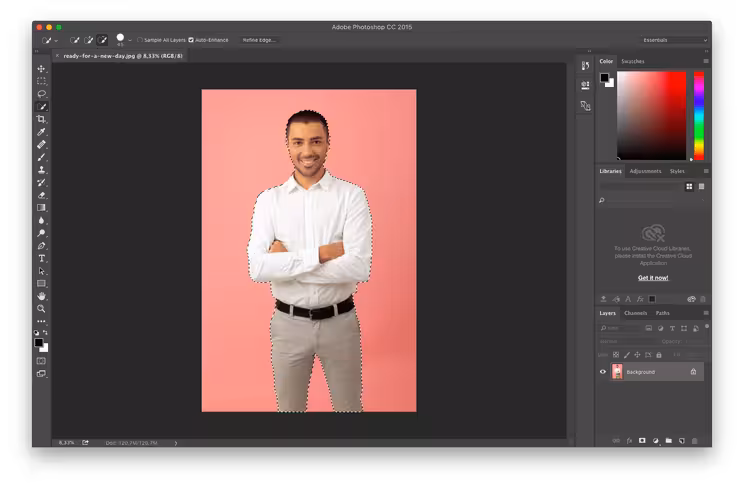
Photoshop will highlight your selection with a trail of “marching ants.” You can add to this selection by clicking on more of the foreground you want to include, or remove selections by holding down ‘ctrl’ and clicking on what you want to remove.
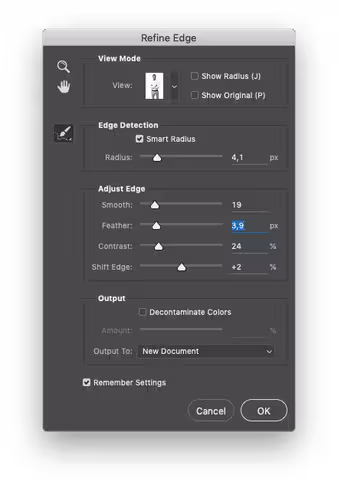
Once you’re happy with your selection, click the “refine edge” button. This will open a new tool box with some sliders that you can use to adjust how Photoshop cuts out your selection.
Play around with these sliders to figure out what works best for the image you’re working on, and then click ok. Photoshop will then cut out the selection and open it in a new tab without the background. You’re then free to save the image as you please. Neat!
But there’s something really important to note with all these techniques.
Be sure to save your output image as a PNG file. Otherwise, the background will be filled in, and all your hard work will be lost.
Get the TNW newsletter
Get the most important tech news in your inbox each week.