Product design processes are meant to be cyclical. But what if you could speed up each phase for better results and more frequent feedback?
This is the thinking behind design sprints, a fast process for yielding more iterations in less time.

Design sprints aren’t simply “rushing” everything. We’ll describe a few best practices for ensuring the process is quick but productive.
First, let’s explore why design sprints work.
The What and Why of Design Sprints
Popularized by Google Ventures and their design partner Jake Knapp, the design sprint aims to validate your ideas as quickly as possible through fast research and prototyping.
In general, design sprints typically last about a week, with each day dedicated to a different activity, plus a preparation period. By the end of the week, you’ll have not only a completed prototype, but also substantial user data.
You can conduct sprints at virtually any time in the design process.
As explained in UX Design Process Best Practices, design sprints are effective for three main reasons:
- User-focused — Usability testing precedes iteration, ensuring you never veer away from creating what users need.
- Naturally collaborative — When you work fast, you need the whole team onboard.
- Perfectly efficient — With rapid prototypes, you build just enough product to test if the idea has any merit with users.
Photo credit: eda. c. Creative Commons.
Within the constraint of a week, the team limits itself to only the most important issues, and can’t afford to overthink anything. But the pressure is taken with grain of salt — participants recognize that sprints are meant for speed, not perfection. As Knapps describes, the approach has worked out well for some highly successful companies like Blue Bottle Coffee and Nest.
Design Sprint Preparation
Everything that can be done beforehand, should be done beforehard. In our experience running our own design sprints, this frees your team up to concentrate only on designing during the actual sprint. By the morning of the first day, we try to complete the following tasks as suggested by Google Ventures:
- Review existing user research — While the point of the sprint is to generate new learnings about users, you shouldn’t start from scratch. Collect and distribute the previous documentation to the team so everyone’s on the same page, or collect new relevant data (for example, if a new market segment were introduced). Research sprints, described later, can accomplish this quickly.
- Schedule user tests — Yes, you’ll need to book tests for a prototype that doesn’t exist yet. For the sake of speed, schedule a minimum of five users for testing on the last day of the sprint. This “no turning back” also sets a clear finish line for the team.
- Recruit the right people — Too many participants bog down the process, so you want to make sure you have only the right people. We follow Knapp’s advice when we run design sprints at UXPin by including the CEO, product manager, visual designer, developers, and UX designer in the first few days.
- Elect a sprint leader — Because design sprints can get hectic with all the team members involved, decide on a leader beforehand to keep everything on task and on time. This leader may need to limit their involvement in the actual designing to moderate the sprint.
Deal with these first so you can start the sprint with a few less things to worry about.
The 5-Day Plan
Sprints can be modified and customized, but the basic foundation follows this 5-day plan:
- Monday: Analysis and Goal Creation
- Tuesday: Idea Generation
- Wednesday: User Flows
- Thursday: Prototyping
- Friday: User Testing
We delve into the best practices for each stage below.
-
Analysis and Goal Creation
The first order of business is to analyze the situation and bring everyone up to speed.
While the relevant documentation should have been distributed before, now is a good time to go over it together to ensure nothing important slipped through. This is also a chance for different departments to share their unique perspectives on the project.
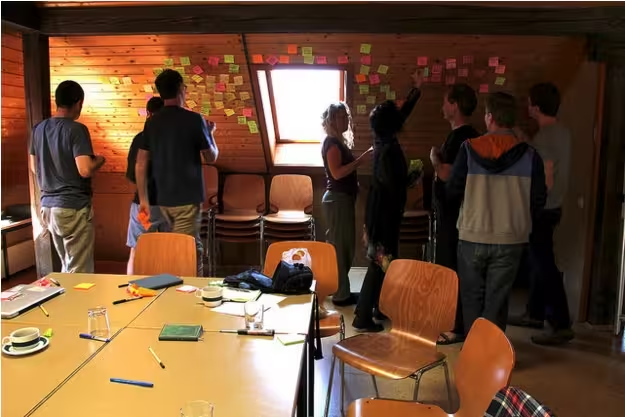
Source: “Booksprint Futurish ‘14.” Time’s Up. Creative Commons.
Getting to the task at hand, the first day must also organize the project’s goals. If the team works well together, this can be a simple discussion, but for more control and efficiency we recommend an affinity diagramming exercise that’s worked quite well for us.
Also known as the KJ Method, an affinity diagram is an activity for organized prioritization, following four steps:
- Ask a question — Take the problem you want the sprint to solve, and pose it as a question. This could be as specific as, “What feature could help the user achieve their goals?” or as vague as “What issues do we want to address during this sprint?”
- Collect ideas — Thinking individually, everyone writes down their ideas on sticky notes and puts them on the wall.
- Sort notes in silence — Once all the ideas are collected, the team reorganizes them into logical groups. The key component of this stage is that no one talks — this way, no one person dominates and the ideas are grouped organically. Afterwards, give each group an appropriate title (it’s okay to talk here).
- Vote on prioritization — Within each category, conduct votes on which ideas are more important. Then, vote on which categories are more important.
After the affinity diagram, the team has established a clear hierarchy of ideas and priorities for the next days’ designing. In our experience, it’s best that the core design team still has final say over which categories are most important. The votes help inform their decisions, but don’t act as design by committee.
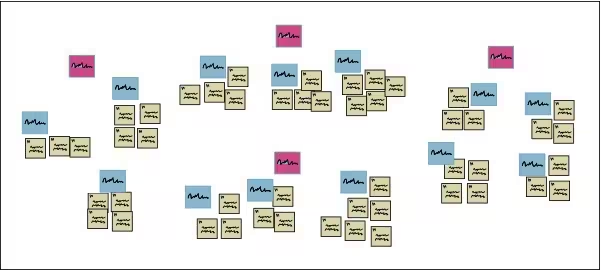
Source: “Affinity Diagramming 2.” d_jan. Creative Commons.
To learn more, we highly recommend reading usability expert Jared Spool’s guide to the KJ method.
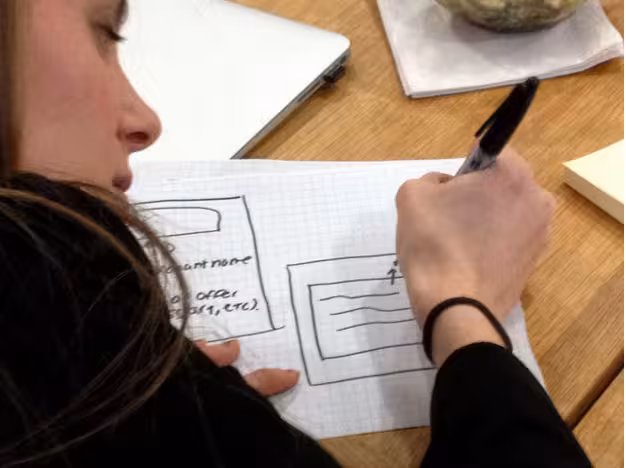
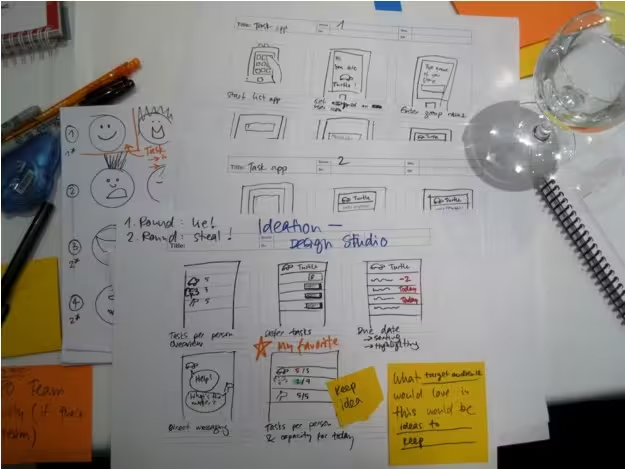
2. Idea Generation
The second day is the most important for brainstorming. Here is where the team creates most of its ideas and the product begins to form. Based on the goals established the day before, the team works with coming up with the best possible solutions.
A design studio is a great way to get people working together to sketch viable ideas. In fact a design studio is like a next-tier affinity diagram — using similar methods, it fleshes out potential solutions from the highest priority goals that we already determined.
Basically, everyone sketches potential solutions to the problem, the work is critiqued, and the design team can further iterate on useful ideas. We suggest the following method:
- State the task — Describe clearly the problem for which everyone is sketching solutions, such as “Redesign the checkout process to capture more sales”.
- Create your teams — Divide your participants into at least 2 teams, with no more than 4 people per team. Ideally, you want at least one designer per team.
- Sketch quickly (15 minutes) — Encourage people to quickly sketch at least 5 ideas, focusing on the concepts and using annotations where necessary.
- Critique ideas within the team (15 minutes)— Within each team, every member explains their sketches for feedback.
- Iterate (20 minutes) — With feedback gathered, every member now distills their many concepts into one unified idea.
- Vote & polish (20 minutes) — Each team now reviews everyone’s iterated sketch as they try to hone in on one concept. Once that concept is decided, each team can add any finishing touches based on all the feedback gathered.
- Group discussion & review (40 minutes)— Each team now has one unified concept. At this point, both teams can merge together to review and iterate the main concepts. When the session is finished, one concept will emerge for the design team (along with other alternatives created in the process).
There will also be people resistant to sketching for concerns about their artistic skill. Reassure everyone that this isn’t about the art, it’s about the ideas (hence the time limits).
Source: “Design Studio.” LindsayT…. Creative Commons.
The goal of day two is to come up with many viable solutions so you can zero in on the best idea. The sketches make a great jumping off point for the next day, when the structural designing begins.
3. User Flows
In our process, this step is when collaboration becomes more selective. As we warned against in Web UI Design Best Practices, involving everybody at all times just invites a “swoop and poop” mentality. Instead, we’ve found it most helpful if the designers take over from here and involve others for feedback.
Source: “Ideation sketching.” visualpun.ch. Creative Commons.
We will now create user flows will help us optimize all the steps required for completing user tasks. Here are two of the most useful techniques we’ve tried.
i. Writing-first Approach
In her article Jumpstarting Your App Conception Without Sketching UI, Jessica Downey explains how the writing-first approach fleshes out the details, while creating a common language that’s recognizable on every page of your app or site.
For example, in the below scenario, the user wants to activate auto deposit. Content in brackets represents buttons or links.
Step 1: Would you like to set up auto deposit?
[Set auto-deposit]
Step 2: Select Deposit Frequency
[Once per month][Twice per month]
[Every other week][Every week]
Step 3: Deposit Once per Month
[Select calendar day]
Step 4: Set Amount
Display amount field
[Set auto-deposit]
ii. Shorthand Approach
As an alternative, the shorthand approach, used by Ryan Singer at Basecamp, treats flows as ongoing conversations.
Using the same scenario above, this method abbreviates Steps 2 and 3 with shorthand:
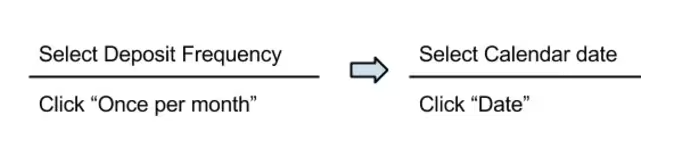
Photo credit: UXPin via Ryan Singer’s shorthand method
Singer can illustrate even complex flows with this process, as you can see in his article A Shorthand for Designing UI Flows.
4. Prototyping
This is the big day, in which the team builds the actual prototype. Given the fast pace of the design sprint, a prototyping tool will be much faster than prototyping with HTML or Javascript.
No one said it’d be easy to build a prototype this fast, so here is some advice to help:
- Know it’s not perfect — Nobody’s expecting it to be perfect; the design sprint prototype only needs to be functional enough to test. Tackle only the most important aspects, then handle the details if there’s time later.
- Avoid placeholders — It’s tempting to use placeholders like lorem ipsum under this time constraint, but you may confuse users. As stated in Interaction Design Best Practices, low fidelity does not equate to low quality, so use real content (it’s fine if it’s rough).
- Follow good visual hygiene — Follow strict consistency standards. Use a grid for alignment. Ensure that interface labels are consistent across each page. Make sure the design matches user expectations (external consistency) and doesn’t contradict itself (internal consistency). We use customizable libraries and smart elements in our own app to create consistent UI patterns.
Delegate & collaborate — When we use UXPin, multiple teams can co-create and comment on wireframes and prototypes. While the design team should focus on the “core” prototype, it’s totally fine if developers or PMs want to create a simple prototype for specific interactions (e.g. a check-out process, or sign-up form). Don’t turn them away. Just remember to filter their ideas through the design lead before adding them into the main prototype.
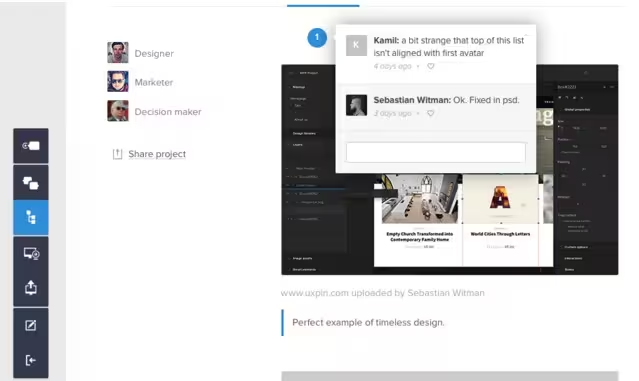
Photo credit: UXPin
Embrace over-the-shoulder critiques — Get at least one round of feedback from people who didn’t create the design. Developers and marketers are always great candidates. The feedback sessions can be as brief as 15-20 minutes.
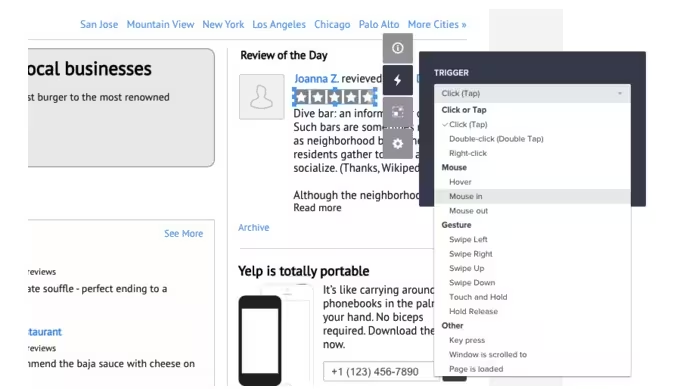
Photo credit: UXPin (inspired by Yelp)
5. User Testing
Now it’s the moment of truth. Since the prototypes are low fidelity, we’ve found moderated usability tests to be most helpful since someone can help guide users if they go way off track or are on the verge of giving up.

Photo credit: UsabilityTools
To save some time, you can limit your documentation to just the test script, questions, user tasks, and usability report. The usability report can be as simple as a list of prioritized problems (based on patterns you saw during the test). Discuss the problems with stakeholders, then start tackling them right away.
Now you have even more user data to draw from and a even better prototype. Implement what you’ve learned into the next iteration, and start the whole process again. In fact, Lyft has managed to condense the whole process into 4 days.
Takeaway
Design sprints aren’t just for designers strapped for time. Sometimes deadlines can be the greatest incentive, and in situations when they don’t occur naturally, creating one with a design sprint can get the team more focused and motivated.
So many of the traditional design methods are starting to show their age, and more modern tactics like sprints can help shake things up, in addition to their practical benefits. At times they can be difficult, but maybe that kind of constraint is exactly what good design requires.
For more real-world advice on improving UX design, check out UX Design Process Best Practices. The free guide provides tips on the whole UX process from gathering requirements to testing designs. The book also explains the types of design documentation that are most helpful to fast-moving teams based on experience designing a product from scratch.
Read Next: The psychology of visual UX
Image credit: Shutterstock
Get the TNW newsletter
Get the most important tech news in your inbox each week.