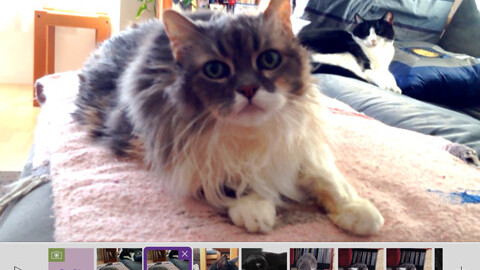
Do you know what October 29th is?
It’s National Cat Day, a US commemoration that started in 2005 to raise awareness that the feline rulers of the Internet are also in dire need of help from the humans who depend on their largesse.
Adobe thinks that creating a cat video with its new Premiere Clip iOS app, which debuted early this month, is the purrfect way to honor our feline friends, and have expressed these observations in a new blog post for the occasion. Thus, on Wednesday, the Premiere Clip Community Feed (which will be renamed Purrrmiere Clip Catmunity Feed for the day) will be comprised entirely of cat videos and tweeted under the name Purrrmiere Clip (the handle will remain @PremiereClip).
Your cat video is welcome.
While Adobe Premiere Clip is a companion to Premiere Pro CC, the company’s professional video app within Creative Cloud, Premiere Clip is a standalone consumer mobile app that’s free for anyone to download from the app store. You do not have to be a dues-paying member of Creative Cloud to use Premiere Clip, but you will need to establish a Creative Cloud account so that you can log in, store, sync and post video files.
It generally takes less than an hour to scrape together a purrfectly respectable video about your little friend (OK, even if he weighs 20 pounds, you’re still bigger than he is).
Typically, people are shooting video on the iPhone and editing on the iPad — if you have one — but you can use roughly the same techniques outlined below without switching devices. Here’s how to get started.
1. Go to the App Store and download Premiere Clip. Then, launch the app, create a free Creative Cloud account, and sign in.
2. You can shoot fresh video with your iPhone or iPad, use video already in your Camera Roll or in your Creative Cloud account, or mix both old and new clips.
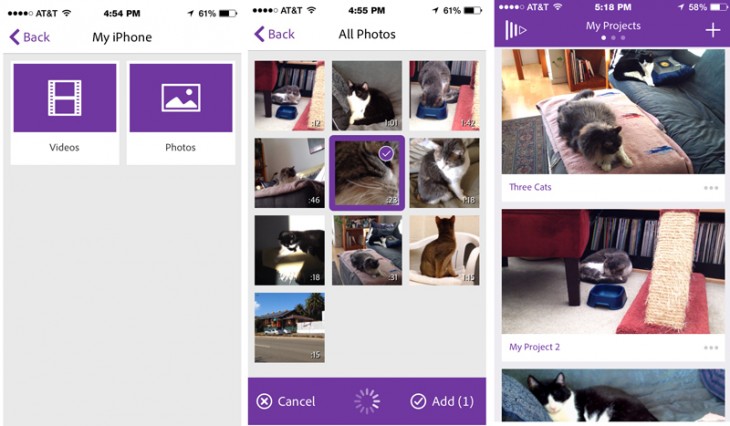
3. Click the Plus (+) on the upper right-hand corner of the phone to create a new project and name it.
4. Tap the + button again to bring in video from your Camera Roll or capture new footage.
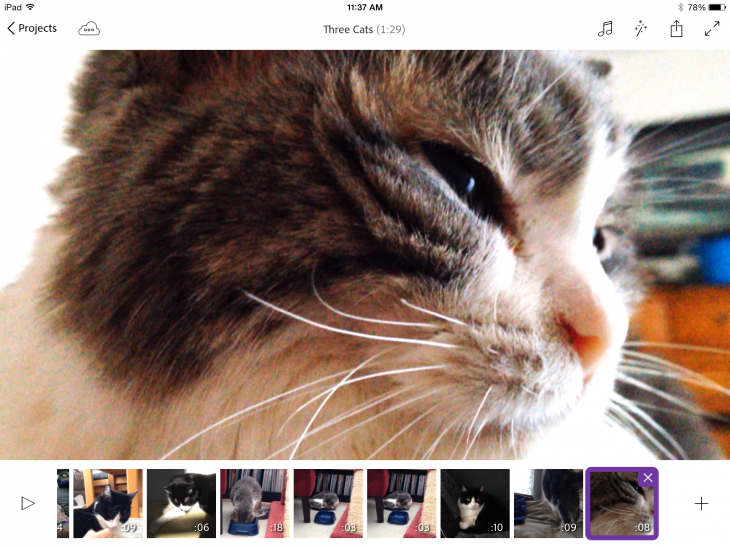
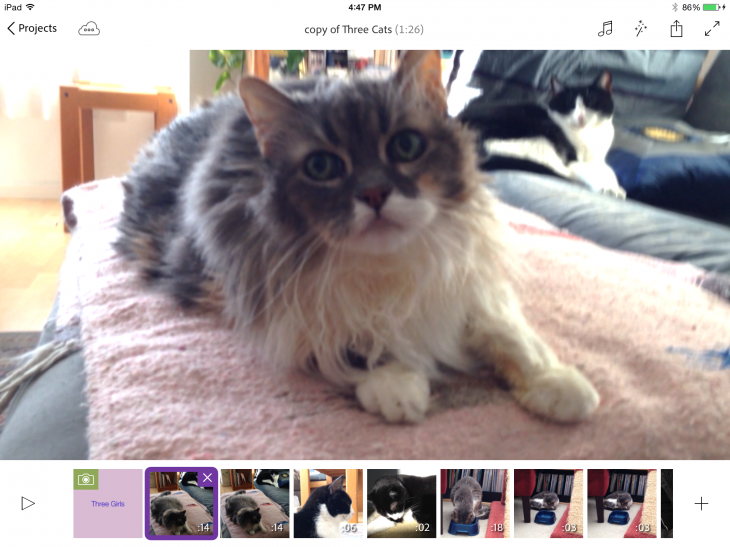
5. Choose the clips you want to include in the project and they will appear in the timeline in the order they were shot. Tap and hold to move clips to change their order. Tap the X in the corner to remove a clip. Note that you do not have to use multiple clips — your first video can be just a single shot with natural audio or set to music.
6. Move the clip handles to change the length of the clip.
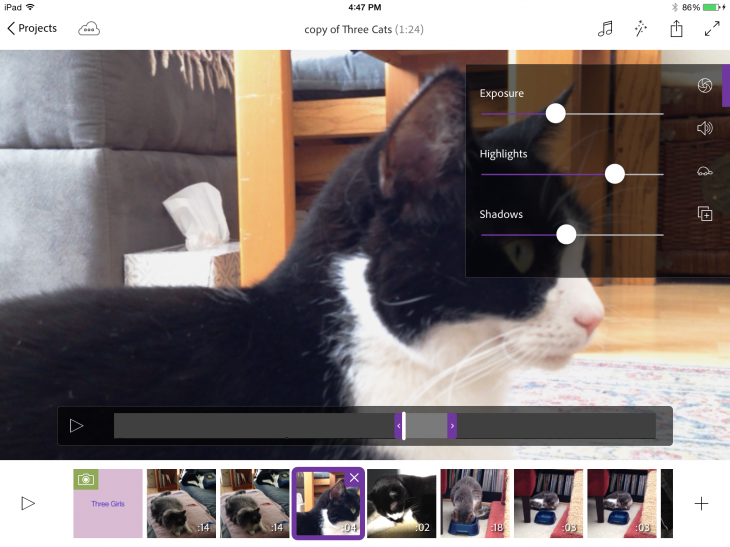
7. Tap a thumbnail of any clip you want to edit and then tap the actual video to reveal some simple editing controls.
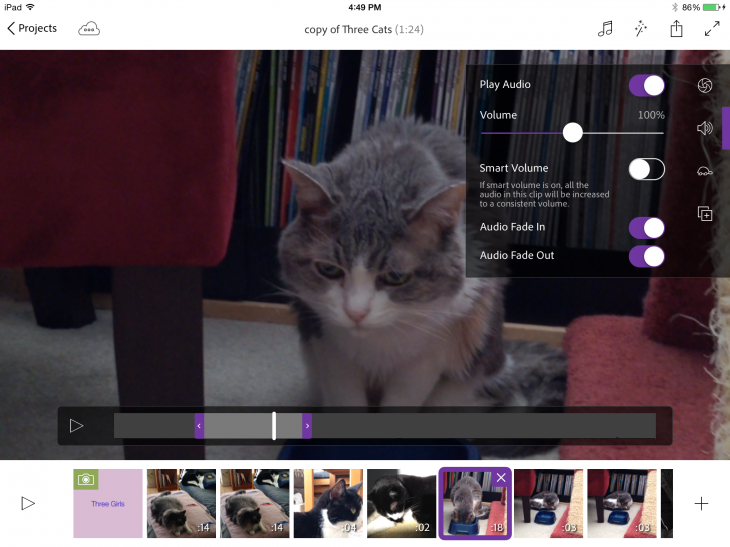
8. Use editing controls to adjust exposure, highlights and shadows. Audio adjustments let you control overall volume, while the Smart Volume automatically equalizes sound throughout the clip. Adjust the speed of the clip if you want to slow it down. There are also audio fade in and fade out features.
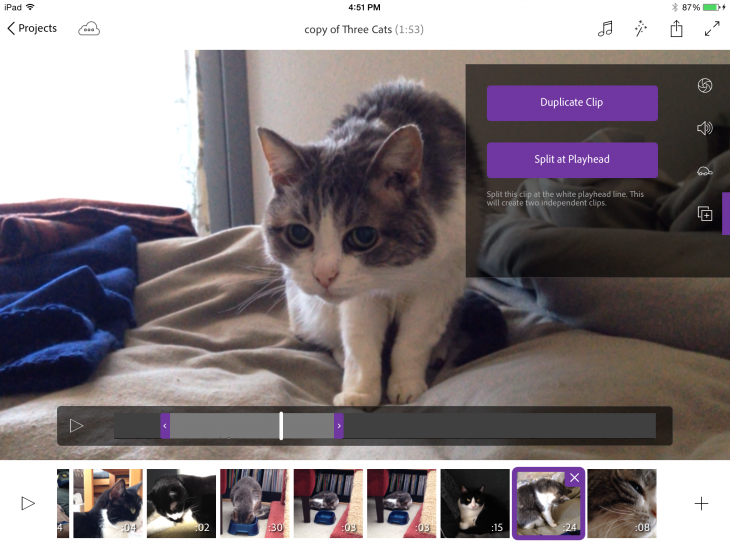
9. If you want to use parts of clips in different places, use the Duplicate Clip or the Split at Playhead controls and then tap and hold to move and position the new clips in the timeline.
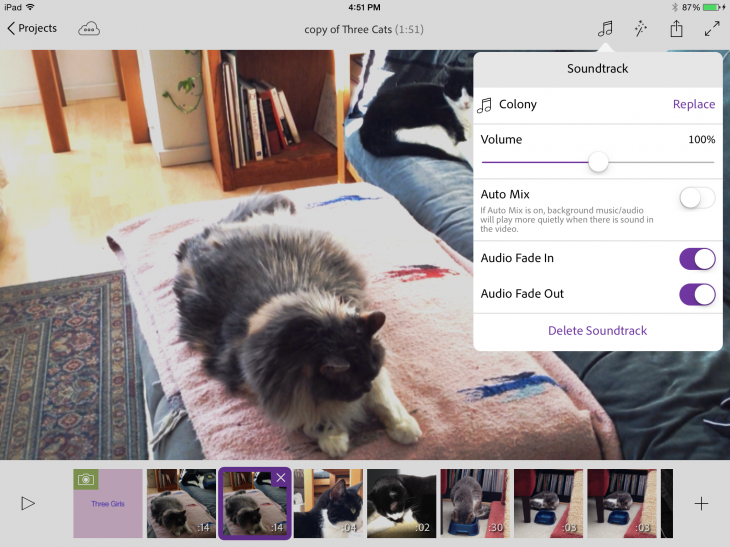
10. When you’re done assembling the clips, it’s time to move to the menu controls. Soundtrack lets you choose from a small number of royalty free tunes, but you can also use a song from your own collection. Auto Mix modulates the music to mix in better with background sound on the original clip, but you can just play the music without any background sound, and add an optional audio fade in or out. Or you can skip the soundtrack completely.
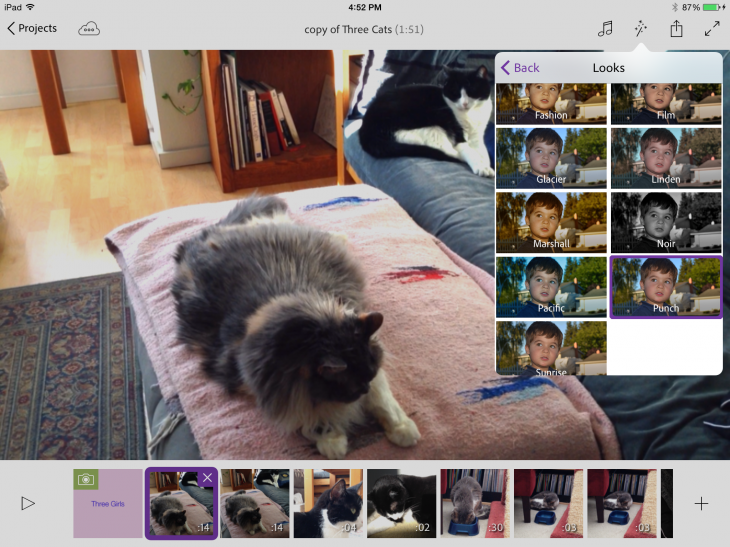
11. Add one of 15 Looks or filters to the video, such as stylized colors, sepia tone or black & white variations to give each disparate clip a unified character that visually pulls the movie together. Optionally, also add a fade in and fade out to black and a crossfade between clips.
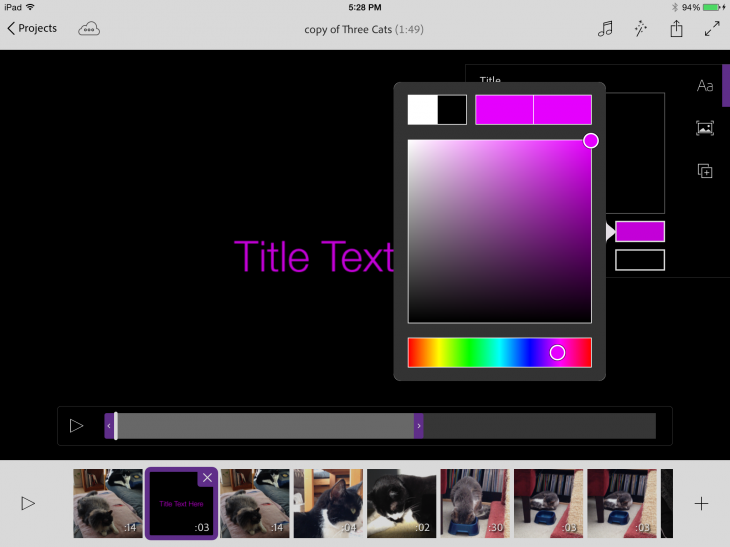
12. To add a title, tap plus and choose New Title from the menu, which presents a simple interface to choose text and background color and duration of a title card.
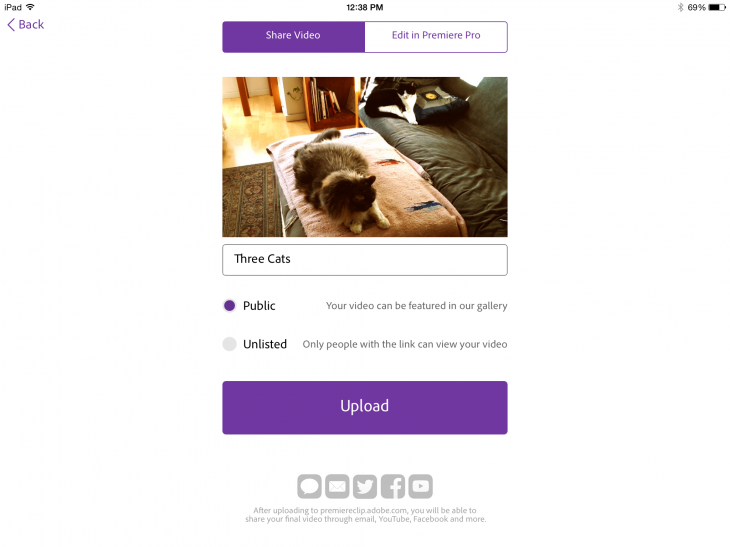
13. When you’re happy with the length, content, look and sound of your video, it’s time to share it. Upload it to the public gallery by tapping Share video or keep it private by getting a URL to share only with certain people. If you choose Edit in Premiere Pro, the video goes to your Creative Cloud Storage area so you can access it for further work on the desktop. Once your movie is uploaded, you can then share on other social networks like Facebook, Twitter and YouTube.
This is the quick and dirty way for video novices to create a cat video during your lunch break (and maybe still have time to eat).
Need inspiration? Launching Premiere Clip lets you view both your own projects and those created by the Premiere Clip community. Additional information and how to videos are also available on Adobe’s website.
Note: There is also an International Cat Day, on August 8, which was created in 2002.
Get the TNW newsletter
Get the most important tech news in your inbox each week.

