What do you do if you want to monitor and manage users on your home Internet network? Do you dig deep into the parental control settings on the family tablet? Do you experiment with individual apps? Maybe you set up separate user accounts on the home PC? Or perhaps you do all of the above?
However you choose to manage your kids’ time on the Web, there surely must be an easier way of controlling all those devices that connect to your home Internet? Such as a central switchboard where you can set parameters for what can be accessed by whom, from which device and at what time?
Step forward Skydog.
Following a successful Kickstarter campaign which saw $122,000 raised on what was initially only a $75,000 goal, PowerCloud recently launched Skydog, a smart WiFi router and Web app that brings very granular controls to home networking. We managed to get our hands on one of these routers to see exactly what it’s capable of. Here’s the lowdown.
Sky-what?
Skydog is a router, not a modem – it integrates into your existing home Internet setup. So if you currently have a router/modem combo for connecting multiple devices to the Web (which we’re guessing the typical broadband user will have), the Skydog router connects into that.

Before you start joining cables though, you must first visit the Skydog website, select your region (Americas, Europe, APAC) and create an account. You can also do so using your Google credentials if you so wish.
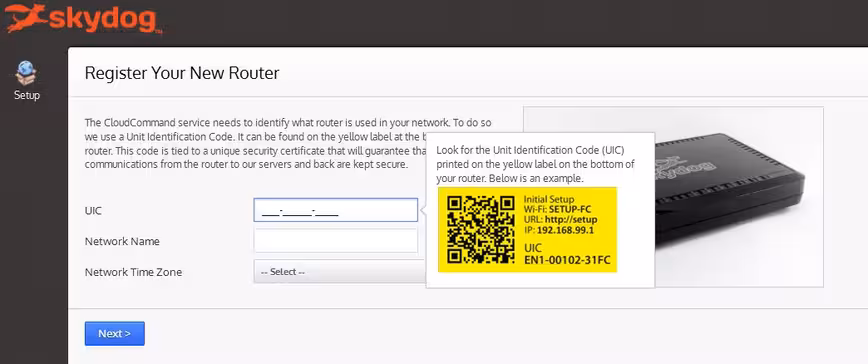
As part of the set-up process, you will be required to register the router you’ve purchased, by entering the Unit Identification Code (UIC) which can be found on a yellow label on the bottom of the unit. You can also give it a unique network name – this will show up alongside all the other routers in your vicinity, so you’ll want to give it a distinct name to that of your normal home router/modem.
Once the wizard has guided you through the account set-up process, it’s time to start physically connecting things up in your home.
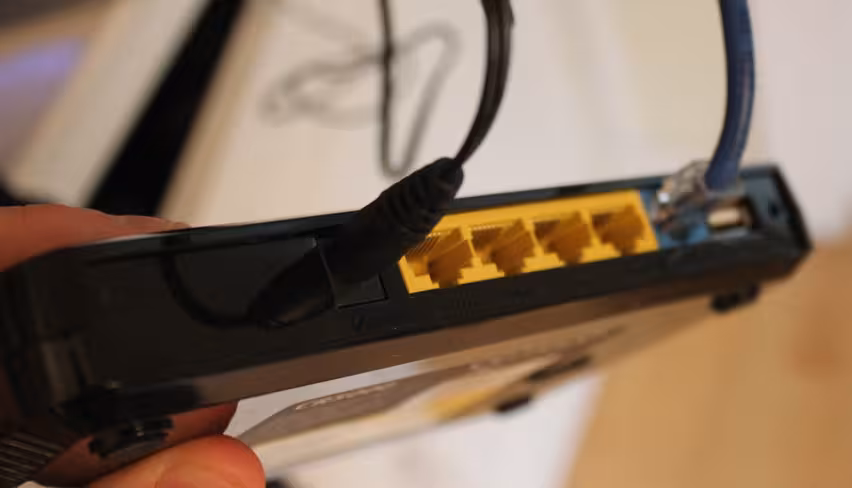
Out of the box, you get the Skydog router, a power adapter for the wall, and a blue ethernet cable. You connect this cable from the blue WAN port (marked ‘Internet’) on the back of the Skydog, and guide it to one of the LAN ports on the back of your Internet-enabled router/modem.
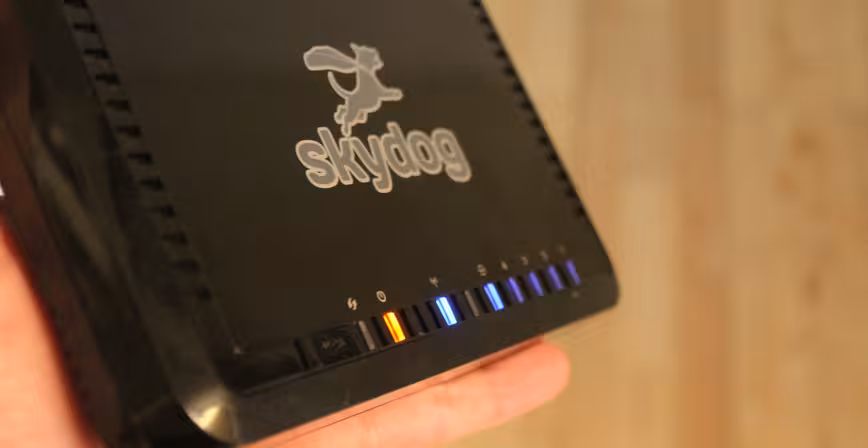
Now, power it on at the mains and leave it for up to five minutes. During this period, the lights on the top of the Skydog will flash and cycle off/on several times before eventually settling. The power light should go solid amber, while the WiFi and WAN lights will flash blue. If this is the case, then you’re good to go.
You will also receive email notifications at this stage, telling you that everything has been set-up and you’re online.
Now, it’s time to dig-in and see exactly what you can control through your Skydog, but first you must ensure that each device is connected through the Skydog router – so in your usual WiFi settings on your PC, smartphone or tablet, connect it up to whatever name you gave it during the set-up process, enter the password you were given, and everything will now be channeled through Skydog.
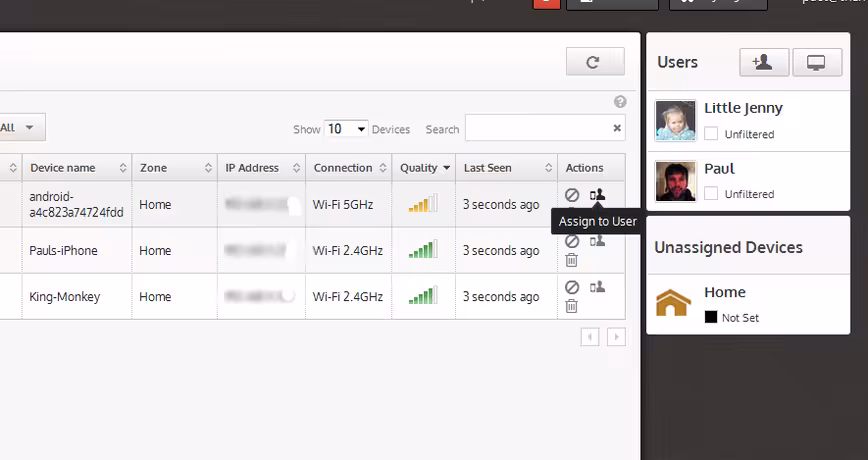
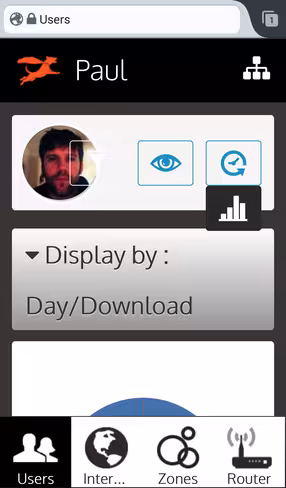
Log-in to your Skydog account, and you should see all the devices that are currently connected to the network.

It’s at this juncture that you’ll want to start creating new users within your Skydog account – for many people this will likely be their children.
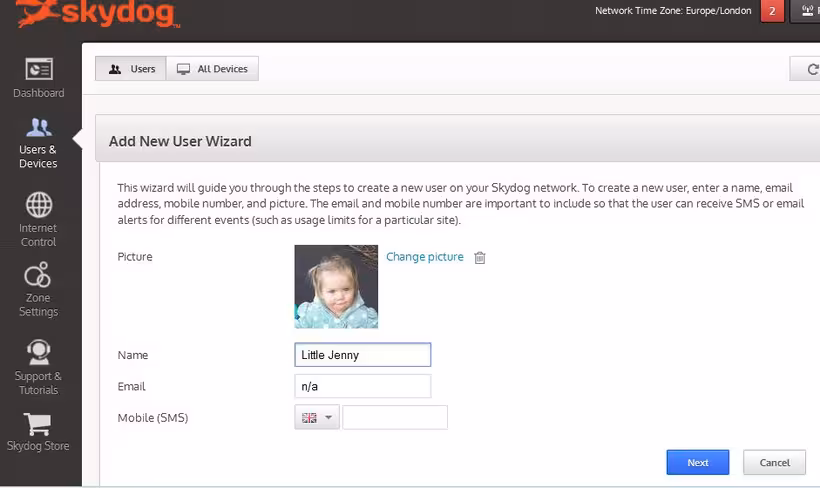
With various user accounts set up, you can then assign each device on the network to a specific user. So if your little girl loves playing games on the family tablet, you can assign that device to her, and you can tweak and change the control settings as you see fit.
You can also activate up to three separate zones – these are essentially separate networks that can have different policies and access rights applied to them. The default names are ‘Home’, ‘Guest’ and ‘Work’, but you can edit their names accordingly.
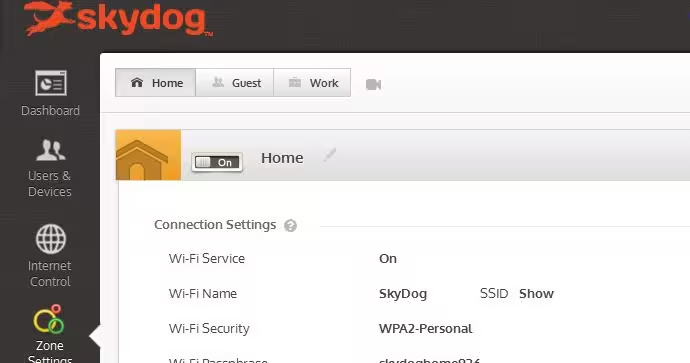
For example, you may wish to set up one specifically for your children, or one for the entire house. And you could have a separate one for visitors that are staying for the weekend, or one for your neighbor if they wish to ‘borrow’ your Internet while their Internet is down. This could prove particularly useful if you run your own small hotel or guest house, or if you want to keep data transfers separate from your business and guest networks.
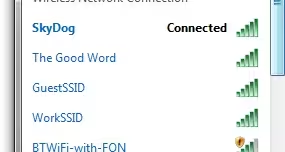 Indeed, these can be given their own unique passwords and actually show up as separate networks in your connections list – as you can see here, I’ve chosen to name the main one ‘SkyDog’, and then kept the Guest and Work networks as the default names they were allocated – ‘GuestSSID’ and ‘WorkSSID’.
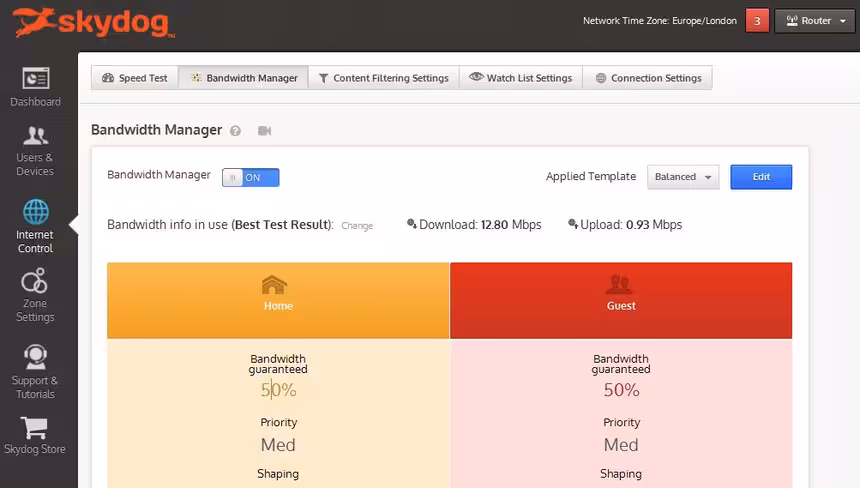
This is a really handy feature to have, and enables very granular control covering a myriad of circumstances. You can limit bandwidth not only within certain zones, but also for specific users. So, for example, if you’re not on an unlimited bandwidth plan, and don’t want your kids or guests draining your allowance dry, well, this will help you control things.
Skydog lets you set content policies on weekly schedules – these are basically ‘rules’ for accessing the Internet which can restrict all access, or only pre-defined websites. So if you want to encourage your teenager to stay offline during the wee hours, you can cut off access completely. Or if you want to restrict access to gaming sites or social networks when it’s time for studying, well, you can do that too.
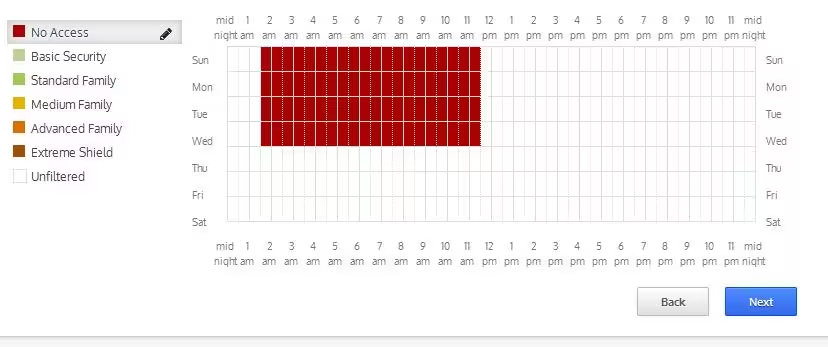
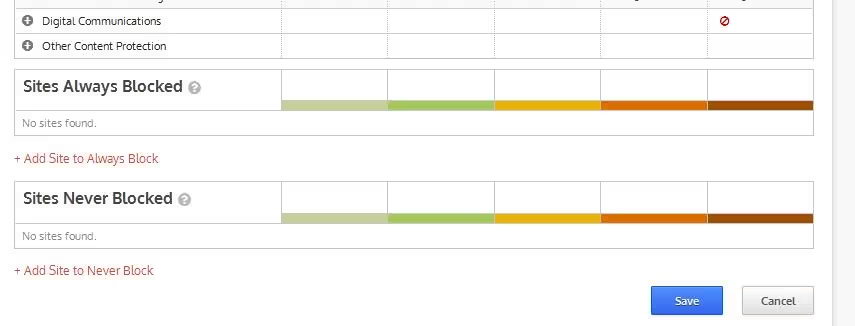
Alternatively, you can just enforce a blanket block on certain sites by hitting ‘Add Site to Always Block’ and entering the URL.
 The Watch List section also lets you monitor user activity on a pre-defined group of websites, with the usage data displayed as an aggregate across all devices that have been assigned to a particular user. The intensity of use is shown by color code, determined by the amount of data exchanged with a particular site.
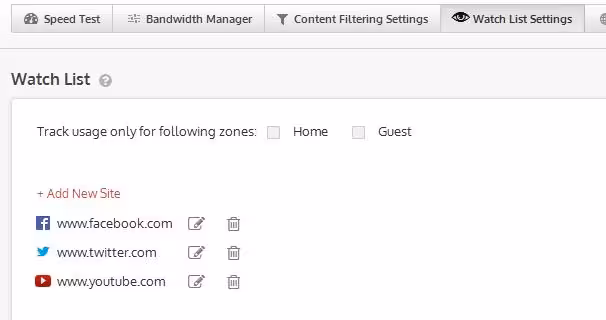
Alerts (SMS and email) can be set to notify the admin (you), as well as the user, when a certain milestone of data usage has been reached for a site.
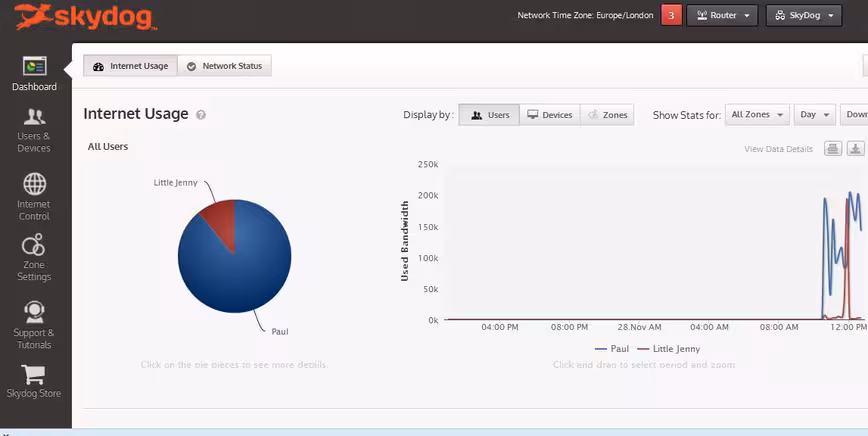
Meanwhile, if you’re a stickler for stats, Skydog’s Web portal serves up fairly detailed breakdowns of data around who’s using the Internet most, which can be further filtered down by device and zones. If you’re the father or mother from hell, you can download this data as PDFs too.
 Skydog’s Web app also works across a range of devices – including tablets and smartphones, so you can tweak settings, grant access and view data on the move, from anywhere in the world.
The verdict
There’s little question that Skydog has hit on something really great here. Granted, kids have a tendency to be able to outsmart their parents and will probably find ways to access the things you don’t want them to; and no, this won’t let you exert any control over their 3G data allowance. But it still gives a good level of control over who accesses what in your house.
In terms of prices, well, the Skydog router will set you back $149, which includes a one year of subscription to the cloud service (there is actually three years free for a limited time only). After this, it will cost $30 a year to gain full access to the cloud service.
So the cost may put some people off, but Skydog is the real deal and should prove popular with anyone who needs granular controls on their home Internet network.
➤ Skydog
Get the TNW newsletter
Get the most important tech news in your inbox each week.