This post originally appeared on the Buffer blog.
You’re taking the dive into a new social network, or you’re itching to grow your existing profile. You’ve got a social media strategy in place and a plan in mind. You’re raring to go.
What would be one of the most encouraging signs when you’re first starting off? I imagine it’d be gaining followers.
So how do new social media accounts do it? How do you gain your first 1,000 followers on social media or grow an account from dozens to hundreds?
Follower count is one of those metrics that has tons of meaning—both for the confidence of the social media manager and for the distribution of the content you share. If you want to grow your followers, there are tons of useful tips to try.
Here are some key learnings I’ve drummed up about how to get that first initial batch of followers on each of the six major social media networks.
Quick tips: The best general strategies for growing your audience
Regardless of the social network you choose, there seem to be some similar, high-level strategies that apply to every network—Twitter, Facebook, Pinterest, Google+, LinkedIn and Instagram.
If you’re looking to build your profile and add new followers, here are some of the standard best practices. Lots more detail on each of these below.
- Fill out your profile completely
- Share a link to your profile via your other networks and via email
- Place follow links and widgets on your blog or website
- Add your new social profile to your email signature
Shortcuts:
Twitter | Facebook | Pinterest
Google+ | LinkedIn | Instagram
Next: Let’s start with Twitter
How to get your first 1,000 followers on Twitter
Step one: Fill out your profile completely
This includes:
Writing an awesome bio with one or two select keywords or hashtags
Adding your URL and location—URL is great for adding context, location is great for getting found via search and geographic tools
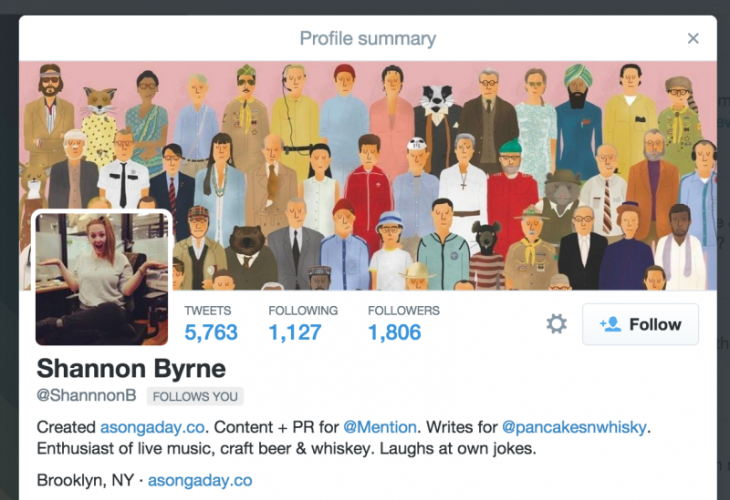
Uploading a profile picture and cover photo. Check out the image below for what it looks like when someone clicks your username from Twitter’s desktop site.
Seeding your Twitter account with five to 10 tweets
If you want to get your profile even more optimized, you can use the Pinned Tweet feature to pin a tweet to the top of your profile page. Choose a tweet that embodies what your Twitter profile is all about or shows a lot of social proof, i.e. one with a lot of favorites and retweets.
Step two: Share a link to your profile via other networks and via email
Share with your Facebook friends that you’ve started a Twitter account. Add an announcement to your next company newsletter or in an email to friends.
Step three: Include a Follow button on your website or blog
Twitter offers four types of buttons that you can use to help visitors connect with you on Twitter.
- Share a link
- Follow
- Hashtag
- Mention
The Follow button is the most direct means of gaining more followers. You can place it in a popular place on your website or blog. For instance, we’ve added the follow button to the author profiles on the Buffer blog.
Step four: Find relevant accounts to follow
Many users on Twitter will follow back those who follow them. This is a popular strategy for those just starting out on Twitter to help connect with others, and thanks to Twitter lists, users can customize the information they see on Twitter, which makes following tons of people all the easier to manage.
- Sign up for a free tool like Tweepi or Followerwonk so you can see a list of followers for other users in your niche.
- Optimize this list of followers by sorting it by recent activity.
- Follow up to 100 of these new folks per, whoever seems relevant and interesting to you (any more than 100 per day and you risk a Twitter ban).
- Every so often, to balance out your follower/following ratio, you can check into a tool like JustUnfollow to unfollow any accounts that haven’t followed you back. JustUnfollow has a whitelist option, too, so you can skip over the accounts you wish to keep following no matter what.
Step five: Use relevant hashtags
When you use a hashtag, people outside of those you follow will be exposed to your tweet. To find the best hashtags to use, there’s a fun browser extension from RiteTag that tells you the potential reach of your hashtag.
Step six: Join a Twitter chat and contribute value
If you’re in the digital marketing space, we’d love to have you join a #bufferchat, which takes place every Wednesday at noon ET/9:00 a.m. PT. Other great resources for finding a relevant Twitter chat include:
- Chat Salad is a great place to find chats that are currently happening or taking place in the near future.
- Tweet Reports also has a great listing of Twitter chats.
- Twubs, a website where you can register a hashtag, has an easy-to-read and thorough listing of chats.
- This huge Google doc spreadsheet includes hundreds of Twitter chats.
Step seven: Optimize your native Tweet This button to include your username
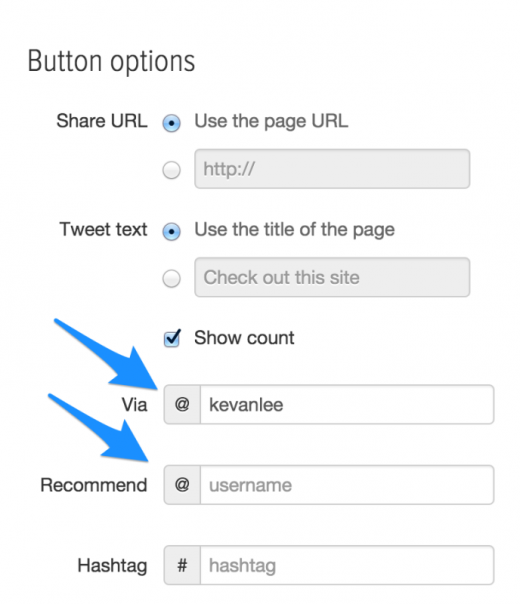
When someone shares your content from your blog, you can customize certain elements of the way the Twitter share button works. Add a snippet that includes “via @-username” at the end of the tweet text. You can also add your username as a recommendation, which will be shown to the person after they click to tweet.
Summary
- Fill out your profile completely
- Share a link to your profile
- Place Twitter follow buttons on your site
- Find relevant accounts to follow
- Use relevant hashtags
- Join a Twitter chat
- Optimize your Tweet This button
Next:</> Now, do the same for Facebook
How to get your first 1,000 fans on Facebook
Step one: Fill out your page completely
Facebook pages offer an incredible level of detail and information. Many businesses even use them as their main website. To maximize your chances of gaining as many fans as possible, you’ll want to fill out your profile as thoroughly as possible.
- About section
- URL
- Profile picture & cover photo
- Start info
- Address (for brick-and-mortar businesses)
- Long description and mission
- Phone number and/or email address
- Create several updates so there is content on the page
One helpful tip that we shared in our Facebook Page starter guide is to edit the photo description of your cover photo. When you upload and add the cover photo to your page, the photo will appear in your timeline. By editing the description on the photo, you can control the text that appears in the update.
Step two: Invite your friends to the page
From your Facebook page, you can select the option to Invite Your Friends and then browse through your friend list to send an invite. It might be best to select a handful of friends you think would be most interested rather than blasting the invitation to all.
If possible, it’d be great to get to 25 fans via this method. Once you hit the 25-fan threshold, you can then claim a vanity URL for your page (e.g., facebook.com/yourbrandname), which will look more appealing when you share the URL in later steps.
Step three: Share a link to your profile via other networks and via email
Tweet your Facebook page URL to your followers, or share your Facebook page
Step four: Add Facebook buttons to your website
Facebook offers a huge helping of buttons and widgets that you can add to your site. Here’s the complete list of their social plugins:
- Like button for web, iOS, and Android
- Share button
- Send button
- Embedded posts
- Follow button
- Feed dialog
- Comments
- Activity feed
- Recommendations feed
- Like box
- Facepile
If you’re looking to get more fans on your Facebook page, the Like button and Like box are two of your best bets. (The “Follow” button, while it sounds enticing, is more for individuals with profiles who want to offer people the chance to follow rather than friend.)
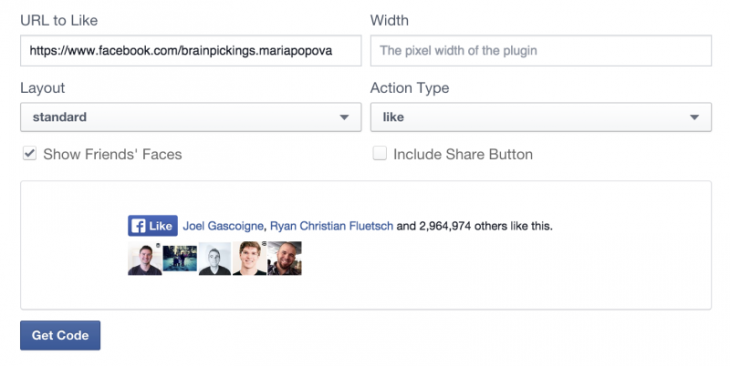
For the Like button, enter your Facebook page URL, and edit the Like button to show people’s faces, specific wording, and more.
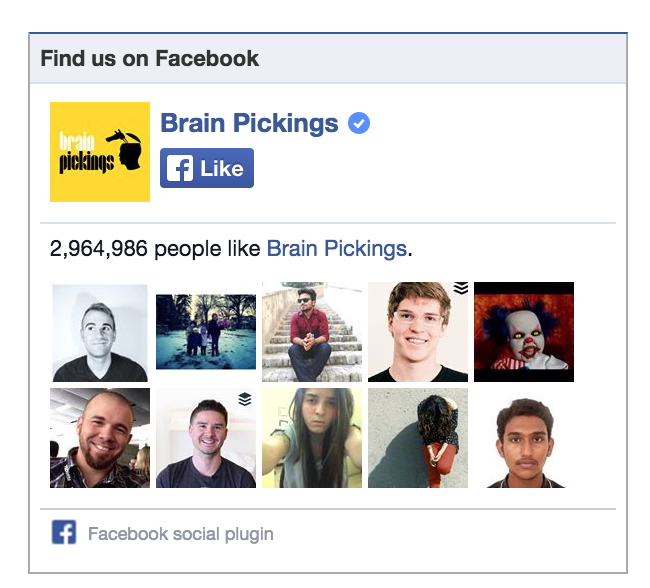
If you’d prefer the Like box, you can set your Facebook page URL and edit options for showing a feed of your posts, the height and width of the box, and a handful of other options. The box will take up a bit more space on your site, but you get the added value of your Facebook profile picture appearing the box, too.
Step five: Spend a little on Facebook advertising
Facebook lacks many of the organic options of getting your name out there. With a news feed algorithm and the sheer mass of users, paying a bit for extended reach and boost can help.
A couple of tips:
- Advertise to those interested in your niche. When in doubt, go more targeted. Fewer than 100,000 people is generally best.
- Retarget the ads to people who have visited your website or blog.
Step six: Try a Facebook call-to-action on your blog.
We have a handful of calls-to-action on our blog, including our HelloBar at the top of the page and a slideup box that appears as you scroll. Either of these could be repurposed for Facebook calls-to-action as well (or any other social network, for that matter).
Summary
- Fill out your profile completely
- Invite your friends
- Share a link to your profile
- Add Facebook buttons
- Spend a little on Facebook ads
- Calls-to-action on the blog
Next: Pinterest is a little different…
How to get your first 1,000 followers on Pinterest
Step one: Fill out your profile completely
Pinterest creates a distinction between individual users and business users. You can switch your individual account to a business account at any time and then enjoy features like rich pins, customized Pin It buttons and widgets, and more.
To fully complete the information on your profile, when viewing your profile click the gear icon and then “Account Settings.” Clicking the “Edit Profile” button lets you edit only the basic information and nothing deeper.
In Account Settings, you can fill out the following:
- Business type
- Contact name
- Business name
- Profile picture
- Custom username and vanity URL
- About section
- Location
- Website
- Connected social networks
- For the website, Pinterest can step you through verification options that will help with their Rich Pins services as well as add a verified icon to the website on your profile, which may give potential followers more confidence in following you.
Additionally, when you connect another social network like Twitter and Facebook, a small icon appears in your profile header as well, giving potential followers another way of getting a bit more info about you.
Step two: Share a link to your profile via other networks and via email
Publish an update on Twitter or Facebook with a link to your Pinterest page. Share your new page with your email list.
Step three: Include a Pinterest button on your website or blog
Pinterest offers five different styles of buttons and widgets that you can place on your website.
- Pin It button
- Follow button
- Pin widget
- Profile widget
- Board widget
The Pin It button is helpful for getting the content on your website more traction on Pinterest. There are also some helpful WordPress plugins that can help add Pinterest functionality.
If you’re interested in boosting your followers, something more akin to the Follow button or the Profile and Board widgets might come in handy.
The Follow button is super simple. Enter your Pinterest URL and your full name, and build the button. You get an HTML code to place wherever you’d like the button to appear.
The Profile and Board widgets let you display an interactive preview of all your pins or just the pins from a particular board. You can choose the layout size—square, sidebar, header, or custom.
Step four: Follow the boards of your competitors’ followers
Matthew Barby has a number of neat strategies for getting more initial followers on various social networks. Here’s a strategy that he tested with great success for Pinterest:
- Find a selection of your competitors’ Pinterest pages and click on their followers.
- Go through and follow around 50-100 of their followers’ boards each day (do this for around 2 weeks). You can also search for users based on hashtags relevant to your niche.
- Now create between 5 and 10 boards of your own that span across a range of different topics. Each week, you should aim to create another 3-4 boards.
- Pin as much content from your website as possible into a selection of your different boards. Add long descriptions to each pin with 2-4 hashtags. Try to space this out – don’t pin too many things at one time or you’ll flood everyone’s feeds. Try to stick to no more than 10-15 pins in an hour.
- Now, on a daily basis, go through your feed and repin around 10 pins onto your different boards – do this twice a day.
Summary
- Fill out your profile completely
- Share a link to your profile
- Include a Pinterest button on your site
- Follow the boards of your competitors’ followers
Next: Now, on to Google+
How to get your first 1,000 followers on Google+
Step one: Fill out your profile completely
Click over to the About tab on your Google+ profile and make sure that you’ve filled out all the necessary information. Google+ breaks down the profile info into several categories:
- Story – your tagline, introduction paragraph, and bragging rights
- Communities – the Google+ communities you’ve joined
- Links – your website, YouTube, and custom links
- Contact information – email, phone, and physical address (for brick-and-mortar businesses)
Like the other networks, it helps to seed your Google+ profile with relevant, useful content before asking others to join.
Step two: Share a link to your profile via other networks and via email
Step three: Place a Google+ Follow button on your website
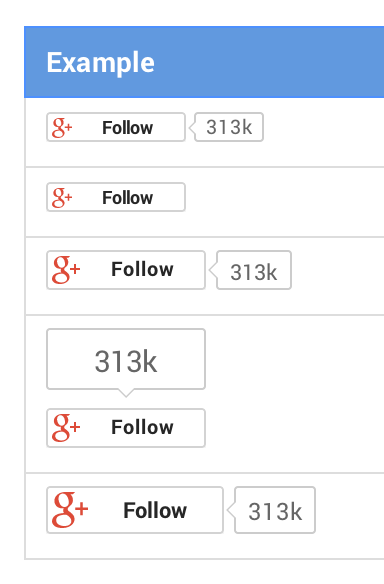
The Follow button comes in five different shapes and sizes.
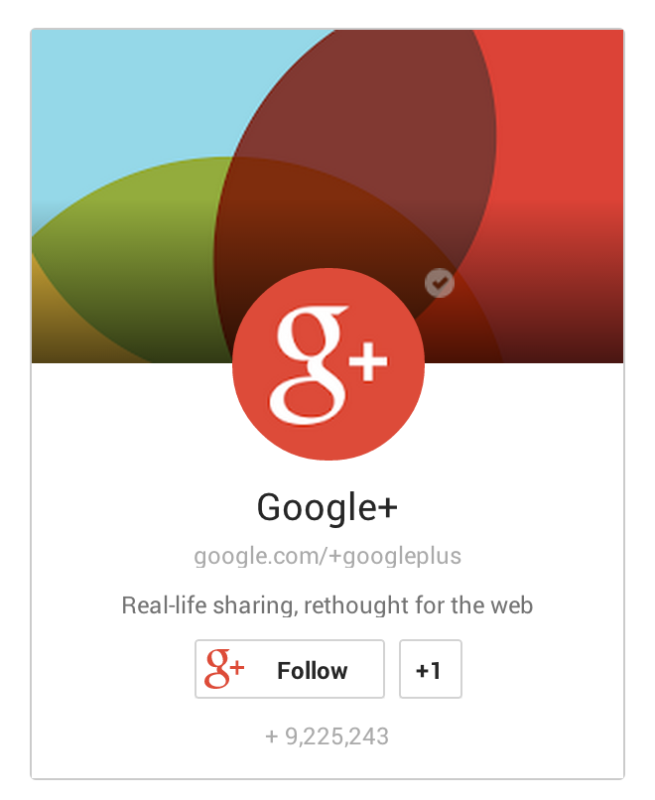
You can also go with a follow badge, which shows your Google+ profile picture and cover photo as well as the tagline.
Step four: Get involved with Google+ circles
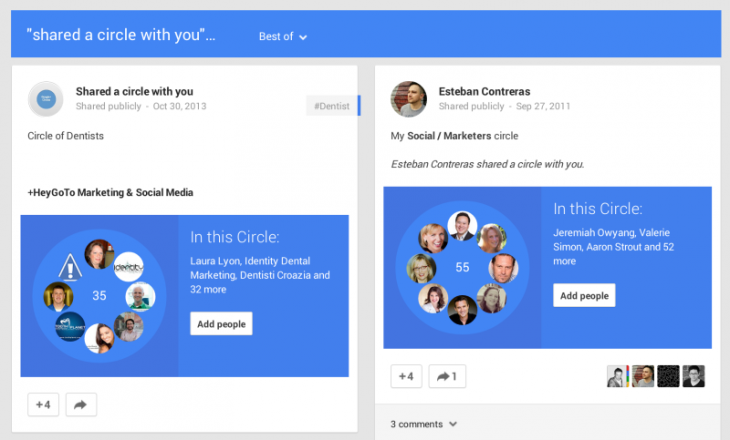
Google+ circles are a neat way to form collections of Google+ users. When you follow someone on Google+, you add them to your circles. Users often share their circles on Google+ as a way to build community on the network.
Search for circles that are relevant to you and your business. In the Google+ search box, you can type “Circle” and the keyword for your niche.
You can also go directly to a page of a relevant company in your niche and see both the people in their circles and those who have circled them. Clicking through to either of these pages gives you an option to quickly add targeted, interested Google+ users to your circles.
Like other networks, follower reciprocity comes into play here. The more people you follow, the more you can expect to be followed back.
Step five: Join and contribute to a community
You can even start your own. Contributing to a relevant Google+ community can help spread your name and attract more followers. And as a community moderator, there’s an added bonus:
If your business page is a moderator on a Google+ community, all of the +1s from that community will be added to your business page’s tally (and if that’s linked to your website, it will pass on to your homepage!).
Summary
- Fill out your profile completely
- Share a link to your profile
- Add a Google+ button to your website
- Get acquainted with circles
- Join and contribute to a community
Next: Strategies for LinkedIn
How to get your first 1,000 followers on LinkedIn
There are a couple unique ways to look at the climb to 1,000 followers on LinkedIn. Are you seeking followers for your personal profile or for your company page? The advice below touches on each.
Step one: Fill out your profile completely
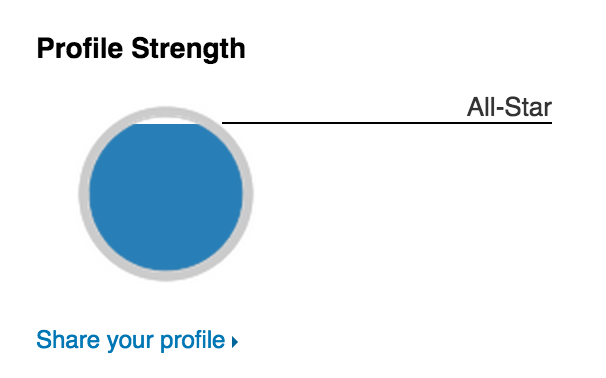
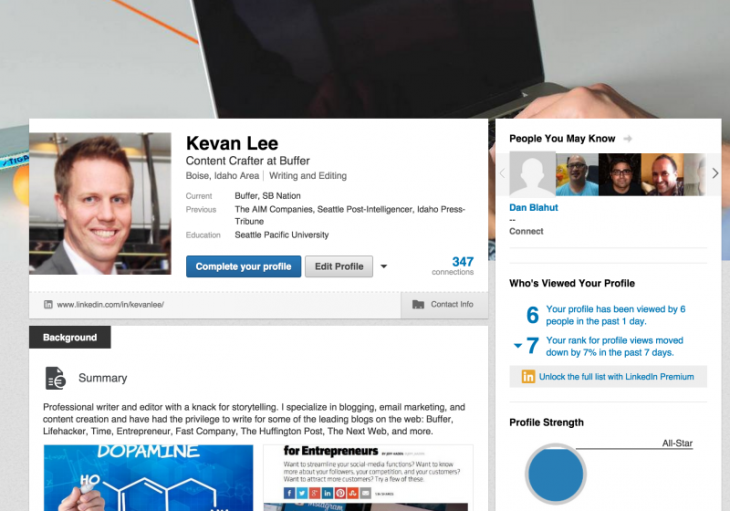
LinkedIn places great value in its users filling out their profiles completely. Your profile likely has a Profile Strength icon that shows you how thoroughly you’ve filled in your information.
The more information you add, the more likely it is that someone may find you. Fill out as much as you’re comfortable with, and be sure to take advantage of LinkedIn’s new cover photos and rich media options for your profile.
For instance, you could add a relevant industry image as your cover photo and place portfolio images and links into your profile.
Same goes for businesses. The profile options are a bit more limited, but you can still add cover photo and profile picture, URL, about information, and the specialties with which you’re involved.
Step two: Share a link to your profile via other networks and via email
Step three: Place a LinkedIn button on your website
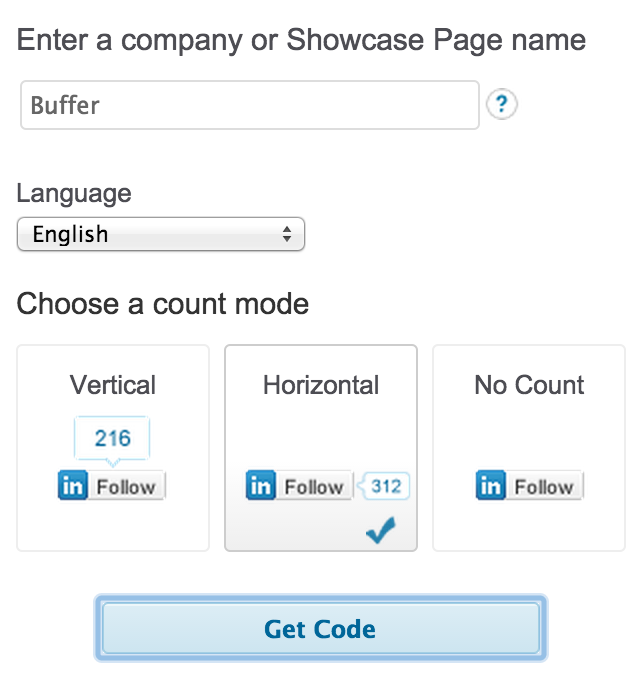
LinkedIn offers three options for creating a Follow button to place on your website.
Step four: Invite your coworkers to join LinkedIn and fill out their profile
This tip comes in handy for company pages on LinkedIn. When employees add you as their current employer on LinkedIn, your logo appears on their profile and it links directly to your LinkedIn company page.
Step five: Send an original connection request, and accept requests from everyone
Chris Lee shared an interesting strategy about how he handles the giving and receiving of LinkedIn requests.
Be indiscriminate about accepting connection requests. I accept all requests – they could potentially endorse you for multiple skills, share your profile to their network, and expand your reach. You should aim to have 500+ connections on your profile.
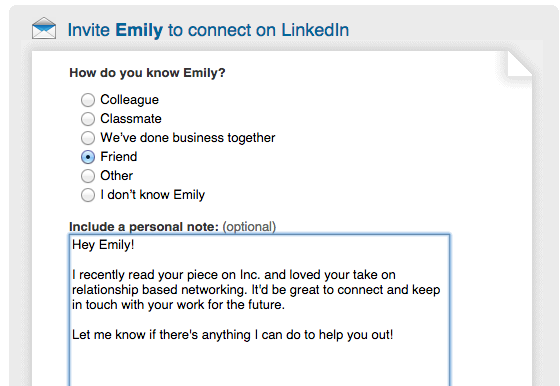
When sending out connection requests, try to modify the default message to something more personalized to increase the chances of your request being accepted. You can include your LinkedIn profile URL in your signature, “Connect with me.”
Here’s an example of a request he might send.
Summary
- Fill out your profile completely
- Share a link to your profile
- Add a LinkedIn button to your website
- Get your coworkers involved
- Accept all requests, and customize the requests you send
Next: Here’s a popular one: Instagram
How to get your first 1,000 followers on Instagram
Step one: Fill out your Instagram profile completely
What might Instagram users consider when they decide whether to follow you? Chances are good that they’ll check out your profile first.
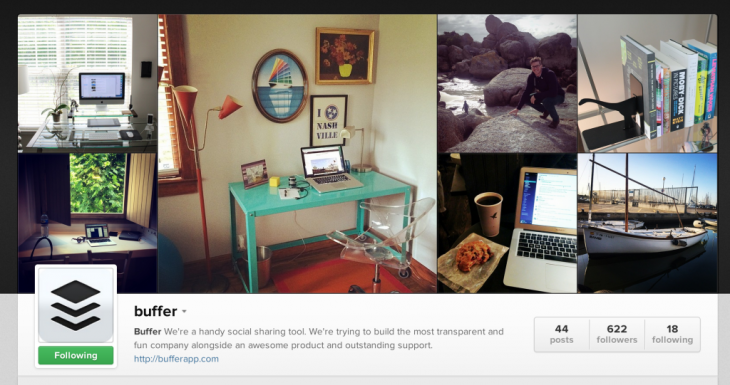
To that end, be sure you have completed your profile with a profile picture, a description, and a link to your website.
What’s more is that you want the photos themselves to look complete and professional. Instagram’s header section is composed of seven of your most popular images. Be sure that you’ve taken at least seven images before you begin promoting your profile. Lifestyle and personal images tend to do best.
Step two: Connect your Instagram and Facebook account
Doing so will help your Facebook friends find you and follow you on Instagram.
Step three: Come up with a commenting strategy
Any given second on Instagram, there are 575 likes on a picture compares to 81 comments. A comment figures to get noticed (and appreciated) much more than a like.
- Comment from a computer, using a tool like Iconosquare. This way you can leave comments quicker and easier than typing out on a mobile device.
- Search for a relevant hashtag.
- Comment on photos posted within the last day or two.
- Comment on photos with fewer than five other comments (to make sure your comment is seen and appreciated).
Step four: Like a lot of posts
Neil Patel tried out several Instagram strategies to gain more followers, and his number one takeaway was this:
If you want to grow your account by a few hundred followers a day, the best way to accomplish it is to randomly like thousands of images a day.
Step five: Discover the best hashtags
Find out what the influencers in your industry are tagging. For a more scientific view, check into the Webstagram Top 100 to see the overall trends and top picks for hashtags on Instagram.
Step six: Place a hashtagged feed of Instagram posts on your website or blog
This way, visitors to your site can notice your Instagram account and send you follows. There are some helpful sites—Webstagram and Instansive, for instance—that assist with getting the feed on your site. WordPress users have a lot of plugin options as well.
In addition, Instagram also offers five different types/sizes of badges that you can place on your website.
Step seven: Tag people
Tag and mention the accounts that are relevant to you. This could lead to the accounts themselves following you back or with these users paying the love forward by mentioning you on one of their photos.
Step eight: Share a link to your profile on other social channels and email
Step nine: Use geo-tagging for your pictures and your store
Instagram revealed a photo maps feature which lets users see the pictures that were taken from a certain location. If you enable geo-tagging on your pictures, you can be part of this map. Same goes for a brick-and-mortar store you own. Connect your Instagram via Foursquare to turn on this feature.
Summary
- Fill out your Instagram profile completely, and make sure that you have at least seven high-quality images on your account
- Connect your Instagram account to your Facebook account
- Comment on as many images as you can
- Like as many images as you can
Conclusion
Which tips might you try to get more followers on these social channels?
What have you found that has worked well for you in the past?
I’m curious to try some of these tips out myself on personal social media profiles and on the accounts for Buffer. Many of these we’ve tried-and-test; others are new. It’d be great to test them all out and report back with what works.
Read next: Your content, everywhere: The 17 best tools to get your content its largest audience
Get the TNW newsletter
Get the most important tech news in your inbox each week.
