
Welcome to TNW Basics, a collection of tips, guides, and advice on how to easily get the most out of your gadgets, apps, and other stuff.
As people around the world participate in protests and demonstrations the world over in support of Black Lives Matter and to honor the late George Floyd, some are running into resistance from law enforcement. Should you be arrested while participating, here’s how you can make sure your iPhone can’t be unlocked without a pin code.
My colleague Georgina Ustik recommends not bringing your phone at all, or bringing a cheap burner phone with tracking disabled, so if your phone is lost or stolen it won’t hurt you too much. An iPhone is an expensive piece of equipment, so my first recommendation to all of you going out to participate in the protests is to leave it at home.
Read: Protesters flood Dallas Police app with K-Pop videos
That said, if you do take your iPhone with you to protests, beware that the biometrics — FaceID and TouchID — that make life so easy for you can actually be used against you. You can refuse to give a password, but it’s much easier to simply hold your phone up to your face and let the FaceID do the work for the officers.
Sure, you could make the case that police can’t legally force you to use your finger or face to unlock your phones, as it could be considered a violation of your Fourth and Fifth Amendment rights. But indulge me in at least telling you how to prevent that, in the totally, wildly implausible scenario that the police violate your rights should you, say, be arrested at a protest.
How do you do it?
The iPhone‘s Emergency SOS feature, which can be accessed by holding down the wake button and one of the volume buttons, allows you to swiftly contact emergency services and send a message to your emergency contacts. However, it also disables biometrics, meaning you’ll need to enter a password or a passcode to unlock it. Note: if you have an iPhone older than an 8, you’ll have to tap the wake button five times rather than hold any buttons.
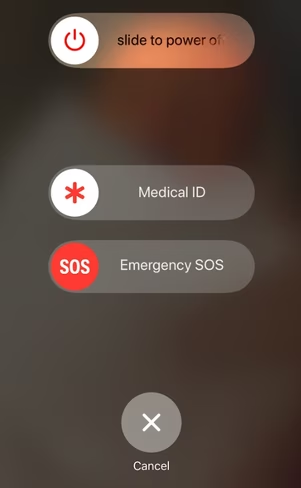
Once you’ve held down both buttons for a few seconds, you’ll see sliders giving you the options to shut your phone off, phone emergency services and to open your medical ID. You don’t need to actually swipe any of these. You can press the cancel button, and it’ll still disable your biometrics.
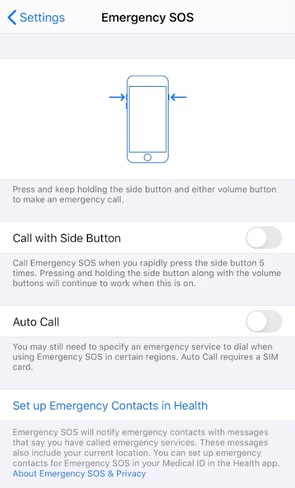
You’ll also want to make sure you have “Auto Call” disabled. If this is enabled, pressing the buttons will mean your phone automatically calls emergency service rather than show you the above options. You can find this toggle under your Emergency SOS menu in the Settings app.
Hopefully this will help you protect your device should you be detained by law enforcement. Good luck!
Get the TNW newsletter
Get the most important tech news in your inbox each week.