This is an excerpt from TNW’s Complete Guide to iOS 5. If you’re interested in more information about Apple’s latest mobile OS, you should check it out here. And be sure to take a peek at the rest of our iOS 5 coverage here.
When Steve Jobs introduced the new iMac in 2003, he described it as a ‘digital hub’. This meant that no matter what music, photos, videos or any other type of digital information you had the Mac was the place that would store it all. At WWDC earlier this year, Jobs introduced the replacement for this digital hub which will be called iCloud and reside on mostly on Apple’s servers rather than in your home.
iCloud
As the new digital hub for everything iOS, iCloud is comprised of several different components that are bundled together into one service to make things more seamless for users. Here’s a list of the various aspects of iCloud:
- iCloud syncing – Keeps data synchronized between iDevices and iCloud web services.
- iCloud.com- Web services like Mail, Contacts, Calendars, iWork and Find my iPhone/Mac that can be accessed on the web at iCloud.com. This replaces MobileMe.
- iCloud backups – Backs up iDevices to allow restoring over-the-air and without iTunes.
- Over-The-Air Updates – Devices like iPhones and iPads can now be updated on the fly, without computers.
- iTunes in the Cloud – Re-download purchased songs, music videos and TV shows from any iDevice or computer.
- iTunes Match – A service that matches your existing library with songs in Apple’s iTunes Store, upgrades them and makes them available for download anywhere. Not to be confused with iTunes in the Cloud, although they are tightly integrated.
- Automatic Installation – Any apps installed or music purchased on any of your devices gets automatically downloaded to all other devices.
- iCloud Storage – Space to keep iCloud backups and other synchronized data.
- Photo Stream – A separate stream of photos stored locally on your iDevice and synced to your computer automatically.
- PC Free Setup – Allows users to set up and use iDevices without connecting them to computers. Technically not a part of iCloud, but related to it closely.
iCloud setup and settings
iCloud’s setup is actually very simple. As mentioned in the PC-Free section below, you will be asked to provide your Apple ID and then asked if you would like to enable iCloud when you fire up your device. There is a simple ‘on-off’ toggle for iCloud and no further setup is mandatory.
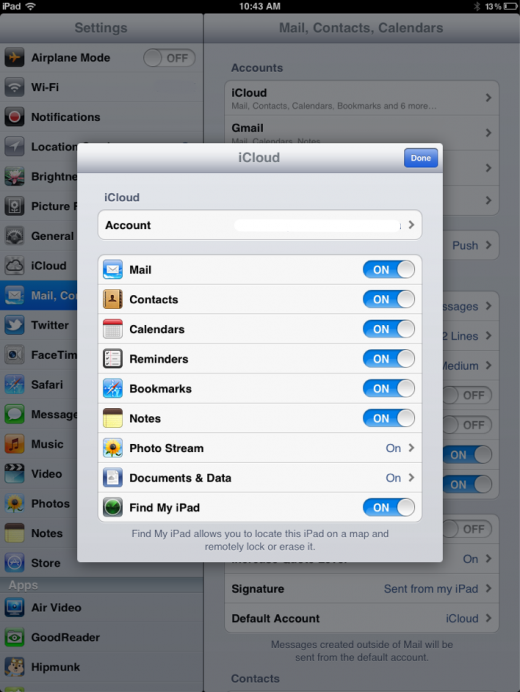
If you would like to tweak exactly what iCloud features you want to take advantage of you can head to Settings>iCloud to choose which items are synced and which are not. Just toggle any of these items on or off to stop them from syncing with iCloud. You can still sync them with iTunes.
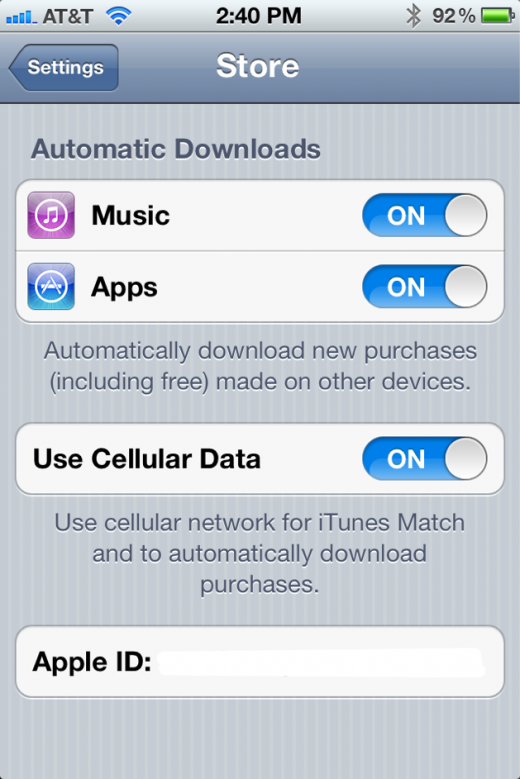
Another set of options that you’ll want to make sure to check out is under the App Store section, where you will find two toggles for Automatic Downloads. Turning these on will automatically download any app or song (or TV Show) you purchase from the App Store onto all of your iDevices and computers with iCloud enabled. It works really, really well and downloads normally begin within a few seconds of purchase.
The Use Cellular Data toggle controls whether iTunes Match and Automatic Downloads work over WiFi only or over your cellular data connection as well.
iCloud Syncing
iCloud syncing is the umbrella under which the various types of data that will be matched between your devices are kept in line. Although Apple itself refuses to use the term ‘syncing’ when referring to many iCloud feature,s it doesn’t’ change the fact that the service does involve an extensive mount of synchronization features.
What Apple has done differently from most syncing services, however, is to remove any thought of conflicts or making syncing choices based on versions of a file. Instead it handles all of the dirty work behind the scenes, turning iCloud into a basic ‘on or off’ choice that a user can make.
Once enabled, many different types of data will be kept in sync across your iDevices and your computers running Lion or Windows computers with the iCloud control panel installed. The basic types of data that will be automatically propagated across your whole collection of Apple devices includes:
- Contacts
- Calendars
- Reminders
- Bookmarks
- Notes
- Photos
- Documents and App Data
If you add a contact on your iPhone, you will see it nearly immediately on your iPad and vice-versa. If you make a change to a Pages document, it will automatically update the versions of that document on iCloud.com and in Pages on any of your iDevices.
As developers integrate iCloud into their apps, you will be able to do the same with any that you have installed on multiple devices or on your Mac and your iPhone. No longer will you have to transfer documents using Dropbox integration just to continue working on them. Instead the experience will be seamless.
That doesn’t mean that there won’t be a place for services like Dropbox as currently iCloud does not allow you to manipulate or even browse files directly. It is meant as a transparent service that most users will never even see working.
But until others begin using this syncing, you can see it in action now in any iWork application for iOS as well as through the way that the items above ‘copy’ themselves across your devices. I tested out the iCloud-enabled versions of iWork myself and found them to work pretty much as advertised at WWDC.
If I created or edited a document in the iPhone version of Pages, the changes were synced very quickly to iCloud.com as well as Pages on my iPad. If you do a lot of iWork editing, this is a great way to have everything working together seamlessly.
Other than that, there is not much to say about document syncing at the moment.
App data syncing is another matter as this is another use of the APIs that are being introduced to developers in Game Center that will allow you to play a game on one device, pick up another device and play it right from where you left off. With this turned on, you will be able to use any app from any device and have the state and data transferred between these apps automatically.
The easiest way to sum up the way that the app data syncing works is to explain it as Amazon’s Kindle Whispersync service, but for every kind of app. Whispersync is the way that Amazon keeps all of your Kindle devices, including apps on iPhone, iPad and iPod as well as its physical Kindle devices, including the upcoming Fire tablet, talking to one another about the spot that you’re at in a book. If you switch devices, the service will alert you and you can choose to jump right to that spot.
This experience should translate to any and all apps that allow you to work on documents or play around with them on more than one device. This way the iPad version of your Scrabble game will look exactly as you left it during your last play session on the iPhone. Reading through your RSS feeds in Reeder on your iPad? Shut it down and pick up your iPhone. On opening the app, it will sync with the data from the iPad version and you can begin reading your feeds right where you left off.
iCloud syncing has the potential to make your iPhone, iPad, iPod touch and Mac all work seamlessly together. Whether it reaches that potential will depend on developer adoption as well as the speed and reliability of iCloud as it launches and gets under load. It’s a future that I would love to live in though so here’s hoping this works out well.
Over-the-air Updates
Another banner feature of Apple’s PC free iDevice experience is over-the-air or OTA updates to iOS. This is the process of issuing updates to a device without it having to be plugged in to a computer or even erased and restored.
A typical update to iOS previously required that you plug it into iTunes, allow the entire file system to be replaced and then restore your data from a backup.
You will no longer have to do this for most updates, although the initial installation of iOS 5 will be required to be performed this way and any major updates to the iOS software will most likely have to be done this way.
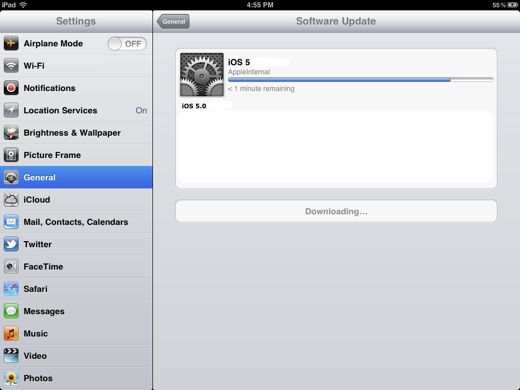
If an update to iOS 5 comes out from Apple, you will be notified that there is an update waiting for you by a small notifications badge on your Settings app icon. When you see the badge, open up Settings>General>Software Update and your device will check to see if there is a new version available for install.
If there is, you can read the release notes and see the version number. When you’re ready to install, make sure that you have a decent amount of battery available, your iPhone will warn you if there is not enough to perform an update. Then tap the install button and it will download the update and begin to install it automatically.
The update process will reboot your iPhone and display a progress bar and the Apple icon. When it is done, your phone will reboot and be ready for use immediately, there is no restore necessary.
This process, also known as a ‘delta’ update, only replaces the files that have been changed or updated by Apple and not the entire operating system. This means that the file sizes of the updates are far lower, 125-175MB versus 800MB+ for a major update.
This means that you can update over WiFi or even 3G much quicker than you would if the update was full-size. Issuing OTA updates that were full-size was never an option for Apple on any data network, so it had to make the transition to delta updates before it could begin to offer this feature.
Like the improved—and non-modal—notifications, this is a feature that Android users have been enjoying for some time and it is an incredible relief to see it come to iOS.
My experience with the OTA updates has been largely positive and it has proven to be a fairly painless procedure, especially in the later versions of the beta, but I still recommend that you make sure that you have a backup of your iDevice before you perform one, whether that is an iCloud or iTunes backup.
PC Free setup
To go along with iCloud, Apple also introduced a brand-new PC free experience for using iOS devices. This PC free experience includes several different aspects. These include wireless syncing to iTunes and iCloud backups which will backup your device without ever having to connect it to a computer but perhaps one of the most dramatic improvements, especially for users without computers at all is the ability to set up an iDevice without plugging it in to a computer running iTunes.
Previously, if you received an iPhone or iPad as a gift, took it out of the box and powered it on, you were immediately greeted with a ‘Connect to iTunes screen’ which stopped you from doing anything else until you plugged it into your computer physically. This was a jarring halt to what is otherwise a beautiful unboxing experience. It felt like it was foreign to the whole iOS device philosophy and it seems that Apple agreed as well.
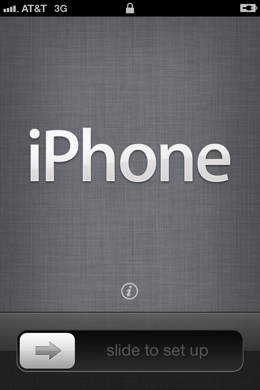
With iOS 5, when you remove an eye device from a box you are no longer greeted with a connect to iTunes screen. Instead there’s a welcome screen that simply says iPhone or iPad or iPod Touch and a ‘Slide to set up’ where the unlock slider normally sits. Once you slide to set up you’ll be greeted with a series of screens that allow you to set up various aspects of your device.
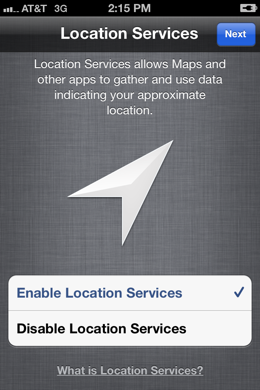
The first screen is Location services which allows you to enable or disable location Services which allows maps and other apps to gather and use data indicating your location. It does stress that it is the approximate location, which is true. This should do to alleviate the fears of some users that the iPhone is tracking them personally.
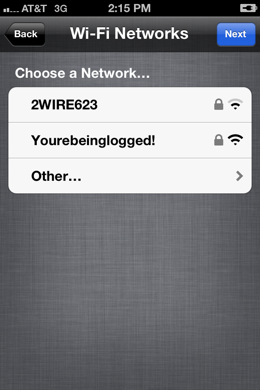
Next you’ll get to choose your Wi-Fi network from a list of any of those available. If you have an iPad that is Wi-Fi only or iPod Touch, you’ll need to choose one of these for some aspects of the setup if you do not pick one here the items that the setup wizard presents you will be limited.
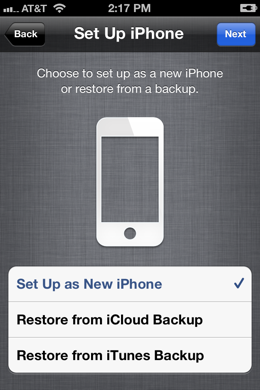
Once you’ve chosen your Wi-Fi network, it will lead you into the actual iPhone setup section of the wizard. The choices here are Set up as new iPhone, Restore from iCloud backup or Restore from iTunes backup. The three options will allow you to set up a new device or restore a previous backup either from your computer or from iCloud.
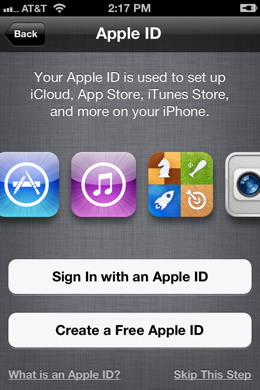
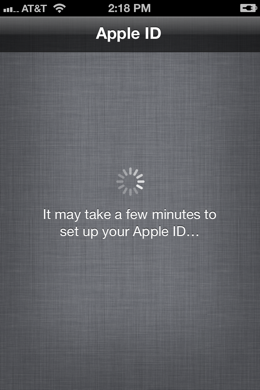
Next, the wizard will ask you to enter an Apple ID with which to associate your device. This will give you access to iCloud, purchased apps and music and more. If you do not have an Apple ID currently, you have the option to create one here as well.
If you choose to set up your device as a new device you will be guided through two more steps. The first will ask you if you would like to turn on contact syncing, photo syncing and other types of features that are all contained within Apple’s iCloud umbrella. This is represented by a simple on-off toggle for iCloud. We definitely recommend you do this, as the service is free by default and provides a very nice way of backing up and synchronizing your device with other iDevices and your computer.
Next you will be asked if you would like to sign on to the Find my iPhone service. This service will allow you to locate your iPhone or other device if lost or stolen, send messages to it, remotely wipe the information to prevent it from falling into the wrong hands and more. There’s really no reason not to enable this service, it’s highly useful.
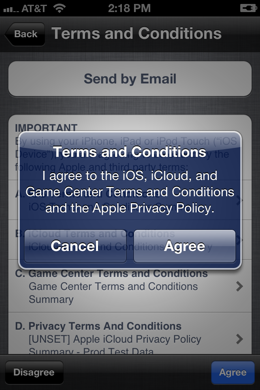
If, however, you choose the other path and decide to restore from a backup of your device, you’ll be asked whether that backup is from iCloud or from iTunes. If it’s from iTunes, you’ll plug it in and follow the instructions as requested and restore it as you always have. If you would like to restore from an iCloud backup, you’ll be asked to agree to the IOS and iCloud terms and conditions and then it will poll the server with your Apple ID looking for backups.
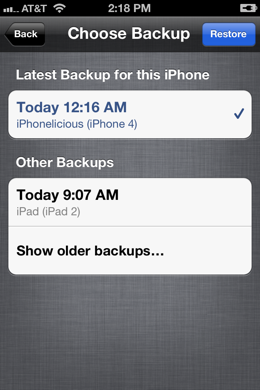
It will then display the latest backups for the device as well as other backups from other devices. Simply choose a backup and hit restore.
Once you’ve chosen to restore, your device will fall back to a blank screen with an Apple logo and progress bar. Once this portion of the restore is complete, your phone will reboot and you will be presented with a device pre-loaded with contacts and other info as contained in your backup.
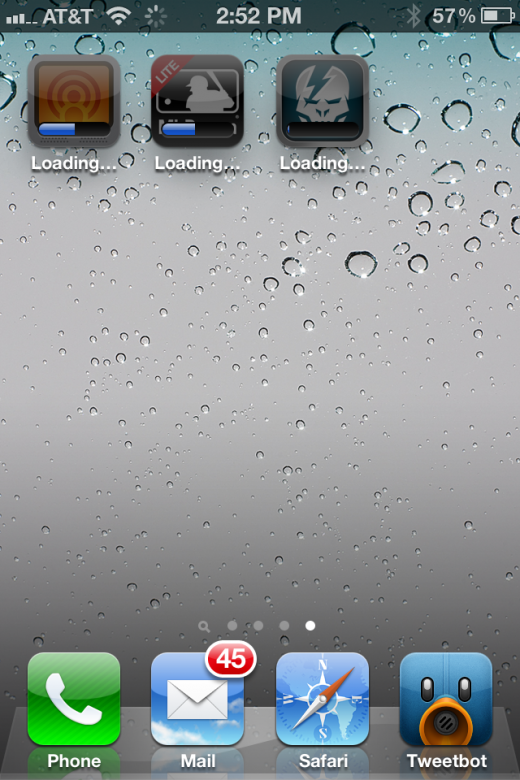
If you had a lot of apps installed on your device, you will see that they are re-downloading themselves from Apple’s servers. Only the application settings are stored in your iCloud backup in order to limit the size. This means that once your apps have finished re-installing, they will be in the same state as the backup that you restored from.
iCloud backups
As mentioned, iCloud backups do not contain an image of your entire iPhone. Instead they contain information like your camera roll, accounts, contacts, calendars, documents and settings. They also contain files that store application data, preserving the state of your apps and any information that you have entered into them.
If, for instance, you delete your phone and restore from an iCloud backup, you can pick a game back up from where you left off.
This is important because an iCloud backup does not contain your apps. Instead, it re-downloads the applications that you had installed after you restore from a backup. It does, however, retain your app icon layout, which is nice.
After you restore from an iCloud backup, the apps will begin re-downloading themselves. This takes advantage of the new ability of iOS 5 to download multiple apps at one time from the App Store cloud. This also applies when purchasing or manually downloading apps.
iCloud backups also do not contain music or TV shows. These are instead re-downloaded automatically from Apple’s servers once the restore has been completed. If you have iTunes Match, this will include any songs that have been added to Apple’s database from your library or matched with songs that you have purchased.
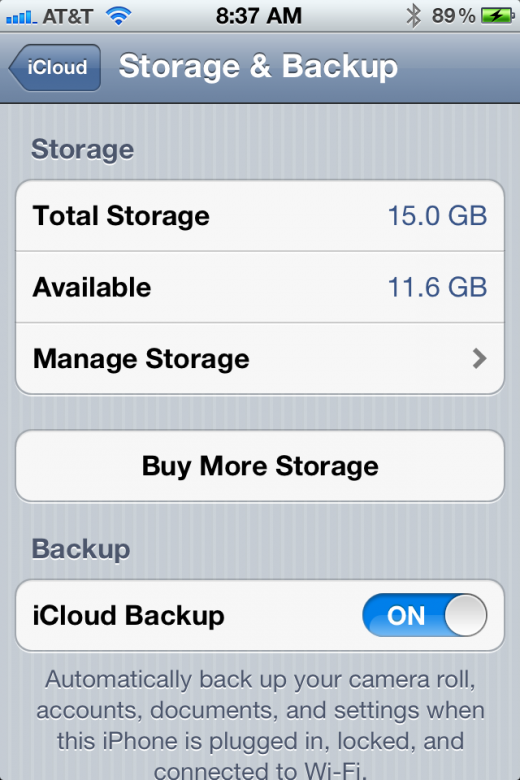
You can check the status of your iCloud backups by visiting Settings>iCloud>Storage & Backup. This new settings screen will show you how much total storage you have as well as show you the status of your iCloud backup and allow you to enable it if it is disabled.
This screen will also tell you exactly when your device was last backed up to iCloud and will allow you to force a backup by tapping the ‘Back Up Now’ button. iCloud backups can be initiated over WiFi only. No 3G here.
Photo Stream
The image syncing service of iCloud comes in a couple of forms. First of all, every photo that you shoot gets pushed to all of your iDevices and to iPhoto (as long as you have updated to the latest version, which supports iCloud). This means that every image you shoot is archived in multiple spots.
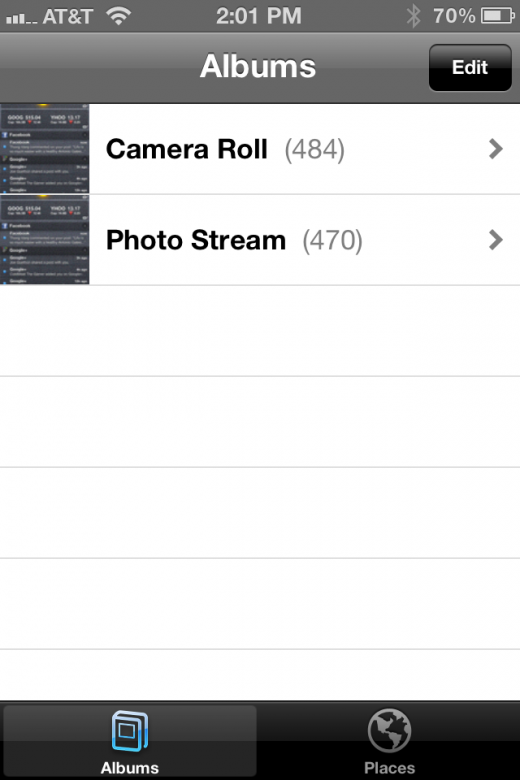
Photo Stream takes a limited number of these shots, 1,000 to be exact, and keeps them available on all of your iDevices that have iCloud enabled.
This takes the form of a rotating series of images that appears in the Photo Stream album, which appears below the other albums in your Photos app. The images will show up in Photo Stream for 30 days. If you want to keep any of them permanently on your devices simply copy them into another album on your device. Remember though that this is still the low resolution version of the image. If you want the full res, go back to your Mac.
These images do not include videos, which are not synced with Photo Stream currently. They do include any images shot on your iDevices or imported into iPhoto on your Mac. You can toggle that last option off if you wish to keep Photo Stream clear of images that you’re importing from memory cards on your computer.
Here’s a quick video of Photo Stream updating after being enabled on an iPad connected to the same iCloud ID of an iPhone:
Any iPhone, iPad or iPod touch connected to your iCloud ID will get the images in a format that is optimized for viewing only, but your Mac gets the full resolution images. Your Mac also keeps all of these high-resolution images, only the iDevices have a limited amount of storage.
I found Photo Stream to be a complete delight to use. I love the fact that every image I shoot shows up on every one of my devices as I shoot it. It is kept separate from the regular albums so it doesn’t matter that I take a lot of screenshots that show up here too.
This is important because for many people, their Apple ID will also be their iCloud ID. This will lead to every device in the family having access to that stream of photos. So, beware, everyone will be seeing whatever you shoot if you have Photo Stream turned on. There is a toggle to disable it in the iCloud control panel though.
In general, Photo Stream was one of the slickest and most reliable aspects of iCloud for me during the test period. I think that this is going to be an incredibly useful feature that many are going to love.
iCloud Storage
By default, you are provided with 5GB of free iCloud storage space. This can be upgraded to several higher tiers if you run out of space. It has been stated that you will stop getting email to your iCloud email address if you run out of space.
These items are not calculated as a part of your iCloud storage limit:
- Music
- Apps
- Books
- Photo Stream
These items are calculated against your limit:
- App data
- Documents
- iCloud Backups (the biggest chunk of which is usually your camera roll)
If you tap on the Manage Storage button on this screen, you can see how much space you are using out of what you have available. It will also allow you to see the amount each of your backed up devices uses as well as the amount dedicated to your email.
You can tap on any device here to see when the latest backup was, see the backup size and delete the backup if no longer needed. This will free up space for you in your iCloud storage.
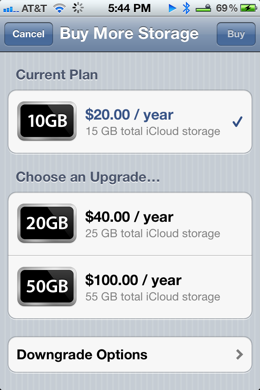
There is a link here to allow you to purchase more storage if you need it. The pricing is as follows:
- 10GB $20/yr – 15GB of total iCloud storage
- 20GB $40/yr – 25GB of total iCloud storage
- 50GB $100/yr – 55GB of total iCloud storage
Note that any amount you purchase is added to your existing 5GB of free storage.
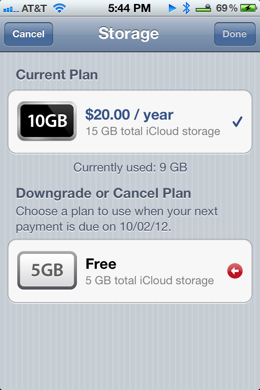
If you purchase an iCloud storage upgrade, a ‘Downgrade Options’ button appears. You can use this to drop your upgraded plan if you no longer need it. You can downgrade to any tier that is lower than the one you’re using, including the free plan if necessary.
When you choose to downgrade your plan it will take effect on your next payment due date, which could be as much as a year out if you have just purchased the plan. It has not been made clear whether there will be any option for a pro-rated early downgrade but if so, it is not available on the device.
While these storage options should be just fine for any normal iOS device user, it gets a bit more hairy when you consider families with multiple iOS devices all using the same Apple ID to connect to iCloud. Or schools that use a universal ID for staff and student devices.
Apple has not made any statements about larger iCloud storage options being made available to educational or enterprise customers.
Wireless iTunes Syncing over WiFi
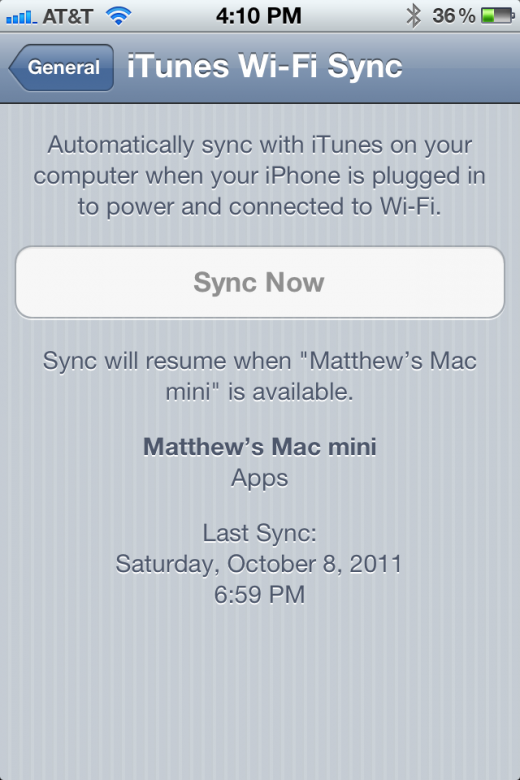
In addition to being able to back up your device with iCloud, you are also able to set up wireless syncing to iTunes across a WiFi network. This syncing happens automatically when your device is plugged in to power and connected to WiFi.
You can force a sync by going to Settings>General>WiFi Sync and tapping Sync Now. If you plug your device in to sync it with iTunes over a cord, this will disable iTunes WiFi syncing.
Regardless of how you sync, whether it is wireless or by cable, you can now continue to use your device. This seems like a silly addition to mention but I’ve already extensively utilized this. I never realized how annoying it was to have to wait to use my device until the sync was done before.
Every time you sync with iTunes, a backup will be created, as has always been the case. These backups are only available to restore from if you plug the device into the machine that you synced it to. If you would like to restore from a backup while not plugged into the computer, you should take advantage of iCloud backups.
iTunes in the Cloud
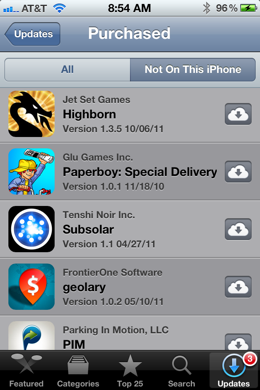
iTunes Match, as a service largely confined to iTunes, is best discussed elsewhere. But another component of iCloud related to iTunes is worth talking about here. iTunes in the Cloud is a service that allows you to re-download any songs, apps or TV shows that you have purchased through iTunes.
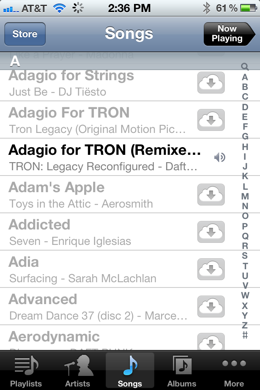
You can then download any of these items on any iDevice or computer with iTunes installed. To do so, visit the purchased section of the iTunes store and tap the cloud icon to re-download them.
This does dovetail nicely with iTunes Match in one aspect. With iTunes Match, any song that you have in your personal library gets matched with Apple’s iTunes library. If it matches and is of a lower quality, it gets upgraded to a higher quality version and if it does not match, it is uploaded and available to you on any of your iDevices through iTunes Match.
If you have iTunes Match then your songs will be visible right in your Music app and you simply tap any song to stream it instantly from the cloud or tap the cloud icon to download it.
TV shows were recently added to the allowed downloads and it has been rumored that Apple has been working to add movies to the available options but it is apparently still cutting deals as no announcement was made at the event introducing the iPhone 4S.
This is an excerpt from TNW’s Complete Guide to iOS 5. If you’re interested in more information about Apple’s latest mobile OS, you should check it out here. And be sure to take a peek at the rest of our iOS 5 coverage here.
Get the TNW newsletter
Get the most important tech news in your inbox each week.

