
Daryl Lang is the Managing Editor for the Shutterstock Blog. This post was originally published on the Shutterstock blog and has been adapted with permission.
Recently, I started to create an animated GIF in Adobe Photoshop Creative Cloud and found myself totally lost. I had learned how to work with animations using an older version of Creative Suite, but with my recent upgrade to CC, Photoshop’s excellent animation tools seemed to have vanished. I searched and struggled and cussed at my monitor before finally asking a colleague for help.
This post is meant to spare you that frustration. If you’re an occasional user of animation tools, and are still getting familiar with Adobe Photoshop Creative Cloud, this 2-minute overview will orient you to where the tools live now.
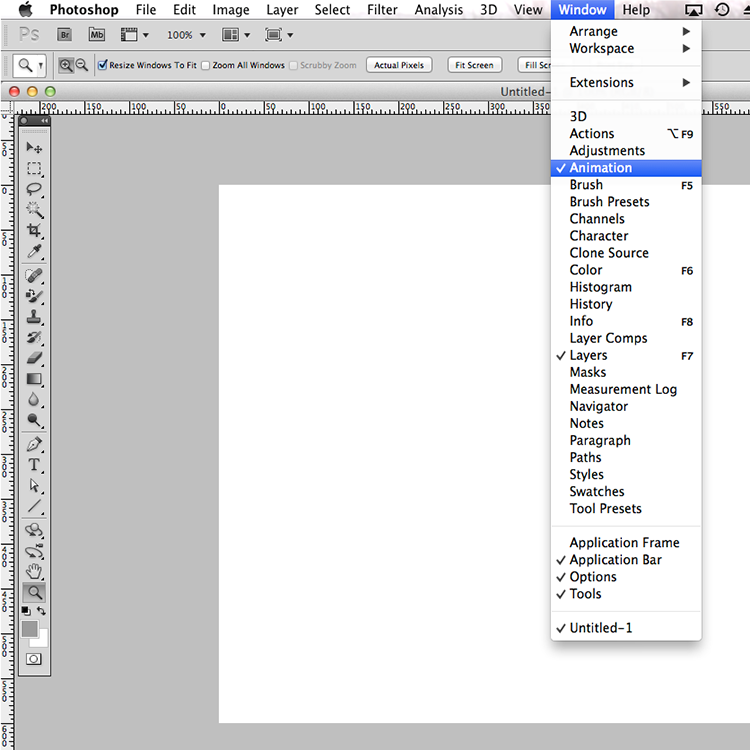
To begin, here’s a picture of where the animation tools were in recent versions of Photoshop (in this case, Adobe Photoshop Creative Suite 5). They were sensibly labeled “Animation” under the “Window” menu.

The 💜 of EU tech
The latest rumblings from the EU tech scene, a story from our wise ol' founder Boris, and some questionable AI art. It's free, every week, in your inbox. Sign up now!
However, if you go hunting for an “Animation” window in Photoshop Creative Cloud, you won’t find it. That’s because it’s been renamed “Timeline.”
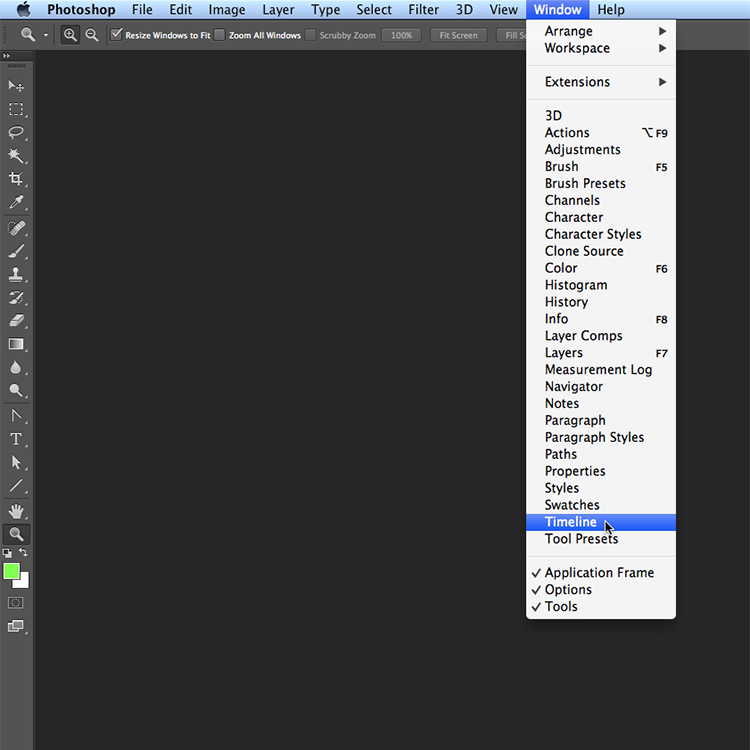
So far, so good. Select “Timeline” from the Window menu and you’ll see a panel full of tools appear at the bottom of your screen.
But suddenly, it’s not so simple. Timeline doesn’t look like the old Animation window you’re used to. Instead, Adobe has introduced a new set of tools called “Video Timeline.”
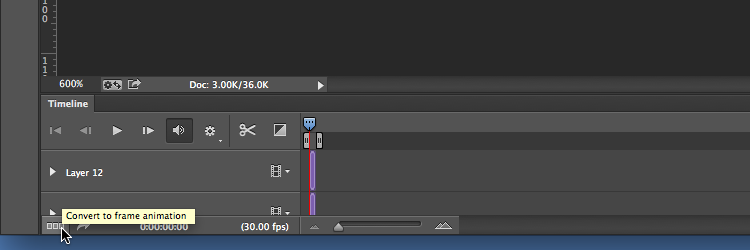
Video Timeline mimics a video-editing tool, with spiffy tricks for transitions and timing and so on. It looks cool, but today we’re in a hurry. Let’s learn Video Timeline another day.
Fortunately, once you’ve made it this far, you’re only one click away from your familiar frame-by-frame animation timeline. Just click on the little icon in the lower-left that looks like three small rectangles. You’ll toggle to “Frame Animation” view.
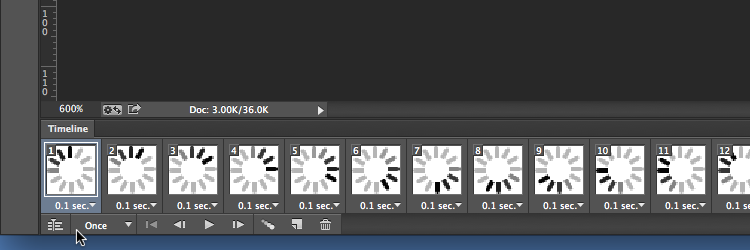
This will look familiar if you learned animation in an older version of Photoshop. Here, you can add and edit animation frames with the exact precision you want.
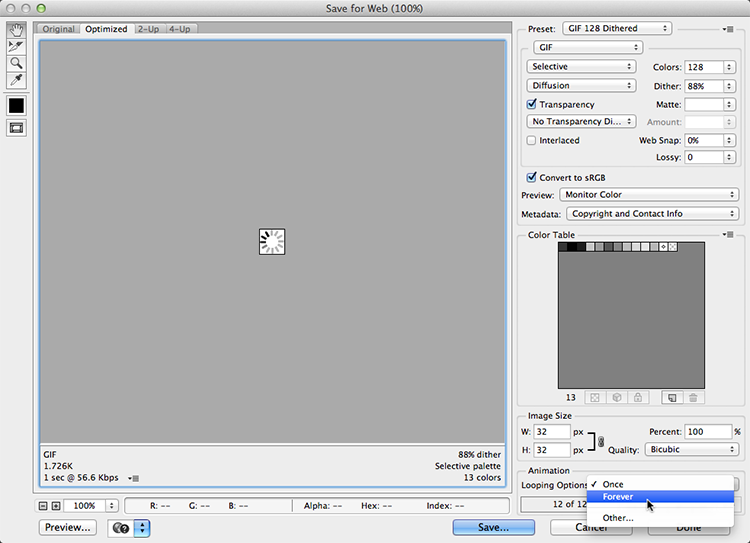
Once you’ve built your animation, Photoshop’s “Save for Web” panel is still the right way to export it as a GIF for a website.
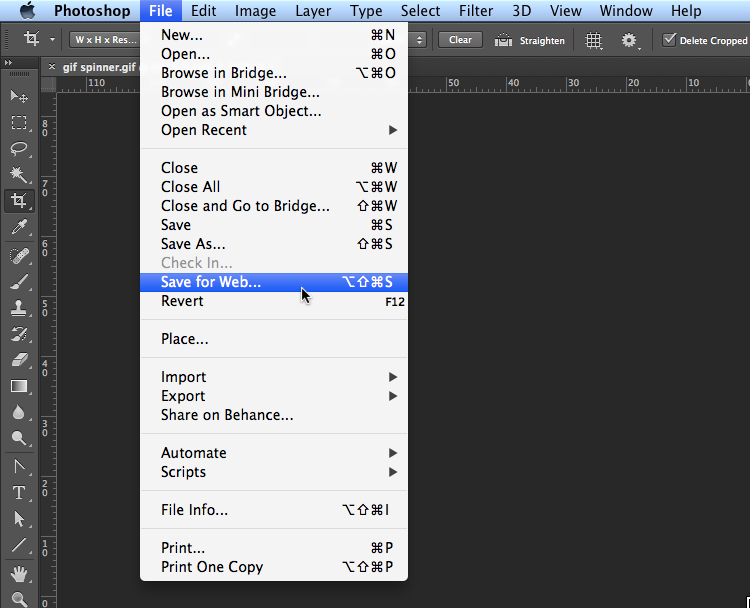
You’ll see all the settings you’ll need to optimize your GIF, including some “Animation” settings in the lower-right corner.
That solves it! Now you know how to build a simple animated GIF in Photoshop Creative Cloud using the same methods you learned in Photoshop Creative Suite. Good luck with your next animation!
Get the TNW newsletter
Get the most important tech news in your inbox each week.