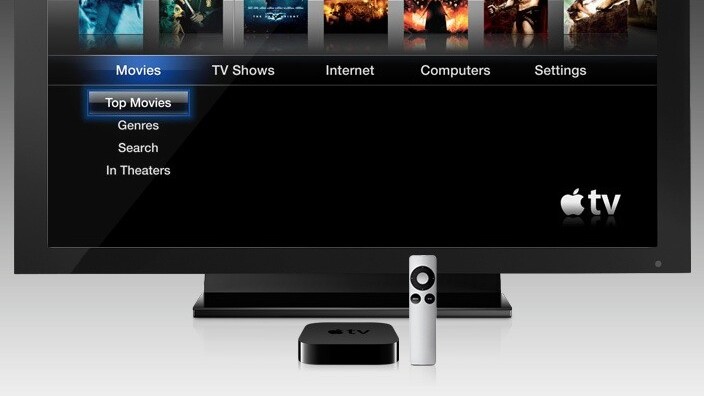
Getting all of your media in one place can be a complicated task. Dealing with different codec requirements and dealing with all the wires can be a stressful task. The easiest way to get your media onto your entertainment system may be to just plug a computer in to it, but that is not always the most elegant of solutions. Here are a few tips for Mac owners who want to get the most out of their computers as media servers.
What you need:
- Mac Computer (Any will do)
- iOS Device (iPod Touch/iPhone/iPad)
- Apple TV (2nd Generation)
- EyeTV HD (Optional)
5 GHz
Before we get into the specifics of media management, figuring out the best way to stream your music and videos is a good place to start. Many routers today offer a 5 GHz band of wifi that many people don’t understand the purpose of.
While in most cases, the 2.4GHz band is much more useful and prominent than its 5 GHz equivalent, streaming media is better with 5 GHz as you can send much more data through at faster rates, with much less interference.
While each router does things a little different, the Apple Airport Extreme is easy to set up. Open Airport Utility and select Manual Update, look for the “Wireless” tab and select “Wireless Network Options”. From here you can turn on your 5 GHz band and connect to it from anything that has that capability to improve streaming.
Update: Thanks go out to Bob in the comments for bringing this to my attention but the iPhone 4 and iPod touches are not capable of using the 5 Ghz band so if you are using them to stream to your Apple TV the benefits gained from 5 Ghz are not worth it. Fortunately the iPad is capable of using the 5 Ghz band.

Organizing your media
Usually one of the biggest problems when it comes to setting up your Mac to manage all of your media is that it can become very disorganized very quickly. The best way to keep it all organized is to use one program to house everything and I suggest to use iTunes.
iTunes is great for this because it will sync with all of your iDevices. As well, iTunes does a great job keeping all the information about your media current, correct and all within a single directory.
The one problem though is if you have you movies from another source, iTunes needs a little help with the metadata and this is where a program like iFlicks can come in handy.
iFlicks
iFlicks is a great little program for you Mac which will convert all your movies into iTunes compatible formats as well as get all of the metadata that exists if any exists as well. This means that it will find all of the pictures, actors and plot summaries as well.
When you convert files into an iTunes format you can also select that they be compatible with the Apple TV, which will be the staple of setting up a great Media Management system in your home. Having all the metadata present makes searching for the video you want much more manageable on your Apple TV or Mac.
Apple TV / Airplay
If anyone has used the Apple TV in the past, they know that it is a great way to consume media in the living room. As well as your own media, it allows you to access the vast databases from the iTunes Podcasts, Netflix, and even some Sports broadcasts. The greatest strength that the Apple TV has going for it, in regards to setting up your own media system, is Airplay.
Airplay allows you to stream music and videos from your computer or your iOS devices. This is why it is a good idea to convert all of the videos using iFlicks into iTunes so that you always have access to your videos without the need for any wires or plugging anything else into your TV.
iOS Apps
A number of iOS apps are starting to take advantage of Apple’s Airplay technology. Using these apps means that your iOS device works much like a universal remote, controlling all of your media and working also as a way to manage all of your media as well as working like a server as well, broadcasting your media to the Apple TV.
One such app that works great with your Apple TV is Air Video. If you don’t want to go through the hassle of converting your files using iFlicks, Air Video will convert your videos to be streamed over your network (and the internet) on the fly, so that you don’t have to worry about it. With Airplay integration as well, it’s as simple as tapping a button to get the videos from your iOS device to your TV.
EyeTV
The pride and joy of my living room is the fact that I only have a single set top box with my TV, the Apple TV. It is only recently that I am able to do this, thanks to an update to the iOS App you can now stream your cable or satellite straight to your iOS device and then to your TV using Airplay.
EyeTV requires you to purchase hardware however but it is quite worth it in my opinion. I suggest getting the EyeTV HD as it allows you to have a set top box plugged in as well and still be able to change channels. Not only can you stream live Television to your Apple TV this way but it also means that you can have your shows with you on the go. Nothing like watching a little Modern Family on that next train trip you have to take.
These are just a few tips for managing the media on your Mac and there are plenty of other great options. Make sure to note in the comments below about what you do to manage your media, and to all the Windows users out there, don’t worry, I haven’t forgotten about you, your guide is coming soon.
Get the TNW newsletter
Get the most important tech news in your inbox each week.


