One of social media’s biggest obstacles is the amount of time required to do it properly. But it is an obstacle that can be overcome if you put some simple and effective processes in place.
In this tutorial I’m going to walk you through a system that will help you stay on top of the bulk of your social media mentions. The best part? Once set up, you only need five minutes a day to make it work for you.
Step One: Set up a ‘monitoring’ folder
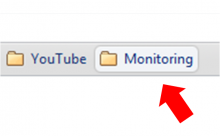
The system I’m going to show you makes the most of the bookmark folders function within all major browsers. Head to your bookmarks bar and create a new folder.
In this example I’ve called it ‘Monitoring’ and this is where I’ll store my tools and pre-set searches (the reason for this will become more apparent later in this post).
Step Two: Gathering your tools
Now that our folder is set up, we can start to pull in the various tools we’ll use for monitoring purposes.
The tools you’ll need include:
- Addictomatic – a multi-platform buzz dashboard
- Social Mention – a slightly more sophisticated multi-platform buzz dashboard
- Samepoint – another dashboard that includes some additional platforms the others don’t offer
- Twazzup – a real-time news dashboard (with a bias towards Twitter)
- BackTweets – a tool which tells you who has been sharing your content on Twitter
- Blogpulse – a tool that searches blog posts for specific mentions
- Google (weekly + in date order) – this will take you to the advanced search box but we’ll make this even more useful during the next phase
You’ll notice that some of these tools overlap – this is intentional to provide the best possible opportunity of capturing the right information without it getting overwhelming.
We’re after relevant data, not data for the sake of it.
Step Three: Tailoring your search parameters
This is where we bring the ‘storage system’ and tools together.
Let’s start with Addictomatic.
- Type your search item into the bar and hit create.
- Make sure you enclose your query in quotes as this will give you the most relevant results.
- Once you get your results back, you want to save this search (in this case I’ve used the bookmarks star) and save the search into the monitoring folder.
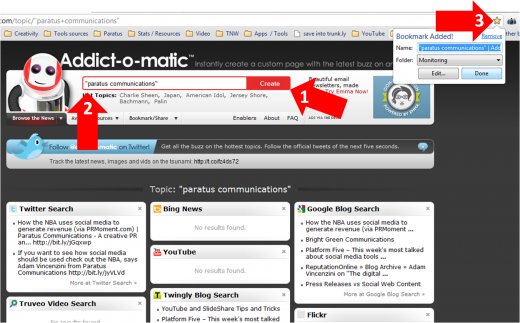
While this might seem a little laborious at first, you only need to do it once. I now have access to that saved search whenever I want at the click of a button.
Addictomatic updates the results as they appear so I’ll always have access to the latest results. Repeat this process with the next tool.
Before we get to the final product which is where the magic happens, let’s set up one more search that will become an invaluable part of your toolkit.
Head over to Google and run your search.
When your results are returned, they’ll automatically come back from ‘any time’ and in order of relevance.
We want to drill this down in more detail by activating two variables.
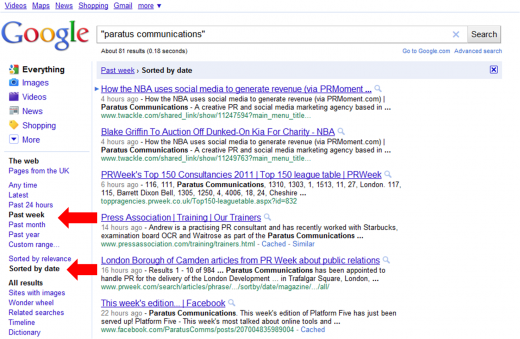
- Go to the left menu bar and click on ‘more search tools’
- Another menu will drop down – select the ‘past week’ option
- Another menu will appear – select ‘sorted by date’
This will give you results like the example to the right.
Note: When you are setting up your BackTweets search, enter the URL you are interested in monitoring as opposed to the brand or keyword.
Step Four: The finished product
Now, if you’ve followed this templated process for each tool, you’ll end up with a folder that looks like this.
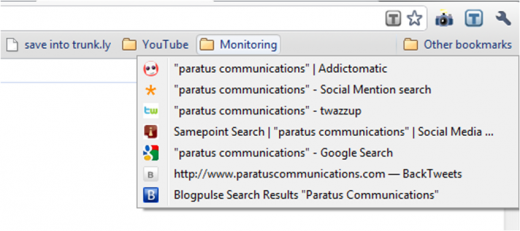
Step Five: Making it work for you every day
By this point you will have set up your folder with all your pre-set searches. This means that you can scan all your searches from the one organised location.
A routine you might want to follow could involve a check of each preset search in the morning, at lunch and then in the evening.
This system will give you a free and easy way of staying on top of your mentions all over the social web.
Get the TNW newsletter
Get the most important tech news in your inbox each week.


