Paulina Thai is a senior graphic design student at the University of Cincinnati, with a special interest in food photography, fashion, hand lettering and brand identity. This post was originally published on the Shutterstock blog and has been reprinted with permission.
Your environment has a huge effect on your mood and performance, and adding personality to a room can be easy (and inexpensive) with DIY crafts. Below, we’ll show you a solvent image-transfer project that can be applied to many materials, such as wood and fabric.
The solvent image-transfer process involves “borrowing” subject matter from printed material, chemically dissolving it and transferring the image onto a new surface. We’ll be applying the image transfer to canvas tote bags and wood cutting boards, but you can take it a step further and try it on different objects of your choice with the same mediums and materials. 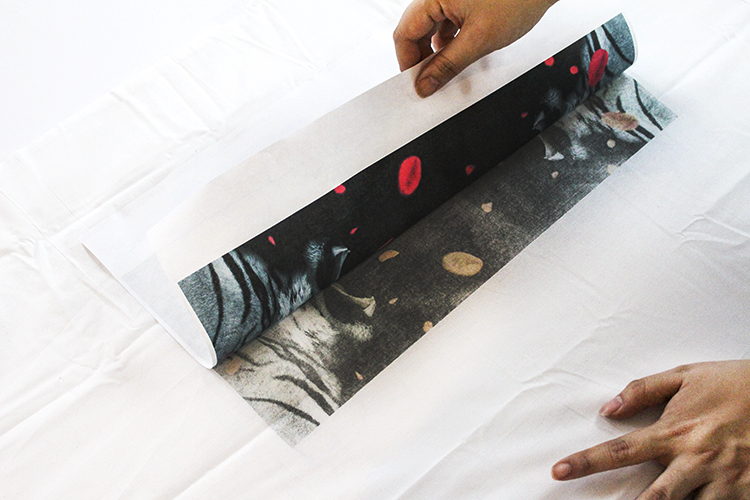
First, think about what imagery or humor you want to use. The possibilities are endless; just think a little outside of the box. You can choose to print anything from quotes to illustrations, or even your own design. Just remember to mirror/reverse everything in your image before you print. I love Beyoncé, so I used some verses from her songs as inspiration for the examples here. After collecting images, I started to create some designs.

The 💜 of EU tech
The latest rumblings from the EU tech scene, a story from our wise ol' founder Boris, and some questionable AI art. It's free, every week, in your inbox. Sign up now!
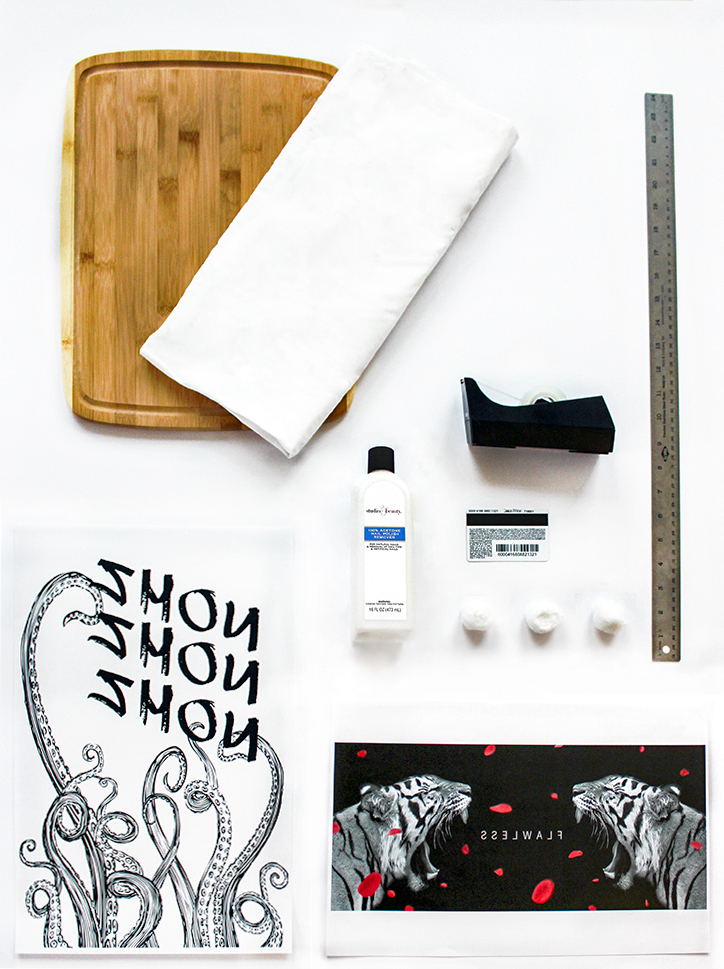
What you will need:
100 percent acetone (nail-polish remover)
Cotton
A credit card or other plastic card
Wood/cotton fabric
Tape
Ruler
A mirrored print
Step 1
Print out a mirrored/reverse version of your image at the desired size. It helps if your image is darker and more saturated, so the ink transfers more successfully. You must use a laser printer, which is important because of the toner-based ink. Inkjet printer ink may bleed too much.
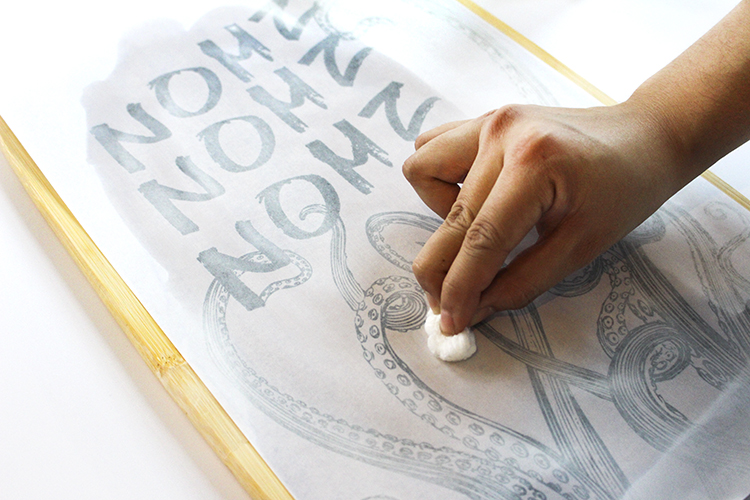
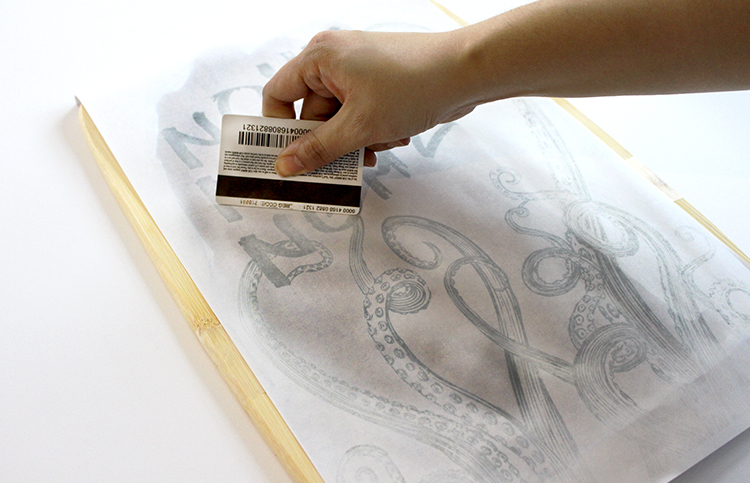
When you’re ready to begin the transfer, be sure to work in a well-ventilated area. Lay your print image side down on the fabric or wood surface you’ve chosen. Tape a side down, if needed, to keep it in place so it doesn’t shift during the process. Use a cotton ball or brush and saturate the backside of the print with acetone.
Step 2
With the card, rub back and forth over the backside of the print. Use even pressure and be careful — too much pressure may rip your print. The ink transfers better when the area you’re burnishing is saturated with acetone, so you may need to re-saturate if the acetone starts to dry out. Making sure it’s saturated while immediately burnishing the print is important, because it will create a crisper transfer. If you need to work in smaller sections, it may also help if the print is big. Try practicing on some paper, scrap fabric or wood to get the hang of it first.
Step 3
Carefully peel back a bit to check on the transfer, and to see if you need to burnish more. If it’s to your satisfaction, peel away the entire printed paper to reveal your transferred image.

Step 4
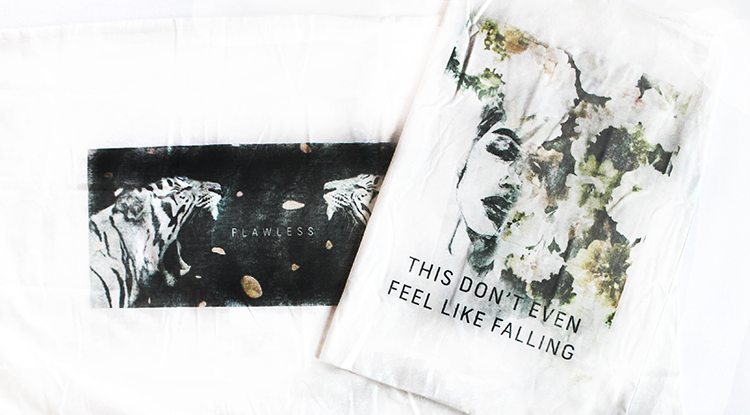
If you’re transferring onto fabric, toss the fabric with the transferred image into the dryer for 10 to 15 minutes once it’s done. The heat will allow the ink settle into the fabric.
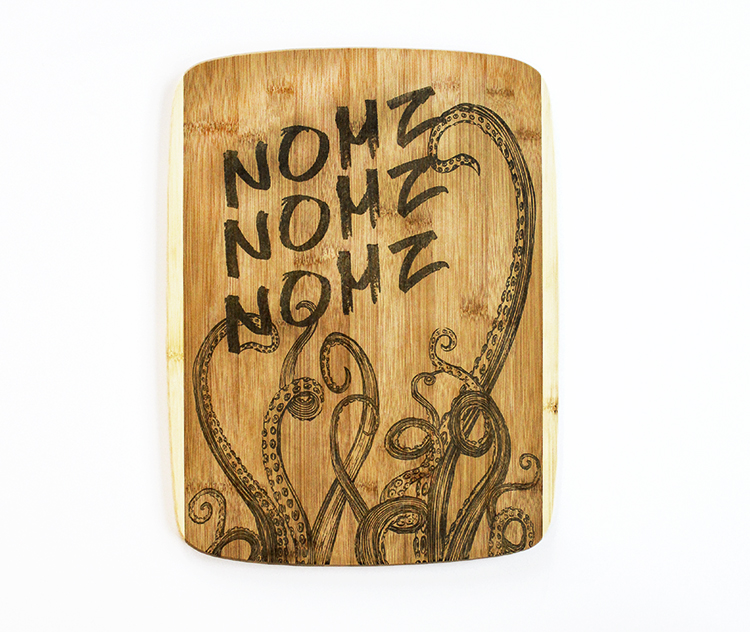
If you’re transferring onto wood, seal it with a clear coat spray. Make sure the spray you use is safe for surfaces you plan to use for anything edible.
Get the TNW newsletter
Get the most important tech news in your inbox each week.