As you frame your shot in the camera viewfinder—or the LCD screen of your point and shoot or smartphone—you are instinctively capturing the most intriguing part of a scene. Later, when you pull that image into a photo editor to tweak the composition, switch the orientation, or shift the visual emphasis, you are cropping.
While image editors like Photoshop, Aperture, Lightroom, and others are famous for their sophisticated slate of controls that are capable of transforming the entire look of your images, the crop tool remains one of the most effective ways of enhancing your photos. A poor crop, or no crop at all, can destroy a picture. A good crop accentuates and flatters the subject.
Why crop a photo after you’ve worked carefully to compose it? You may want to correct a focusing mistake, excise extraneous detail, alter the original emphasis, account for something you did not see as you shot the original frame, or maybe you changed your mind about how to present the scene. Consider too, that the photo you’re cropping may have been shot by someone else, as you adapt it to your own needs.
Cropping need not be a radical change; it might simply remove unwanted details from the edges of the frame. An overly broad or busy scene can be distracting and frustrating—the viewer doesn’t know where to look at first.
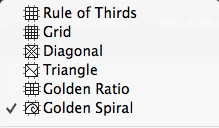
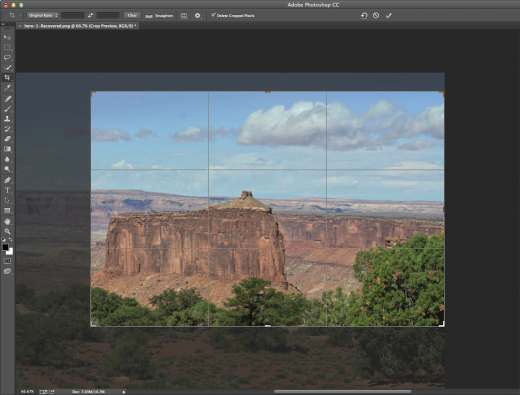
Cropping is almost its own art form, with a distinct methodology. Here are some guidelines you can use to analyze and experiment with your photos. These help to impart a natural look that expresses your unique vision. While the screen shots below are in Photoshop CC—because it offers a variety of popular crop guides—you can use any photo package to crop an image. Eventually, practicing these techniques behind the lens will train your eye so well that you’ll wind up doing less cropping over time.
Rule of Thirds
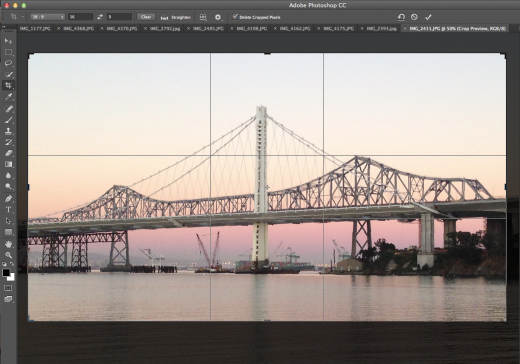
This classic crop is the most common and easy to visualize in real time—some cameras, and many image editors, have a Rule of Thirds guide built-in. Picture an evenly spaced nine-square grid overlay with three rows and columns of boxes in a checkerboard, and then align the image’s main points of emphasis with any of the intersecting lines. Positioning critical photographic elements at the left, right, top, or bottom of the grid—instead of smack in the middle of the frame—naturally adds visual interest to the composition.
Diagonal
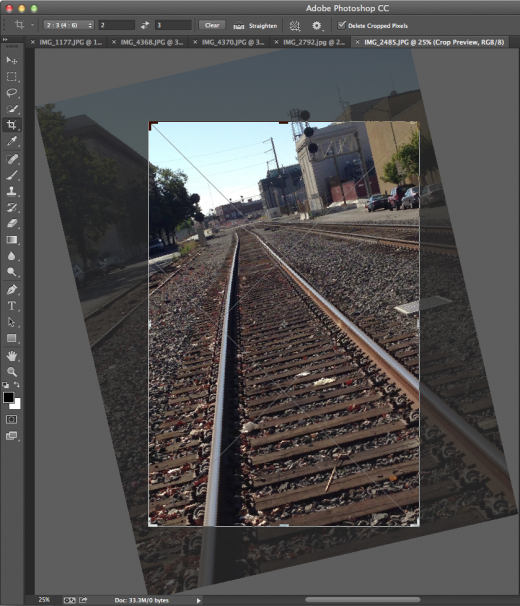
Diagonal compositions add a sense of motion and energy to your image. Cropping with a diagonal guide helps align major elements of the shot to make it look more dramatic.
Triangle
The Triangle crop offers another way to highlight the most important part of the image. In this composition, the subject is located within one of the triangles.
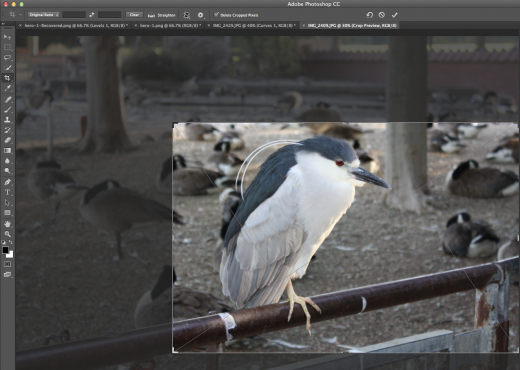
Golden Ratio
Sometimes the Rule of Thirds and the Golden Ratio (also known as the Divine Proportion or Phi) are confusing because they look so similar—both are rectangular grids. The difference is that the Golden Ratio is 1:1.618 (as opposed to 1:1), a pattern long recognized as attractive to the eye, and used in art and design for centuries. Placement of the subject follows roughly the same principles as the Rule of Thirds with dominant detail intersecting with the grid.
Golden Spiral
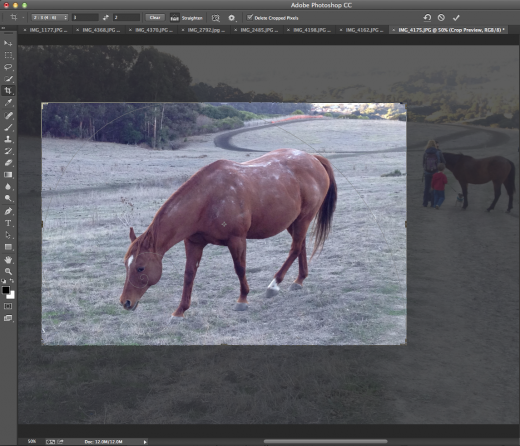
The Golden Spiral is a mathematical construct that pinpoints the important part of an image. The overlay guide lets you see where elements in the picture are located within the spiral.
Cropping tips
No matter what app you use to crop images—from a pro-level Photoshop to consumer-level iPhoto—always save an original version of your photo and work on the copy.
Try on different standard crops (and various aspect ratios) first such as 5 x 7, 8 x 10, or 16 x 9, just to see what you get. Auto crop features in various image editing programs will give you alternate perspectives that can fire up your imagination and artistic instincts.
Experiment with rotating your image as you crop. You may wind up with a much more dynamic composition.
A tight crop, one in which the subject occupies the vast portion of the frame, can actually sacrifice important parts of an image in service of a high concept. But it can be especially effective for cropping small images.
As you zero in for your crop, take into account the original size of your image, how large you want your resulting image to be, and crop appropriately. Don’t crop too tightly. Keep in mind that removing parts of the image cuts the pixel count, so if you intend to print your image, make sure not to wield too heavy a scalpel.
Cropping is always a less-is-more proposition and these guides can assist in achieving compelling compositions. But the end, it’s your vision that counts.
Image credit: Shutterstock
Get the TNW newsletter
Get the most important tech news in your inbox each week.


