
Discord is a instant messaging and digital distribution platform designed for creating communities. With over 100 million users, the service allows you to communicate with voice calls, video calls, text messaging, media and files in private chats, or ,as part of communities called “servers”. With this extensive API, Discord allows developers to build bots that perform repetitive, mundane, or even fun tasks. With a Discord bot, users can moderating and send messages to communities, as well as send private messages to users.
In this tutorial, we will build a simple bot that sends random dad jokes to a community at a users request. Using Node.js and discord.js module, we can create, develop, and deploy this Discord bot in less than 60 minutes.
Before we begin…
We’ve listed all the things you need to set up before getting started with the tutorial:
- Install Node.js onto your machine.
- Create an account on Discord. You can either download the desktop app or access it using your browser.
- Create a new community (or a new “server” in Discord language) to test the app.
Once you are set up, you can begin the tutorial!
One last thing, you can find the code for the project on GitHub.
Creating a new Discord bot
In this first step, you should create and configure a new bot on Discord. Here’s how you can do it:
Log in to your Discord account and go to the application page on its developer portal.

Click on “New Application.” , this will generate a popup requesting the new bot’s name.
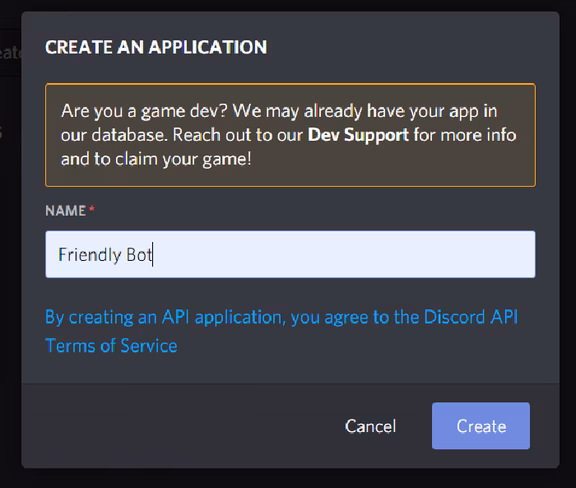
After adding the name, click on the create button, and you’ll be navigated to a new page with application information. From here, go to the “Bot” tab and click “Add Bot” to add the bot to the application. Again, confirm the action in the pop-up.
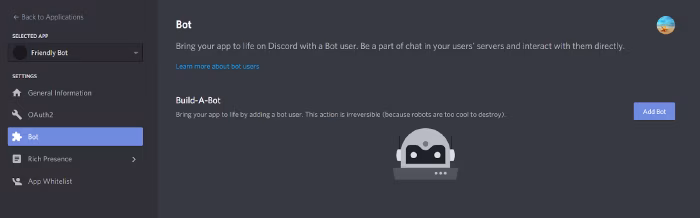
This adds the new bot to Discord. Now, we can start configuring it.
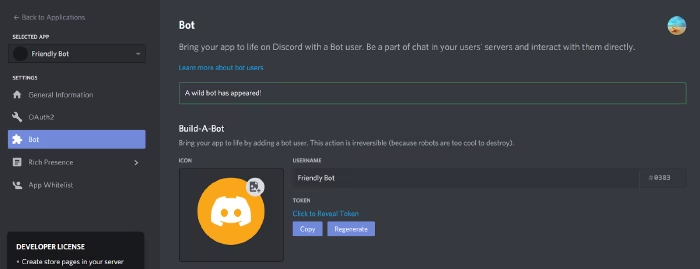
Now, we must copy the bot token and store it somewhere private. Remember: this token is for your eyes only; never share it with anyone else.
Keep the default selections under the “Authorization Flow” section.
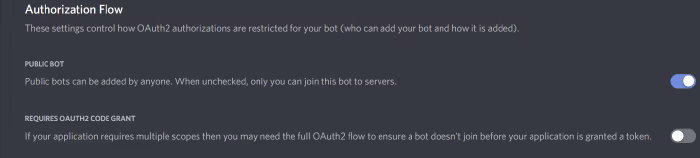
Next, you should turn on the“Server Members Intent” option under the “Privileged Gateway Intents.” Our bot needs permission for this intent to detect when a new member joins the server.

Adding the bot to a Discord server
We should generate an invite link that reflects the level of permissions the bot should have to add it to a Discord server. To do this, go to the “OAuth2” tab on the same page and select “bot” as the application’s scope. Then, choose the set of permissions the bot should have when interacting with the server. Our bot only needs permission to read and send messages in server channels.
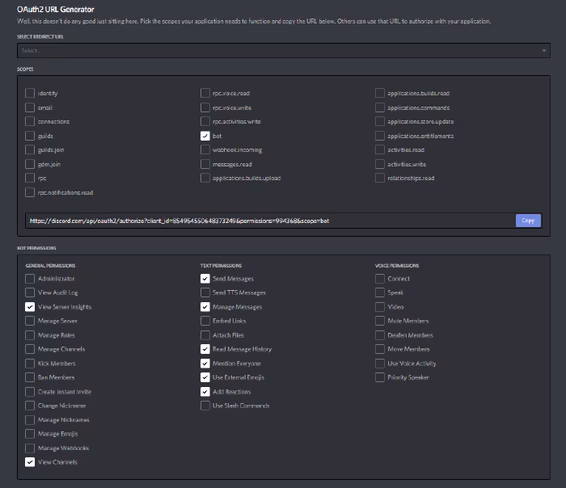
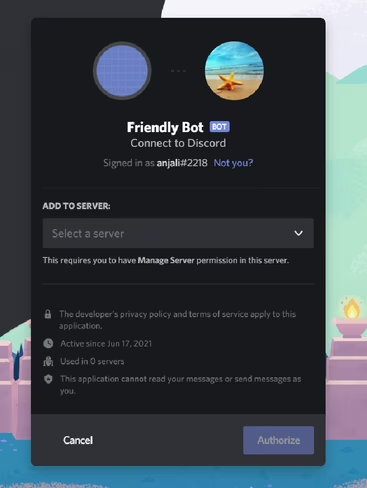
After selecting all the necessary permissions, copy the URL generated under the scope section and open it in a new browser tab. Then, choose the server that the bot should join and authorize the action when prompted.
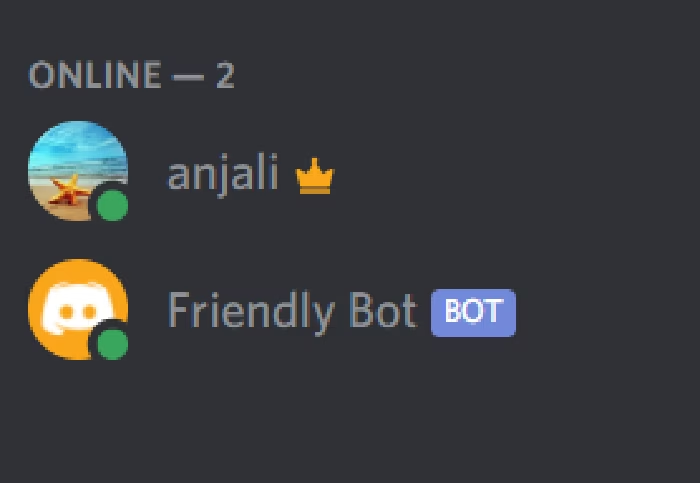
Now, if you go to the Discord server, you’ll be able to see the new bot listed on the right side panel.
Implementing the bot’s behavior
We can now start adding code to define how the bot should behave inside the server. As we mentioned at the beginning, we will use Node.js and discord.js to do this.
As the first step of implementation, set up a new Node.js project and initialize it with npm. Then, we should install discord.js, axios, and dotenv modules using npm.
npm install discord.js axios dotenv
Next, we create a .env file and add the token we previously copied as an environment variable.
//.env

TOKEN=<your token>
Log in and start listening to events
Now we can import discord.js and set up the bot to listen to server events and respond accordingly. Create a new file named index.js and add the following code to it.
//index.js

require("dotenv").config();
const Discord = require("discord.js");
const client = new Discord.Client();

//Listen to the event that signals the bot is ready to start working
client.on("ready", () => {
  console.log(`logged in as ${client.user.tag}`);
});

//Listen to new messages on the server
client.on("message", async (message) => {
  if (message.content === "ping") {
    message.reply("pong");
  }
});

//Login to the server using bot token
client.login(process.env.TOKEN);
There are a few important things happening in this code. First, we import the discord.js module and create a new Client object, which represents the Discord bot in this scenario. The client.login method then allows the bot to log in to Discord using the token we added to the .env file. The dotenv module takes care of adding it as an environment variable to the process.
Our bot listens to two Discord events: ready and message. The ready event is triggered when the bot is ready to be used. And the message event is triggered every time a user sends a message to a channel. Here, we set up the bot to reply to every message that sends “ping” with a “pong.”
When we run this Node script using the node index command, the bot, which has stayed offline so far, goes online and starts working.
You can send a ping message to a channel and test if it’s working correctly.

Reply to a user with a random Dad joke
Finally, we’ve come to the fun part of the project. Here, we will set our bot to reply to any user who directly mentions it with a random dad joke. For this, we are using this API: icanhazdadjoke.com. It has a great collection of funny (and awkward) dad jokes we can retrieve for free.
The basic logic of this implementation goes like this. When a user mentions our bot, it sends a request to the dad joke API using axios and retrieves a random dad joke. Then it replies to the user with the joke. Quite simple.
One thing to note here is that we need to set up the Accept Headers of the GET request to application/json to retrieve the results from the API in JSON format.
require("dotenv").config();
const axios = require("axios");
const Discord = require("discord.js");
const client = new Discord.Client();

const dadJokeURL = "https://icanhazdadjoke.com";
const headers = { "Accept": "application/json" };

async function getRandomDadJoke() {
  const response = await axios.get(dadJokeURL, { headers: headers });
  return response.data;
}

//Listen to the event that signals bot is ready to start working
client.on("ready", () => {
  console.log(`logged in as ${client.user.tag}`);
});

//Listen to new messages on the server
client.on("message", async (message) => {
    //"Ignore the message if the bot authored it"
    if (message.author.bot) return;

    //If the doesn't specifically mention the bot, return
    if (text.includes("@here") || text.includes("@everyone")) return;

    //Return if the message doesn't mention the bot
    if (!message.mentions.has(client.user.id)) return;

    try {
        //Reply with a random joke
        const result = await getRandomDadJoke();
        message.reply(result.joke);
    }
    catch (error) {
      message.reply("Sorry, an error occured");
    }
});

//Login to the server using bot token
client.login(process.env.TOKEN);
The getRandomDadJoke method sends the axios request and returns the retrieved data with the random joke. In the message handler, the bot listens to the message events and determines which messages it should reply to. It eliminates three types of messages.
- Messages authored by the bot itself.
- Messages that mention everyone on the server, not just the bot.
- Messages that don’t mention the bot.
If a user directly mentions the bot, it replies with a random joke retrieved using the getRandomDadJoke method.
You can stop and start the Node script to get the modified bot running on the server.

Search for a Dad joke with a user-provided search term
This implementation is not too different from the last one. But here, users can submit a search term to get a dad joke on a specific topic.
To do this, we must add a new function called searchDadJokes which sends the request to the /search API endpoint with the search term as a query parameter. We also set the limit=1 to retrieve only one joke on a given subject.
async function searchDadJokes(term) {
    const params = { term: term, limit: 1 }
    const response = await axios.get(`${dadJokeURL}/search`, { params: params, headers: headers });
    return response.data.results[0];
}
Then, we have to modify the message event handler to consider the case the user submits a search term. Here’s how we do it.
//Listen to new messages on the server
client.on("message", async (message) => {

    //"Ignore the message if the bot authored it"
    if (message.author.bot) return;

    const text = message.content.toLowerCase();

    //If the doesn't specifically mention, bot return
    if (text.includes("@here") || text.includes("@everyone")) return;

    //Return if the message doesn't mention the bot
    if (!message.mentions.has(client.user.id)) return;

    let result;
    try {
        const term = text.replace(/<@!d+>/, "").trim();

        //If there is a search term
        if (term !== "") {
            //Search a joke containing the term
            result = await searchDadJokes(term);
            if (!result) {
                message.reply(`Sorry, got no dad jokes about ${term}. But how about a random dad joke?`);
            }
        }

        //Reply with a random joke
        if (!result) {
            result = await getRandomDadJoke();
        }

        message.reply(result.joke);
    }
    catch (error) {
        message.reply("Sorry, an error occured")
    }
});
To check if a user has submitted a search term, we need to remove the bot’s ID from the text. It’s added to the text when the user mentions the bot. A mentioned ID appears in the text in the following format.
<@!1223344342859688930>
We can detect IDs in text using the regex pattern <@!d+> and replace it with an empty string. After trimming the modified text, the bot can retrieve the search term that was submitted. Then, the bot uses the searchDadJokes method to find a relevant joke.
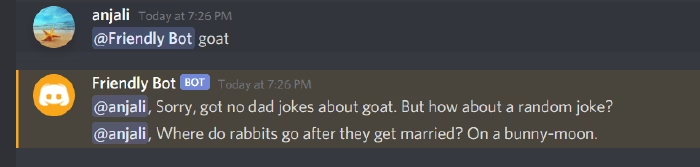
If the API database doesn’t have a joke on a particular topic, the bot replies to the user explaining the situation along with a random joke. If the user doesn’t submit a search term, it responds with a random joke by default.
The rest of the code stays similar to the last scenario. So, we can now run and test this new feature of our bot.
When there’s is a joke related to the search term:

When there’s no joke on the submitted term:
Welcome new members
We can set up our bot to welcome every new user who joins the Discord server. When the bot detects a new “guildMemberAdd” event, which signals a new user has joined, it sends a message to the “general” channel welcoming the new user.
//Listen to new member joining event
client.on("guildMemberAdd", member => {
//Find the general channel in the user's channel list to send the welcome message
const channel = member.guild.channels.cache.find(ch => ch.name === "general");

    //If the channel is not in the server, exit
    if (!channel) return;

    channel.send(`Welcome, ${member}! I'm at your service if you want to hear dad jokes`);
});
Here’s how this feature works on the server when a new user joins:

With that, we have completed the development of our Discord bot. You can now add the bot to any server where you have “Manage Server” permission and have fun reading random dad jokes.
Deploying the bot to Heroku
Running the bot locally on your machine is not ideal if you want to keep it working 24/7. So, to make it continuously available, we will deploy the bot to the Heroku cloud.
First, we should create a Procfile in our project folder specifying the commands that Heroku should execute at the application start. We add a new worker process with npm node index.js as starting command to the Procfile.
//Procfile

worker: node index.js
Next, we need to initialize the project as a git repository and push it to GitHub. We can connect the GitHub repo to Heroku which will deploy the bot. We recommend adding the node_modules folder and .env file to a .gitignore file before pushing the project to GitHub.
Once you log in to Heroku (create an account if you don’t have one), you’ll be redirected to the Heroku dashboard. Here you can create a new application by clicking on the “New” button.

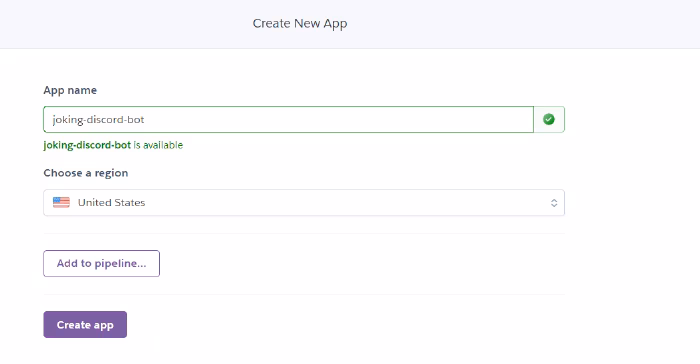
Choose the “Create new app” option, give your application a name, and confirm the app creation.
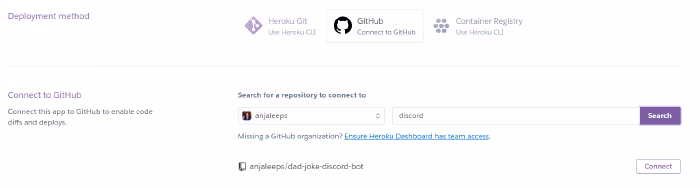
The new application will be listed on your Heroku dashboard. Select the application and go to the deploy tab, where you’ll find the option to connect your GitHub account. After connecting the account, search for the app repository and click on “Connect.”
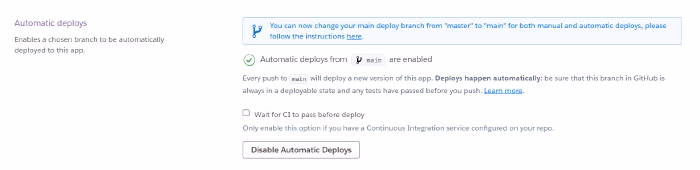
Heroku will now automatically deploy your app via the GitHub repository. You can enable automatic deployment to deploy the repo every time you push new changes.
Next, go to the Settings tab and add the bot token to the “config vars” section. This adds the token to the env variables of the process. If you want, you can remove the dotenv configuration in the initial application code.

We have to make one more change to complete the deployment. For this, go to the Resources tab of the application. Currently, the “web” option is turned on in the free dynos section while the “worker” is turned off. Instead, you should turn on “worker” and turn off “web” to prevent the app from crashing due to a 60-second timeout error.

With that, the app deployment is complete. Now, our Discord bot can run 24/7 on a server and provide an endless supply of dad jokes.
Summary
Discord API is a powerful tool that allows developers to build various applications for Discord, including bots. The Node-based discord.js package makes it even easier for us to take advantage of this tool.
Today, we created a simple bot that could do several automated tasks, including messaging channels, welcoming new members, and retrieving content from a remote API. It’s a fun experience anyone can try that would prepare you for building more serious, complex bots. I hope you’ll enjoy experimenting with the Discord API with what we learned today.
This article was originally published on Live Code Stream by Anjalee Sudasinghe.
Get the TNW newsletter
Get the most important tech news in your inbox each week.