
Welcome to TNW Basics, a collection of tips, guides, and advice on how to easily get the most out of your gadgets, apps, and other stuff.
“How can I boost my productivity and procrastinate less?” This is a question I’ve asked myself countless times.
Shall I ignore my emails, try and get through them as quickly as possible, or set aside some time every week to clear my Inbox?
Then, one day, as I was trawling through Twitter I saw Intercom co-founder Des Traynor’s tweet — and well, it struck a chord.
Thinking about productivity and its tools
* Your email is what *others* think you should work on.
* Your Todo list is what *you* think you should work on.
* Your calendar is (usually) what you *actually* work on.How much do they overlap in your world? pic.twitter.com/sLyKGagsKP
— Des Traynor (@destraynor) June 26, 2019
It then dawned on me that productivity is ultimately about control, figuring out a way to prioritize one task over another, and doing so efficiently.
Understandably, I started thinking about how I could — once and for all — take control over my overflowing Inbox without exhausting myself. The answer? Canned responses.
[Read: 4 ridiculously easy ways you can be more eco-friendly]
For those of you unfamiliar with canned responses, they’re templates to send quick replies to similar queries you get repeatedly. They’re a great resource for journalists like myself, who get the same questions again and again.
So, if you find yourself using the same response time after time, it’s probably best to set up a canned response for quicker email replies.
If you’re a Gmail user, keep reading — and I promise you’ll never have to type the same answer ever again.
Step 1: Enable email canned responses
To enable canned responses, you’ll need to follow these easy steps:
- First, head to your Gmail Settings on desktop and click on the gear icon.
- Click on the ‘See all settings‘ option in the menu.
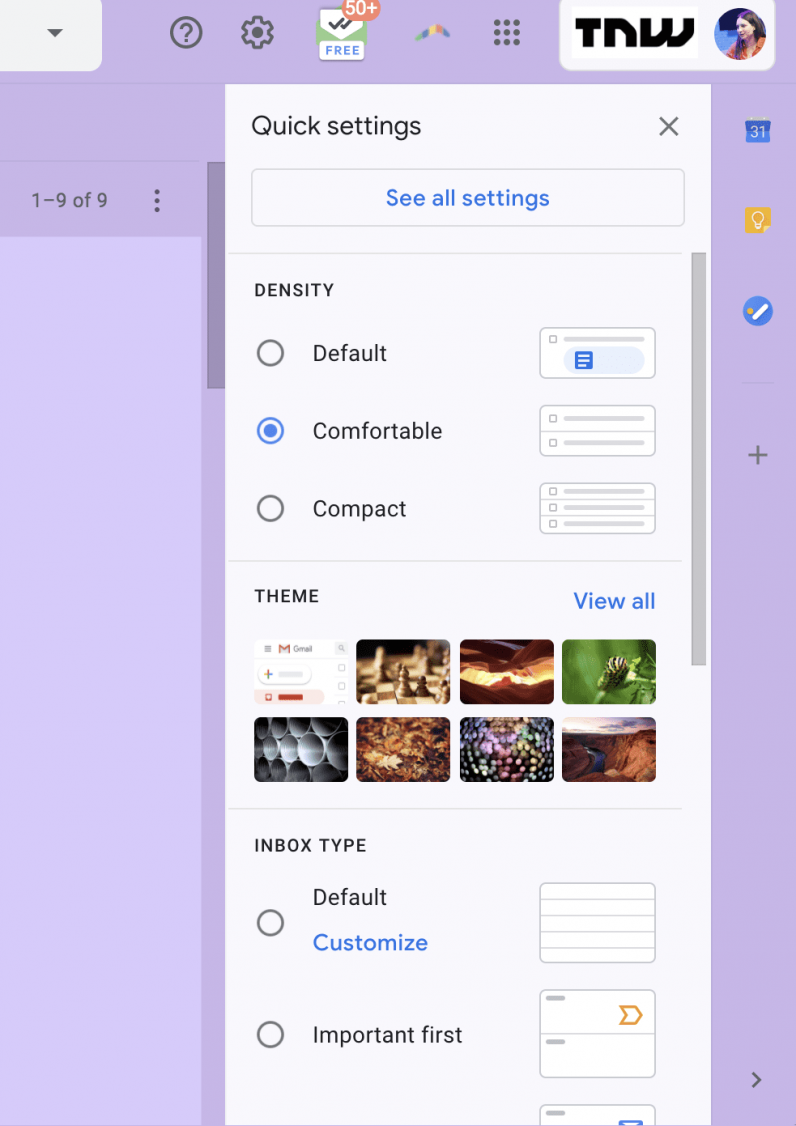
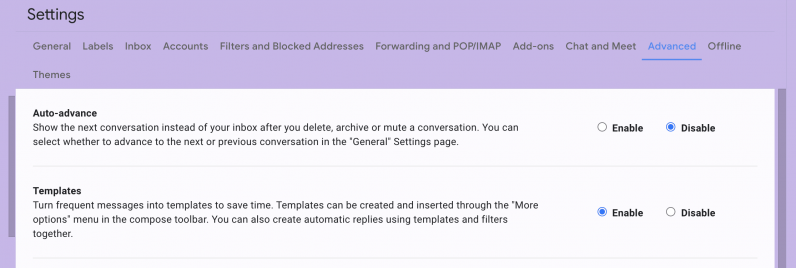
- Once you’ve done that, select the ‘Advanced‘ tab.
- Then, scroll down to ‘Templates,’ click ‘enable,” and then ‘Save Changes.’
Step 2: Composing a response
- After you’ve done this, start a new email by clicking on ‘Compose’ on the upper-left-hand corner of your Inbox, as you normally would.
- Write an email message that would you like to save as a template. For example: ‘Thanks for your email. Unfortunately, I no longer deal with these requests so please contact X. ‘
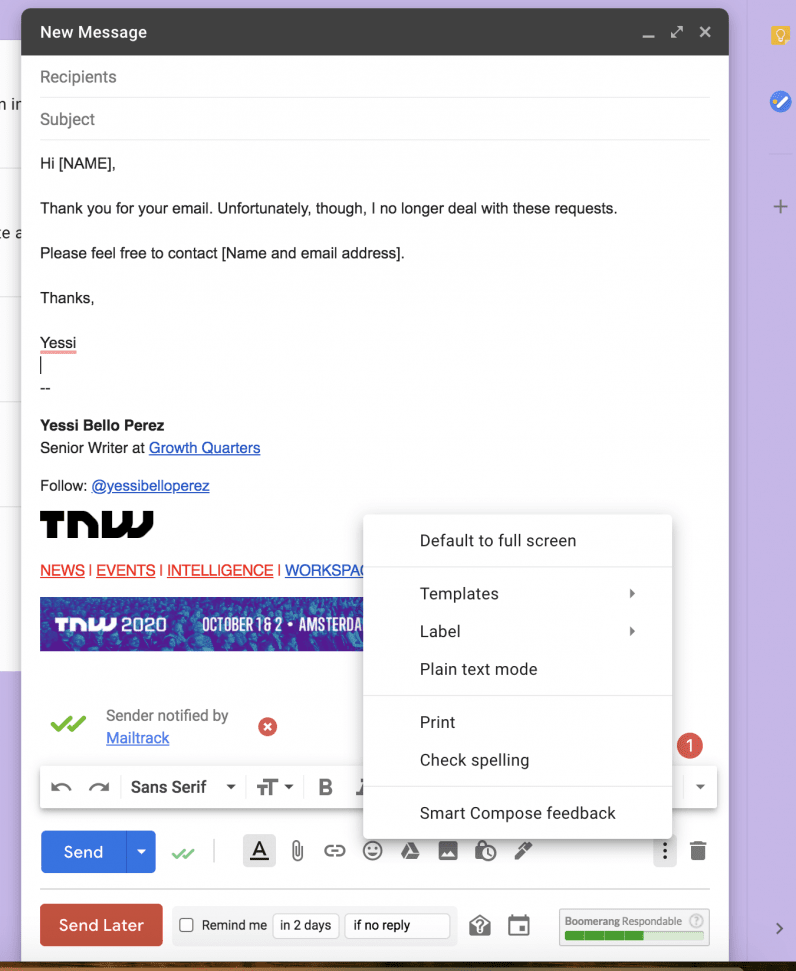
- Then, click on the three dots icon in the bottom right-hand corner of the compose window.
- Hover over ‘Template,’ and ‘Save draft as template,’ and click ‘Save as new template.’
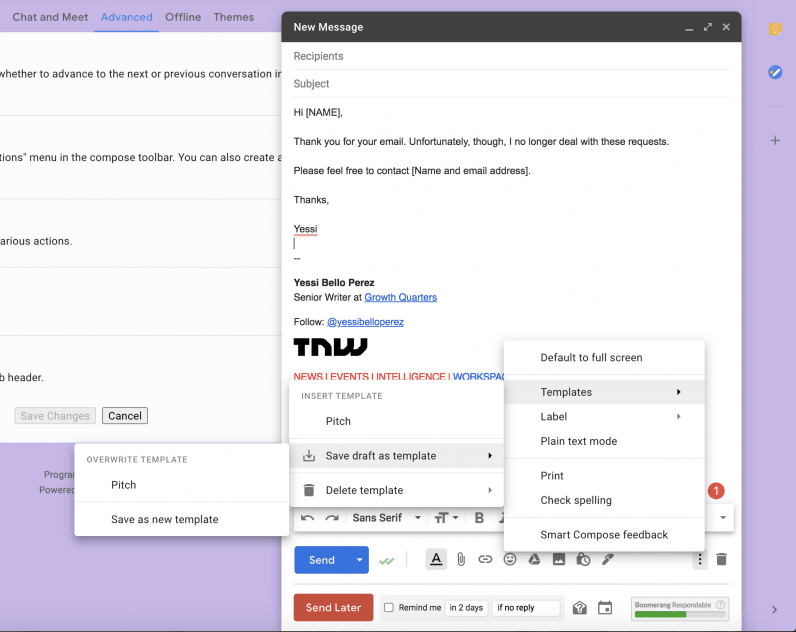
- You’ll then have to name your template — make sure to keep it relevant. Otherwise, things will get confusing once you’ve set up and saved more canned responses.
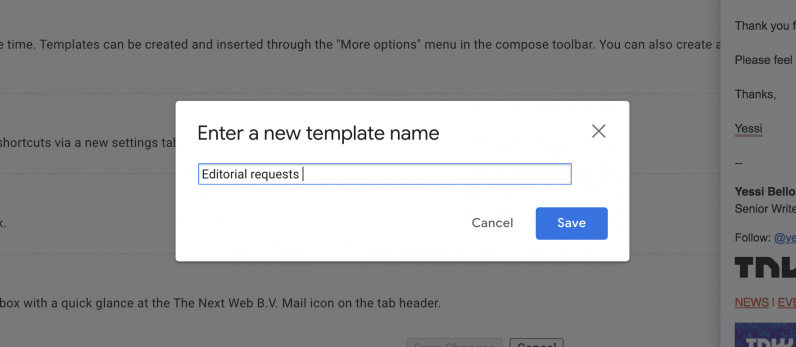
Step 3: Sending a canned response
- When you get a query next time, hit reply.
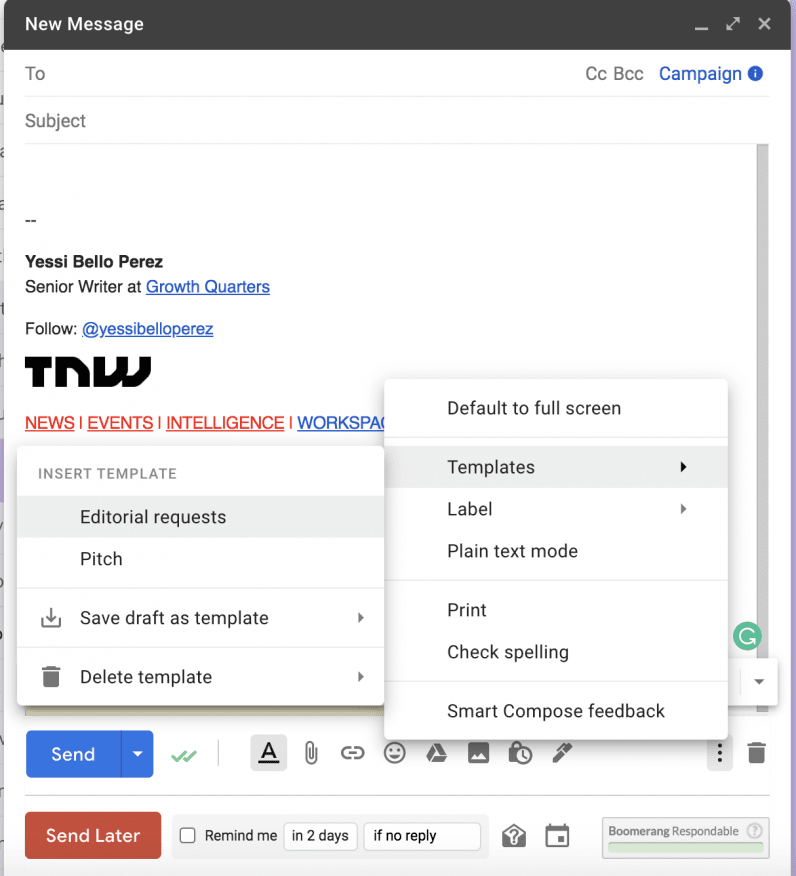
- Once the email response window pops up, click on the three dots icon at the bottom right-hand corner.
- Hover over ‘Templates’ and then click on the template name.
- Once you’ve done this, the template you created should automatically be pasted in the body of the email.
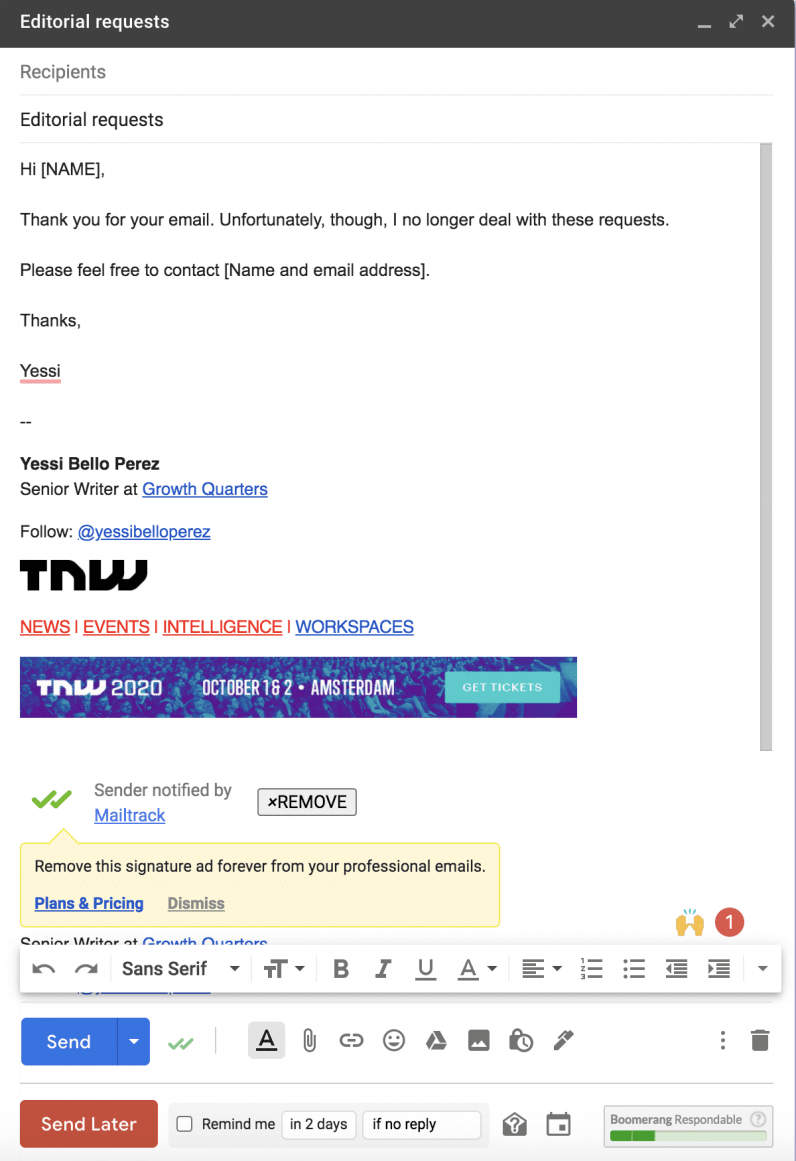
- Make necessary changes to the template and hit ‘Send.’
If canned responses don’t help you become more productive at work, I don’t know what will — and while you’re at it, you can check out our handy guide to achieve InboxZero with some Gmail search queries.
Good luck!
Our annual event is coming up, don’t miss the chance to grab free tickets for TNW2020.
Get the TNW newsletter
Get the most important tech news in your inbox each week.


