Welcome to TNW Basics, a collection of tips, guides, and advice on how to easily get the most out of your gadgets, apps, and other stuff.
Microsoft today announced a new feature for Word: a transcription tool that allows you to get spoken words into your document without you having to type all of them. We’ll show you how to use it.
The new tool works with recorded audio and live speaking, and can detect different speakers. It’ll also allow you to pull quotes from the transcription and insert them as you please into the document. As a former intern whose job was to transcribe hours of interviews, I’ve been waiting years for this moment.
At the moment, the Transcribe tool is only available on the online version of Word, and only to Microsoft 365 subscribers. There are plans to bring it to Word mobile at some point in the future. It also only supports English, but that’s also likely to change.
So how do you actually use the Transcribe tool? Here’s how.
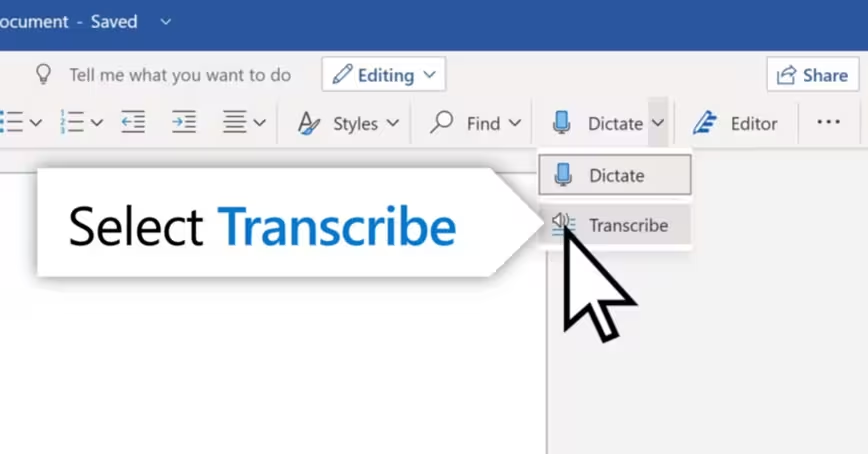
First, you’ll have to go to the online version of Word, which you can access from the Office site. Then open up either a new document or the one you wish to add a transcription to. You’ll see a microphone option in the tool ribbon at the top of the screen, with the word “Dictate” under it. Click the arrow next to it, and the “Transcribe” option should appear in the drop-down menu.
![]()
Once you click “Transcribe,” you’ll be given the option to either upload audio to be transcribed, or to record audio live. The upload feature accepts .wav, .mp4, .mp3, and .m4a files. Keep in mind that if you use the upload feature, you can only upload five hours of recordings per month. There is no time limit on live audio. To demonstrate, I recorded myself doing a Shakespearean soliloquy, just because I wanted to see how accurate the transcription was.
![]()
Once you’ve got the audio, either recorded or uploaded, it’ll appear in a window to the side of the main document. It’ll be broken down in to different sections, with different speakers denoted accordingly. To add a quote from an individual section, click the + icon next to the section and the whole thing will be added to the document.
Note that it managed to get the entire monologue more or less correct, with some wonky capitalization and punctuation. To edit each section, click the pencil icon next to it. You can correct punctuation, or individual words the transcription may have missed. I don’t know whether the transcription software was trained on Shakespeare or not, but I was impressed it managed to get “Lupercal” correct.
![]()
If you wish to add the whole recording to your document, click the button at the bottom of the window. You can also start a new transcription, but keep in mind that it’ll erase the one you currently have. There’s a limit of only one transcription per document. You’ll be encouraged to open a new document for transcription if you’ve got more than one recording.
And that’s it! Now you can get your recordings transcribed within Microsoft Word — provided you’re a 365 subscriber, of course. Good luck!
Get the TNW newsletter
Get the most important tech news in your inbox each week.