Welcome to TNW Basics, a collection of tips, guides, and advice on how to easily get the most out of your gadgets, apps, and other stuff.
Shortcuts for iOS is a useful app for automating actions on your iPhone or iPad. In this series, we’ve been looking at a variety of workflows to make your Apple device a lot more powerful to accomplish specific tasks.
With the upcoming iOS 13 update, Shortcuts is all set to get even better, allowing you to automatically trigger workflows at a specific time and location.
Today, we’ll take a look at a simple automation that tells you the size of any file passed to it. iOS, by default, doesn’t have a native option to find out the size of a file.

The 💜 of EU tech
The latest rumblings from the EU tech scene, a story from our wise ol' founder Boris, and some questionable AI art. It's free, every week, in your inbox. Sign up now!
One alternative is to upload your images and videos to a cloud service like Google Drive, Dropbox, or OneDrive. Another option is to use Apple’s built-in Files app, which uploads the files to iCloud. But Shorcuts makes it dead simple to get this information with a few steps. Here’s how to do it:
Step #1: Download the Shortcuts app from the App Store, if you haven’t done so already. (Note: It comes pre-installed on your device if you’re already running iOS 13 developer or public beta.)
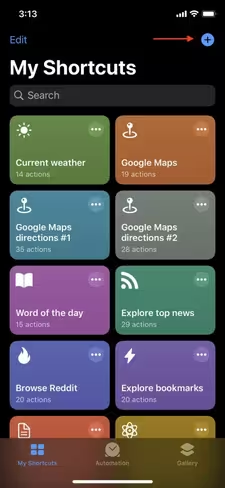
Step #2: Open the app, and in the “My Shortcuts” tab, hit “+” on top to create a new shortcut.
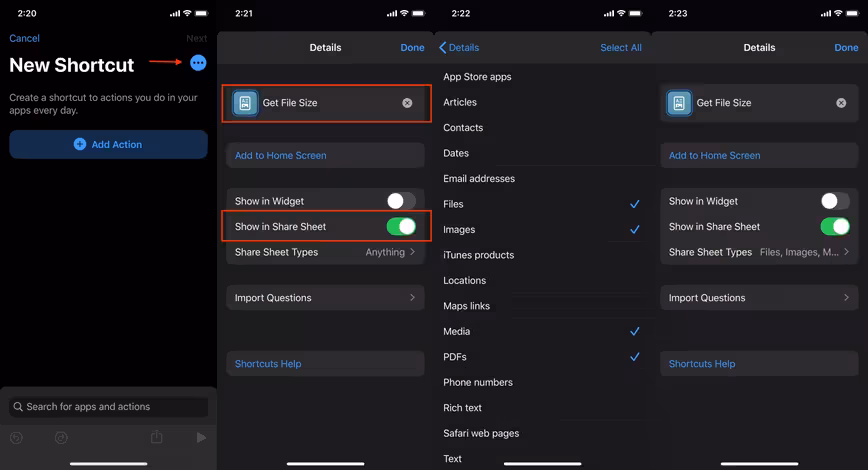
Step #3: Tap the “Settings” icon on top right, and give the shortcut a name, for example, “Get File Size.” You can also tap the “Icon” to change it to something that matches your shortcut’s function better.
As a quick primer, Shortcuts can be triggered in two different ways: they can be run either from within the app as a standalone workflow, or can be initiated from the Share Sheet menu.
To do this, turn on the option “Show in Share Sheet.” You can even fine-tune the shortcut by specifying the kinds of inputs it should run on.
In order to select the relevant input file options, tap “Share Sheet Types.” In this case, for example, it makes sense to run the shortcut when the input is a multimedia file (photo or video), or other kinds of files like PDFs.
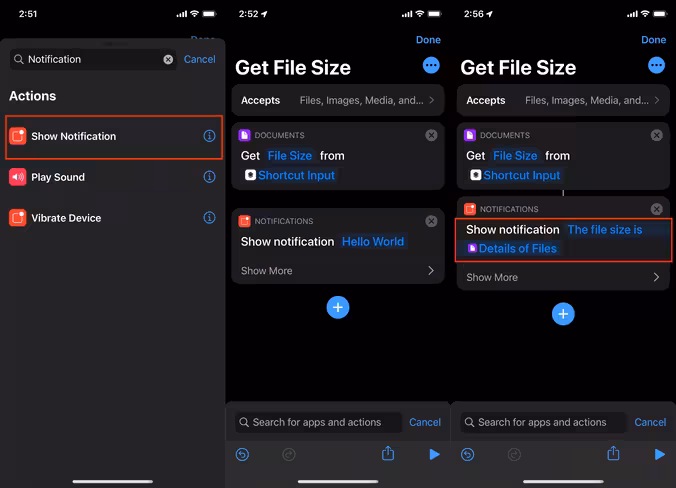
Step #4: Next, add a “Get Details of Files” action. This does exactly what it says — get different details associated with a file, such as name, extension, creation date, last modified date, and size.
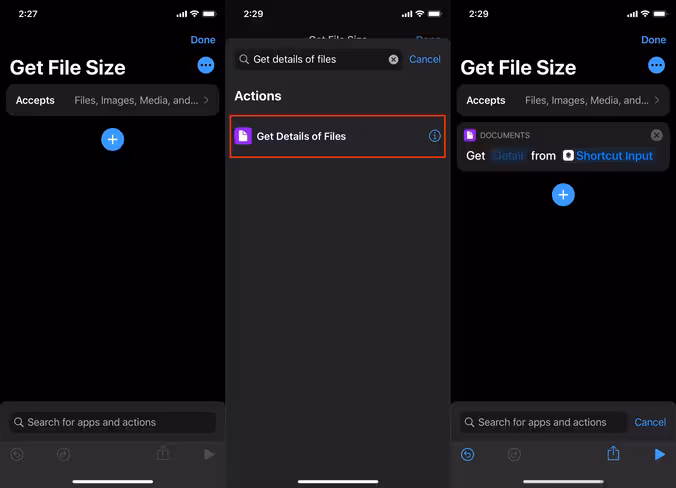
Step #5: Now, tap the “Detail” field and select “File Size” as the option. This will return the size of the file passed as input.

Step #6: A convenient way to show the file size is to send a notification. You can do this by adding a “Show Notification” action and linking it to the output of the previous step. You can further customize the notification message so it’s more easy to understand.
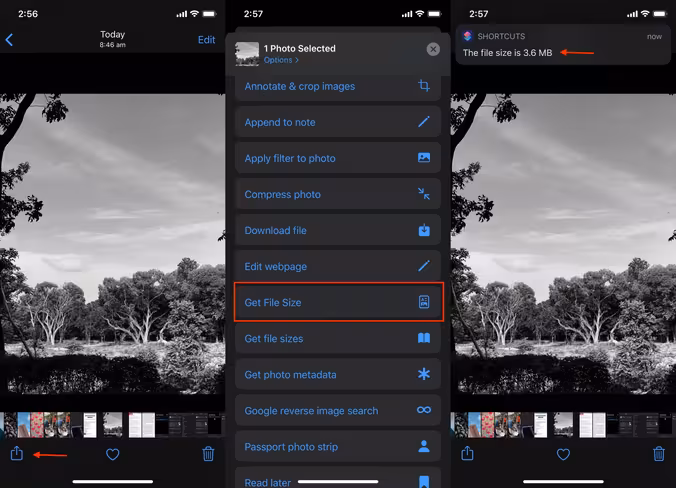
Step #7: That’s it! You’re done. To run the shortcut, all you have to do is select a photo or some other file, the size of which you want to determine.
Then, tap the “Share” icon, and select “Get File Size,” the name of the shortcut set in step #3. Once the shortcut completes running, you’ll receive a notification with the message containing the size of the file.
We’ve already covered how to create a simple RSS feed reader, share your Wi-Fi password as a QR code, remove metadata from photos, and download free themed wallpapers from Unsplash. But, this is just the start of what you can accomplish with Shortcuts.
If you’re new to the whole Shortcuts thing, Apple has put together a handy user guide to get you started. Have any interesting idea for a shortcut? Feel free to tweet at us.
Get the TNW newsletter
Get the most important tech news in your inbox each week.