As soon as my fingers leave the keyboard and hunt for a mouse or trackpad to select an app, link or file on my computer, I feel like I’m slowing down. Speed and efficiency is incredibly important to me and dragging a pointer back and forth across the screen just doesn’t cut it anymore.
On a Mac, I boost my productivity with a customisable launcher app called Alfred, which can handle almost any basic task with a few pithy keywords. There are a few alternatives to consider, including LaunchBar, Quicksilver and Butler, but Alfred is the one that best fits my personal workflow and preferences.
App launchers can be a little overwhelming for the uninitiated, so if you’re curious to try Alfred but unsure where to start, this in-depth guide is for you.
Master your apps
On any given day, I use at least a dozen different apps on my Mac. Google Chrome, TweetDeck, Fantastical, Evernote and Byword are the usual suspects, but I almost always end up opening and closing a handful of other, less frequently used apps too.
Instead of dragging my cursor onto Launchpad, the dock or my application folder, I use Alfred to launch, hide and quit apps when needed. It might take a few days to train your brain so that it uses these commands instinctively, but trust me – it’ll be time well spent in the long run.
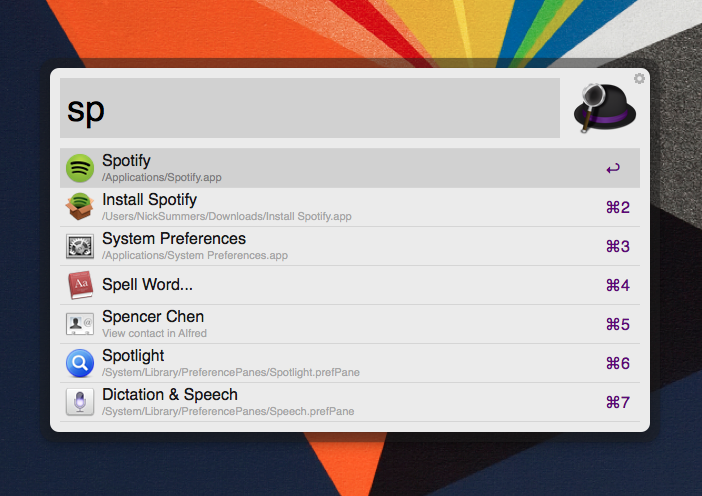
Once you’ve installed Alfred on your Mac, open it with your chosen keyboard combo and begin typing the name of the app that you need. Alfred will show a list of results instantaneously – oftentimes a single character will be enough to surface your intended app. Hit return for the first option, or Command and the listed number key for any of Alfred’s other suggestions. It’s similar to Spotlight, although Alfred’s numbered shortcuts are quicker than the arrow keys needed to hit secondary items in Apple’s built-in search tool.
When you’re finished with a piece of software, you can close it down with the “quit” keyword, followed by the name of the app. It’s also possible to make programs invisible, while retaining their window positions by using the “hide” keyword. Furthermore, Alfred gives you the ability to shut down every app running on your Mac with the phrase “quitall”, or force software that has become unresponsive to close with the keyword “forcequit”.
Search the Web
Although Alfred is often described as an app launcher, its capabilities go far beyond the native software installed on your Mac. Instead of jumping across to your chosen browser and searching with your preferred search engine, you can do all of this and more with Alfred.
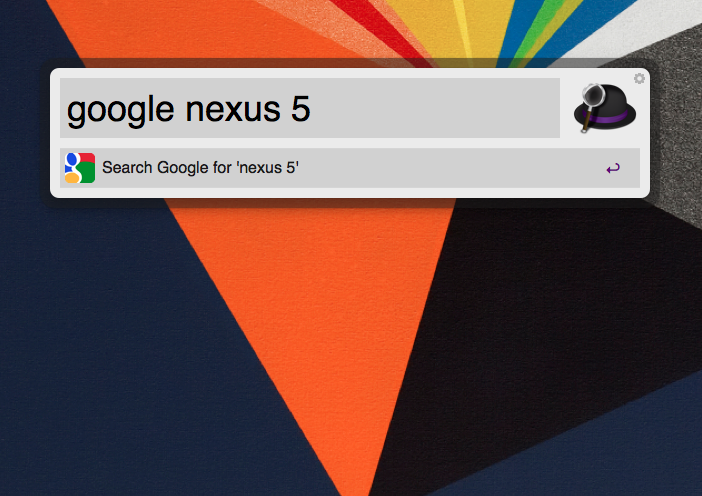
If you type “Google” into Alfred’s search bar, you can easily follow it up with your chosen keywords and then have the corresponding results page appear instantly in your browser. If you want to search with Google Images, or look up a place on Google Maps, this is also supported with the keywords “images” and “maps” in Alfred, side-stepping what would have been additional steps or clicks in the browser.
As Alfred learns your preferences, you’ll notice that it takes fewer characters to execute common tasks. For instance, I only need to type in “G”, followed by a keyword or query, for Alfred to offer me a Google Search results page by default.
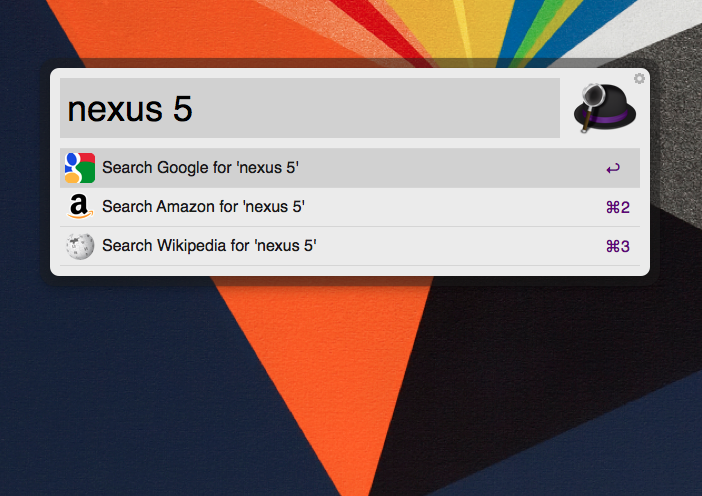
Alfred goes even further by offering shortcuts to some of the most popular sites and services on the Web. If you type a query into Alfred without any keywords whatsoever, the launcher will let you search via Google, Amazon or Wikipedia by default. For the latter, Alfred will often send you to the exact Wikipedia entry too, rather than a page of compatible search results.
The launcher supports a range of other sites too, although you’ll need to type in their name first to trigger a search query. Twitter, Facebook, YouTube, LinkedIn and Flickr can all be triggered this way – for a full list of options, hit the Web Search tab in Alfred’s Preferences menu.
Gmail and Google Drive
If you’re invested in Google’s expansive suite of products and services, you probably use Gmail and Google Drive on a regular basis. Both are supported in Alfred, although in Gmail’s case search results are limited to its Web incarnation, rather than any third-party email client you may be accessing it from on your Mac.
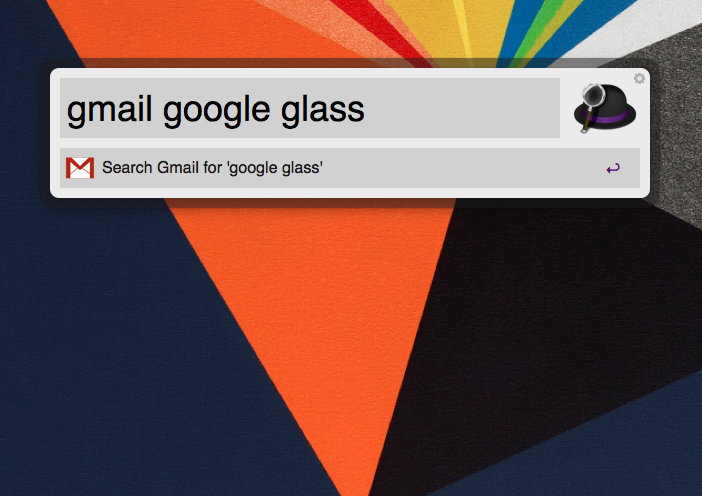
By typing “gmail” into Alfred, you can instantly jump to your inbox or begin searching for a specific message. It’s a sublime tool, as it gives you an immediate shortcut into your messages, regardless of what apps or windows you currently have open. Google Drive works the same way, bringing up text files, images and spreadsheets with just the word “drive” and a keyword.
I imagine Gmail is a more widely adopted service than Google Drive, but to my surprise, the integration with Alfred has made me use Google’s online storage service even more. Together, they actually make Google Drive more useful than some of the alternatives on the market, such as Dropbox or SkyDrive, because it’s now so much easier to look up the files that I need.
Custom Web searches
We all have a favorite corner of the Web, such as Reddit, Hacker News, NeoGaf, and of course, TNW. If you’re prepared to dig a little deeper into Alfred’s settings, you can accelerate your workflow even further with custom shortcuts and searches for all of your most frequently visited sites.
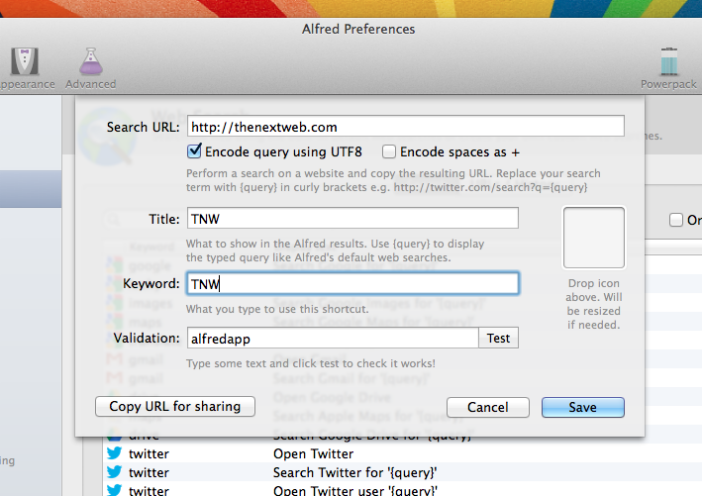
First, open the preferences window for Alfred by clicking on the menu bar icon, followed by the Web Search tab on the left-hand side of the screen. Select the Add Custom Search button in the bottom right-hand corner and then paste the URL for your chosen site or webpage into the first field, titled Search URL.
For now, just try a homepage for a basic site (TNW is a good place to start). Add a title that will show in Alfred’s search results, as well as the keyword that you want to use as a shortcut. You can also submit an icon here for some visual clarity and test it using the Validation field. Once you’re done, just hit Save.
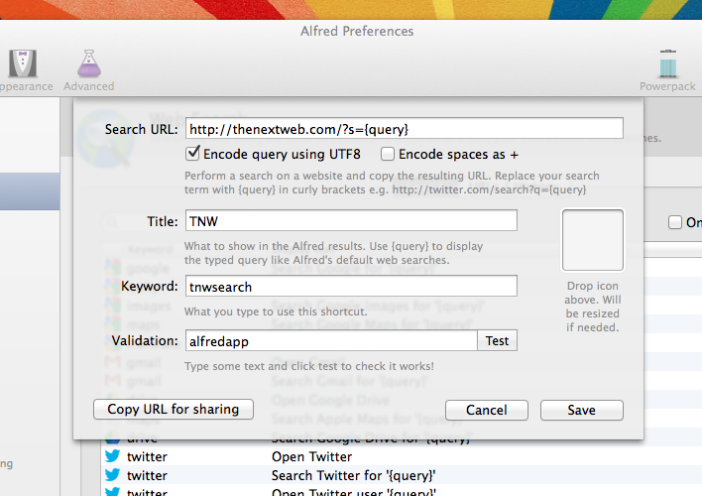
Custom searches are a little trickier. You’ll need to find the search URL, which will be displayed in your browser after you’ve submitted a query on your chosen site. When I search for Vine on TNW, for instance, I get the following URL: “https://thenextweb.com/?s=vine”
In Alfred, you need to take this URL and replace the term with {query}, before adding its to the Search URL field. For TNW, it would look like this: “https://thenextweb.com/?s={query}”. If you’re unsure, it’s worth using the test function in Alfred before committing to the new shortcut.
Next: Workflows, clipboards, snippets and more…
Files, folders and images
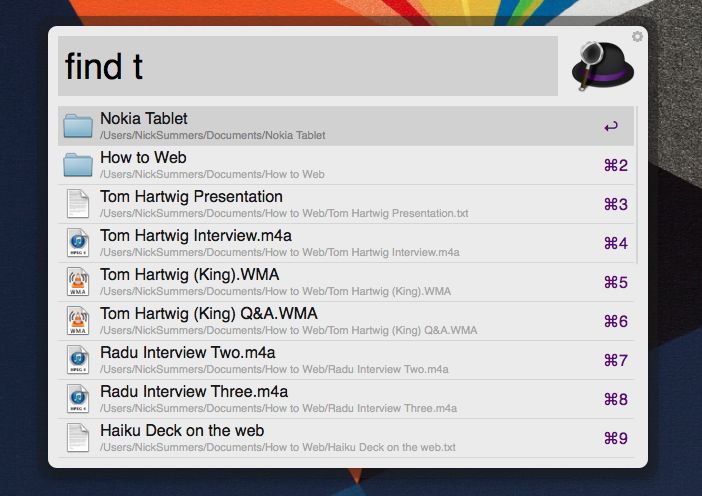
While the bulk of my work is now stored online, I still like to keep some of my most important and valuable files backed up on a local drive. With Alfred, you can quickly find your files by typing them directly into the search field – no keywords required. Adding the keyword “open” will launch the specified file, while “find” will show its location in finder.
Furthermore, you can look for files that contain a specific term by prefacing it with “in”. This is particularly useful when you need to find a document with specific contents, but can’t remember the name or location of the file.
You can unlock additional functionality with the File Search tab, located in the preferences menu for Alfred. Under the Navigation section, you’ll find a couple of check boxes which allow you to go deeper or higher in the folder hierarchy. It essentially negates the need for Finder, keeping all of your efforts and commands locked to Alfred – and perhaps more importantly, away from your mouse or trackpad.
Clipboards and snippets
Copy and paste has a massive flaw. As soon as you store a new piece of text, everything that you had copied previously is inaccessible. That leads to frustration when you realize that you need a piece of text that you copied earlier in the day. You need to backtrack to the original source, or wherever you pasted it last, copy it again and drop it in the new location.
That’s just not very productive.
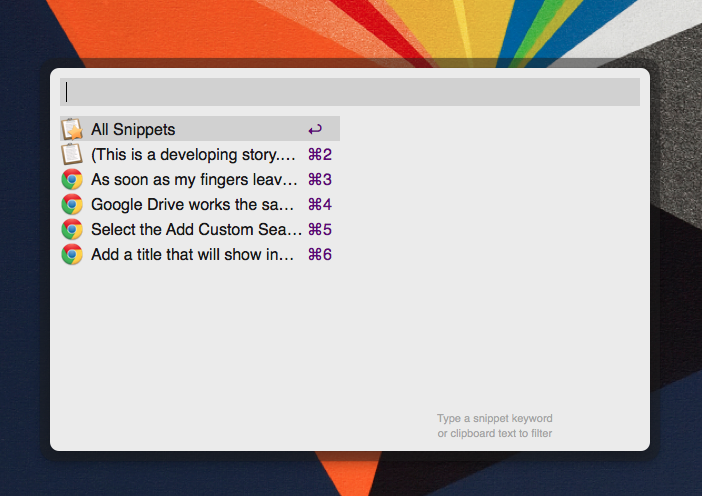
Thankfully, Alfred stores everything in your clipboard history automatically, while giving you an effortless means of finding and selecting text that you had copied previously. It’s accessed with a unique hotkey (⌥⌘C is set by default) which you can customize at any using the in-app preferences.
When you launch the Clipper, you’ll be given a search box just like the normal version of Alfred. Regardless of when you copied a piece of text, you can submit any number and combination of words to find it again. Alternatively, Alfred shows all of the text that you’ve copied in chronological order; you can either scroll down with the directional arrows on your keyboard to review them, or use the numbered shortcuts to grab one straight away.
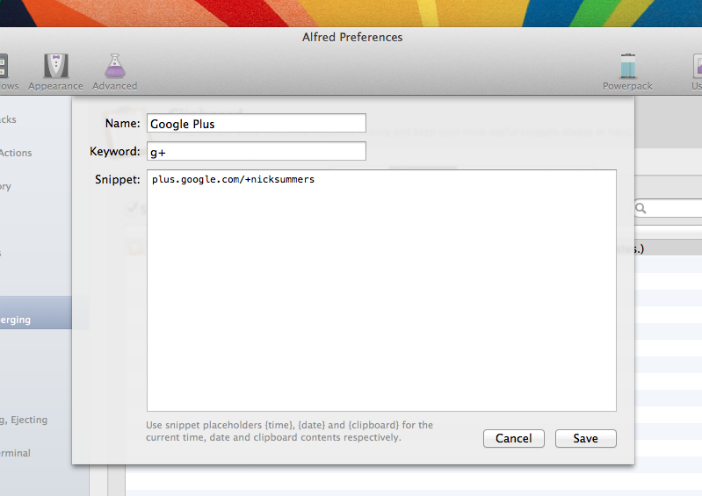
Snippets, meanwhile, give you the ability to paste pieces of text with an abbreviation or keyword. These are set up from the Clipboard tab in the preferences menu, and can be used for almost anything that you type regularly. That could be a common email response, a closing paragraph for a report, or even a shortcut for a link that you use regularly. Just give it a name, a keyword and the full snippet that you want to grab a hold of.
Workflows
Common tasks often involve a number of different apps and steps to execute. If you do them often enough, they quickly feel laborious and a poor use of your time. In the style of IFTTT, Alfred also supports workflows, which let you string together multiple tasks and execute them with a single command.
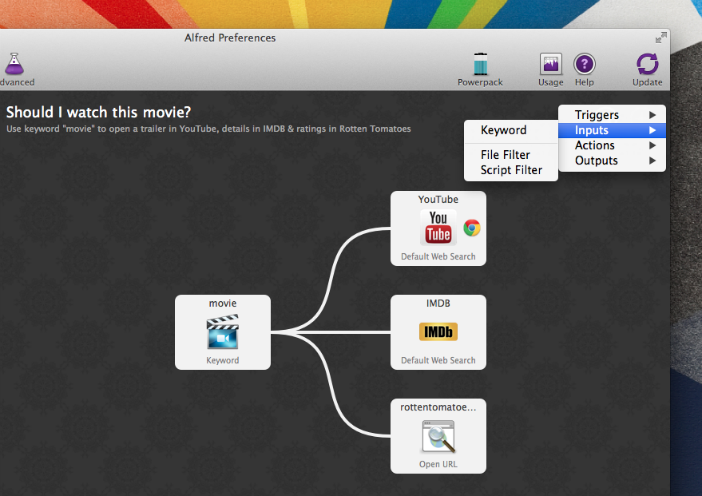
This is by far the most complicated feature in Alfred, and it isn’t for the faint-hearted. Once you’ve selected the Workflows header in the preferences menu, it’s worth starting with one of the Alfred’s pre-generated examples. “Should I watch this movie?” is a good place to start, as it reveals the input – the name of a film – and the corresponding actions, which in this case is three simultaneous search queries on YouTube, Rotten Tomatoes and IMDB.
With the plus icon in the top-right hand corner, you can set how the workflow is activated – a keyboard combo, when you discover a file or contact within Alfred, or a search term that doesn’t match an app, file or folder stored on your Mac. You’ll then need an input, such as a specific keyword, followed by the actions that you want to be carried out. These can include a combination of Web searches, URLs, system commands, scripts and iTunes commands – whatever you need to improve your workflow and stay productive.
…and the rest
Alfred has a number of other search types and features that you can trigger, but they’re not as useful or impactful in my opinion. Among them are dictionary references, which can be activated with the “define” and “spell” keywords, as well as a calculator by starting with “=”.
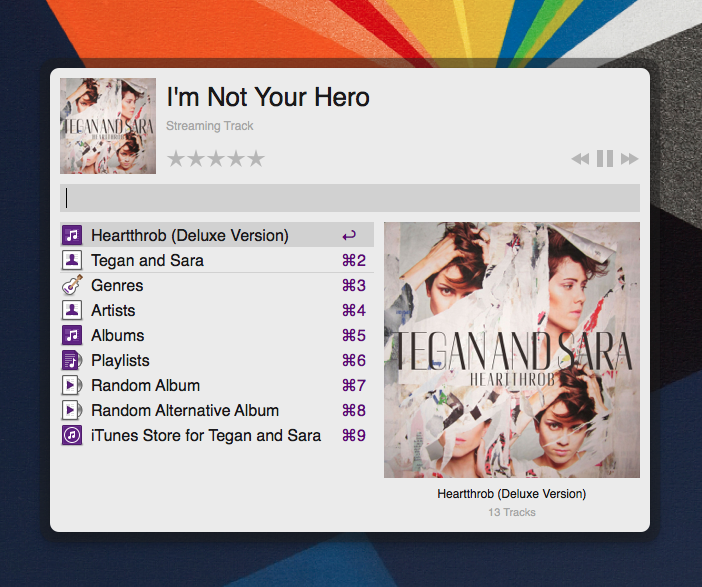
Alfred can also be used to control iTunes via a slick little mini player and some straight-forward keywords (play, pause, next, previous, random, etc.)
My favorite peripheral shortcuts are for system commands, however, including “restart” and “shutdown” – which should be self-explanatory – “eject” to pull out removable media safely and “emptytrash” to ditch everything that’s piling up in your digital waste paper basket.
If you’re an avid Alfred fan it’s also worth tinkering with some of the launcher app’s aesthetics. From the Appearance header in the preferences menu, you can pick a theme or create your own from scratch, dictate where the Alfred search box appears on-screen, hide the menu bar icon and more. For design aficionados in particular, this is a godsend.
Wrap up
That’s it for our in-depth guide to Alfred! It’s a sublime productivity and launcher app with an impressive selection of features and customization options. The app is free to download, but you’ll need to purchase the optional PowerPack to access some of the more advanced features, including workflows, the iTunes Mini Player and your clipboard history. We highly recommend forking out the extra £17 (roughly $28 USD) to access these tools.
➤ Alfred | Mac App Store
Image Credit: Dan Kitwood/Getty Images
Get the TNW newsletter
Get the most important tech news in your inbox each week.
