I’ve previously written a guide on how to detect facial features using Python and I got many questions on twitter asking how to do the same using JavaScript. So today, I’m going to be answering that and we’ll add some extras: masking your face with a Spiderman filter, or the classic, dog filter. It’s been really fun to work on this project and I hope you enjoy it too.
The article will cover two main topics:
- Face features recognition
- Adding filters
So, here’s how to to detect facial features
Similarly to how DLib works, for JavaScript, we have a library called clmtrackr which will do the heavy work of detecting where the face is on an image, and will also identify facial features such as the nose, mouth, eyes, and more.
This library provides some generic models which are already pre-trained and ready to use following the numbering of the features as follows:
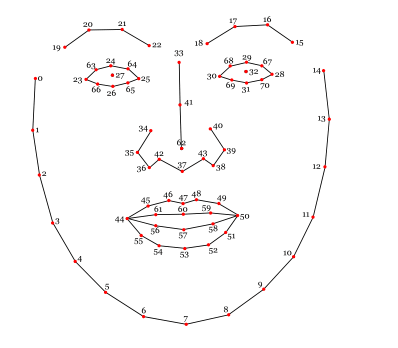
When we process an image with the library, it will return an array for each of the points on that map, where each point is identified by its position on x and y axis. This is very important when we’re building the filters. As you can already probably guess, if we want to draw something replacing the nose of the person, we can use the point 62 which is at the center of the nose.
But enough theory, let’s start working on something cool.
What are we building?
In this article, we will make use of clmtrackr to identify faces on a video stream (in our case a webcam or camera) and apply custom filters that can be selected by a dropdown on the screen. Here is the demo of the app on codepen. To get started, please make sure you allow in your browser for the app to access the camera, otherwise it won’t work.
Awesome! It may not be perfect but it looks amazing.
Now, let’s break the code down and explain what we are doing.
The basic code structure
To build the app we’re using p5.js library, which is a JavaScript library designed for working mainly with canvas, and that fits perfectly for our use case. P5JS is not your traditional UI library, it instead works with events which define when to build the UI, and when to update it. Similarly to some game engines.
There are 3 main events from p5 which I want to cover:
preload: which is executed right after the library loads and before building any UI or drawing anything on the screen. This makes it perfect to load assets.setup: which is also executed once, right after thepreload, and is where we prepare everything and build the initial UIdraw: which is a function called in a loop, and it’s executed every time the system requires to render the screen.
Preload
As by definition, we’ll use the preload event to load the images that we will be using later in the code. Here’s what it looks like:
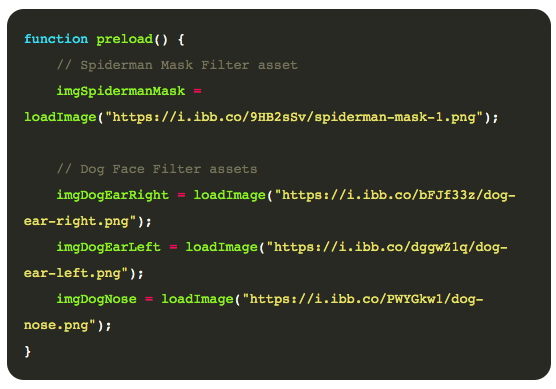
As you can tell, it’s very simple. The function loadImage from p5, as you may expect, will load the image and make it available as a P5 Image object.
Setup
Here things get a bit more interesting as it’s in here where we load the UI. We will break down the code executed in this event into four parts.
Creating the canvas
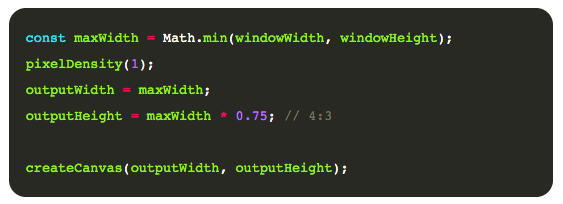
As we want our code to be responsive, our canvas will have a dynamic size which will be calculated from the window size and using an aspect ratio of 4:3. It’s not ideal to have the aspect ratio in code like that, but we will make some assumptions to keep the code concise for the demo. After we know the dimensions for our canvas, we can create one with the P5 function createCanvas as shown next.
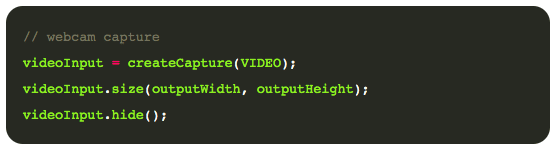
Capturing the video stream
After we have our canvas working we need to capture the video stream from the webcam or camera and place it into the canvas. Fortunately, P5 makes it very easy to do so with the videoCapture function.
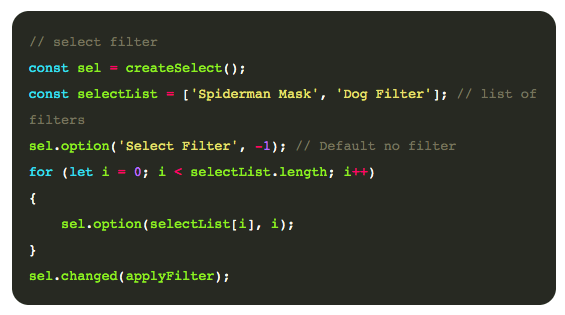
Building the filter selector
Our app is awesome and can provide options for more than one filter, so we need to build a way to select which filter we want to activate. Again, we could get really fancy here, however, for simplicity, we will use a simple dropdown, that we can create using P5 createSelect() function.
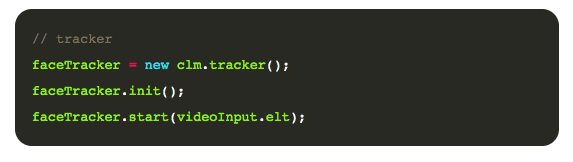
Creating the image tracker
The image tracker is an object that can be attached to a video feed and will identify for each frame all the faces and their features. The tracker needs to be set up once for a given video source.
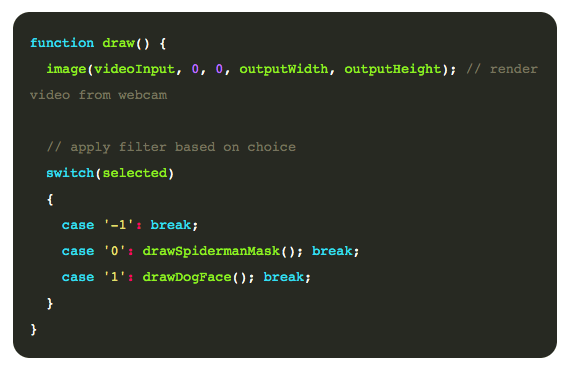
Drawing the video and filters
Now that everything is set up, we need to update our draw event from P5, to output the video source to the canvas, and apply any filter which is selected. In our case the draw function will be very simple, pushing the complexity into each filter definition.
Building the Spiderman mask filter
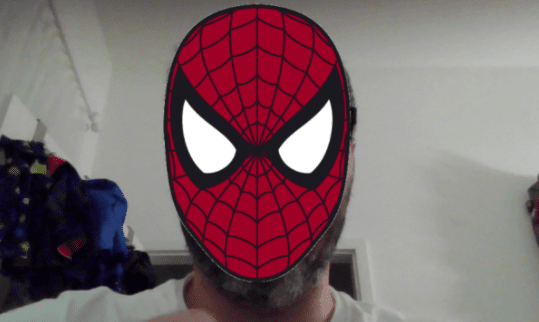
Building filters can be both a easy or a very complex task. It will depend on what the filter is supposed to do. For the Spiderman mask, we simply need to move the Spiderman mask image to the center of the screen. To do that, we first make sure our faceTracker object actually detected a face by using faceTraker.getCurrentPosition().
Once we have our face detected we use P5 to render the image using the face point 62, which is the center of the nose as the center of the image, and with width and height which represent the size of the face as follows.
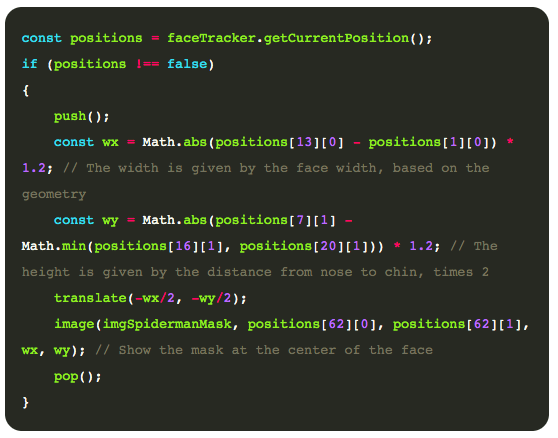
Pretty cool right?
Now the dog filter works the same way but using three images instead of one, one for each ears and one for the nose. I won’t bore you with more of the same code, but if you want to check it out, review the codepen, which contains the full code for the demo.
With the help of JavaScript libraries, it’s very easy to identify facial features and start building your own filters. There are a few considerations though that we did not cover in this tutorial. For example, what happens if the face is not straight to the camera? How do we distort our filters so that they follow the curvature of the face? Or what if I want to add 3D objects instead of 2D filters?
This article was originally published on Live Code Stream by Juan Cruz Martinez, founder and publisher of Live Code Stream. He is a Software Engineer with more than 10 years of experience in the field, working in a wide variety of projects, from open source solutions to enterprise applications. Happily married, with a kid, officially engaged to JavaScript, in a love relationship with Python, and pursuing the writer’s dream! You can read this original piece here.
Live Code Stream is also available as a free weekly newsletter. Sign up for updates on everything related to programming, AI, and computer science in general.
Get the TNW newsletter
Get the most important tech news in your inbox each week.