We’ve all heard the stories of stolen laptops and tablets, of iPhones left in cabs or bars, and how those people often don’t have a backup and have to spend days, sometimes even weeks – and lots of money – to get their lives back on track.
It happens, we read about it, but we seldom take action. This is your checklist to get prepared for when disaster strikes. I’ll guide you through a few steps that one day might save the day, or at least will make you sleep better and worry less.
Step 1: Get a Dropbox account
There are alternatives too, but this is an easy and convenient way to set-up an online back-up archive. You won’t back up your entire life here (you could though) but we are going to use it as a base for your ‘Emergency Scenario’.
Step 2: Set-up your ‘Emergency Scenario’
Generate a Directory/Folder in Dropbox and name it ‘Emergency!’ or ‘In case of Emergency’ or something like that.
Step 3: Generate a system report
OS X:
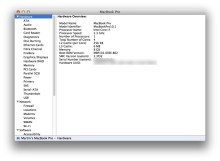 Open your ‘About This Mac’ screen (Apple menu->About This Mac) and click the ‘More Info…’ button. An application called System Information will open. Now click the “System Report” button and then press ‘command-s’ or choose ‘Save…’ from the File menu. Save the System Report to your emergency folder at Dropbox.
You now have a very detailed file with all information about your computer including the hardware serial number, detailed specs about the processor, memory and installed drives. If you lose your Mac or it gets stolen and the police ask you for the specifics of the computer you can tell them almost everything, and certainly a lot more than they need to identify it.
Windows 7:
Head over to Control Panel, and click on Performance Information and Tools. Once there, hit the link on the left side entitled ‘Advanced Tools.’ Next, scroll down to the option listed as ‘Generate a system health report.’ Click it.
It will take Windows a full 60 seconds or so to grab all the information that it needs. I recommend a brisk walk in the interim.
The report, once generated, will include both warnings and notes on your computer. You’ll see a list of diagnostics showing the health of core pieces of your computer, and other pieces of information that will help you pinpoint any problem that you may have. Want to print it out? Snag a screenshot and Ctrl-P to your heart’s content.
Step 4: Paper lasts
Why don’t you take a few minutes to copy a few numbers to a piece of paper and leave it with your parents or a friend? Take your serial number and computer specs and paste them into a document and print that. If everything else fails at least you can still find that data.
Step 5: Install Prey and/or Undercover
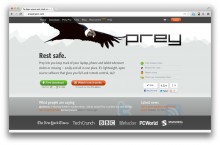 Both Prey and Undercover are services that install a bit of software on your computer so you can track it when it is stolen or lost. They are different from ‘Find my iPhone‘ because all that gets you is a location and the ability to lock your computer or delete data. With Prey you can enable the webcam and, if someone uses the computer, see who they are. You can do a lot more nifty things with Prey but that webcam was the selling point for me.
Undercover doesn’t allow you to activate the camera but as soon as you report your laptop stolen they work with the local police to get it back for you. Prey doesn’t offer that extra service but is free, Undercover has fewer features and costs money, but works for you to get your hardware back. I wouldn’t mind activating ‘Find my iPhone’, Undercover and Prey all at the same time. That is what I did.
Step 6: Start using a password manager app
I love 1Password and I’m going to use it as an example but I’m sure there are other (cheaper?) solutions out there. The reason I like 1Password is that it is well-integrated with all my devices (iPhone, iPad and Mac) and browsers (plugins for Safari, Firefox and Chrome) and syncs to Dropbox. Making the switch to a password application only works if you then also develop a password strategy… which brings me to step number 6.
Step 7: Three easy to remember but secure passwords
 Passwords are difficult to manage. You either pick too easy ones so you can remember them and you won’t be very secure. Or you’ll pick difficult to remember passwords, which are secure, but difficult to remember. Fortunately there is a simple trick that’s secure and easy to manage. All you need to do is come up with three seemingly difficult passwords, and remember these. Like this:
a: Computer
b: Dropbox
c: 1Password
You need to be able to log into your computer so you can access Dropbox where you keep your passwords and you have to open 1Password which will give you access to everything else. As long as you remember those three you are save and can always access everything from anywhere, as long as you have access to a computer.
Now how do you come up with an easy to remember password that is very secure? You come up with a sentence you can remember like this:
“My name is boris and my password is very secure since reading this blog.”
Then you remove the spaces and turn them into dashes. Like this:
“My-name-is-Boris-and-my-password-is-very-secure-since-reading-this-blog.”
Don’t bother with weird characters and a lot of capitals or numbers. The first capital letter and that . at the end and the number of characters are way more important to construct a safe password. Come up with a sentence like that you can remember for your computer, Dropbox and 1Password and you will be set. You can even write them down! Not exactly but like this: “my name is boris and my password is very secure since reading this blog”.
Without the dashes, dot and capitals it would take a hacker about 152 noventrigintillion years to crack that password. Check different length passwords to see how secure you want to be at howsecureismypassword.net.
Step 8: Generate passwords
So now you use 1Password and all is safe. Except it isn’t because you still use ‘12345678’ as a password for Facebook and Linkedin and practically every other service out there, right? But because you’ve installed 1Password you don’t have to remember any of these passwords anymore. So, you might as well use the built-in password generator.
All my passwords look like this: sa-lewo-ju-rert-va-go-wy-que-duph-bech-tho-miwh-zo. Yes, that’s a 50 character password with dashes. How secure is it? It would take a desktop PC about 3 vigintillion years to guess it. And because I use 1Password in my browsers, on my iPhone and iPad I never have to remember any of them. Only the one password I’ve generated from a sentence. Easy & Secure!
Step 9: Lock your computer
 Now you’ve done all of this you still aren’t secure if your computer isn’t locked. So go into your system settings (under Security & Privacy) and activate the “Require password immediately after sleep or screensaver begins” option. Now go to the screensaver settings and set it to 1 minute. Or 5 if you feel lucky.
I’ve set up a ‘Hot corner’ on my MacBook pro that I move my mouse to that starts the screensaver. That way, even when I’m away from my computer for only two minutes, I can lock with one swipe.
Step 10: Back up, back up, back up!
It helps if your documents are in the cloud, but it is even more convenient to have a real local back-up. There are several back-up tools but I like Time Machine backups because they are integrated and the most non-intrusive.
You can back-up to any external drive (I’ve bought a 2TB USB2 drive for $120 a year ago) or Apple’s own Airport and disk solution called Time Capsule. I prefer the external disk because it is cheaper, faster, more portable and my back-ups don’t slow the network connection down.
Conclusion
Nobody wants to think about disaster and bad luck, and losing hardware, software and data. But it happens, and it helps to take a few steps to prepare yourself for the worst. If you do, a disaster could turn into nothing more than a small hiccup.
Image credit: Thinkstock, iStockphoto/Thinkstock, iStockphoto/Thinkstock
Get the TNW newsletter
Get the most important tech news in your inbox each week.
