
Nicholas is a marketer & web designer based in Boston, MA with a specialty in high growth B2B startups. He is currently the Director of Marketing for Jebbit.
For marketers who wear multiple hats, keeping project information streamlined can become an overwhelming task. Managing content, sales requests, client requests, etc., can often cause deadlines and project details to become lost in translation (or in a thread of emails).
Without an enterprise project management system or custom intranet it may seem impossible to keep all of this data organized to maximize your production output. However there are tools out there to help you accomplish this completely for free.
Though it’s not an out-of-the box solution, if you dedicate 15 minutes to reading this article you will learn how to keep your projects organized and streamlined so you never miss another deadline. This tutorial will require:
- Google Drive: To create forms and capture data in a spreadsheet
- Trello: To display the project information in a systematic way
- Zapier: To connect the applications together
This article will provide step-by-step instructions on how to integrate Google Forms with Trello to create a content / editorial calendar for content, but you can use this tutorial for any projects you are looking to manage better.
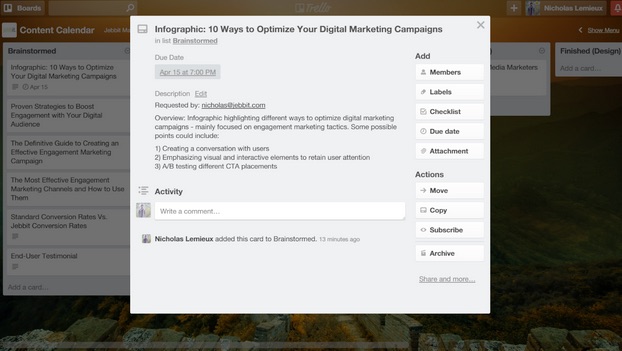
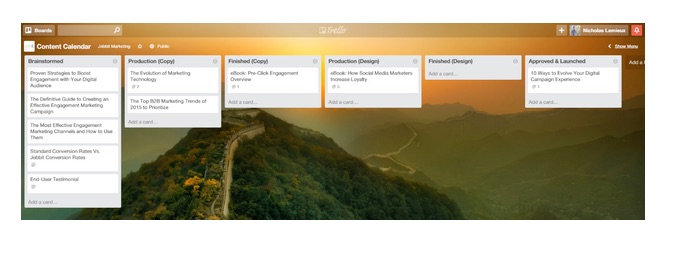
Ultimately what we are going to do is create a Google form that pushes data into a Trello board, so you can have a clean template for creating things like infographics, case studies and other content. The end result will look something like this:
Step 1
The first step is quite simple, make sure you are signed up and logged in to Gmail, Trello, and Zapier. All of these applications are free and do not require a credit card to sign up.
Step 2
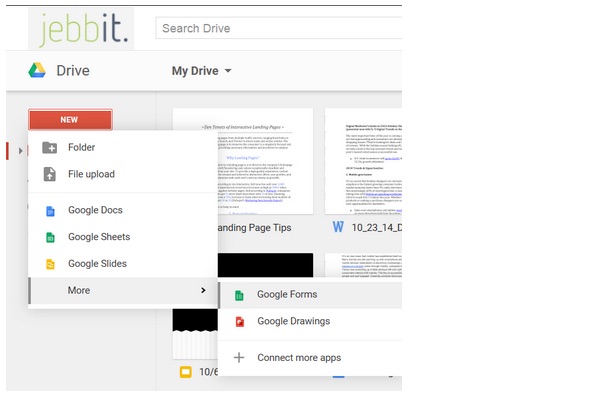
Login to Gmail to access Google Drive and create a new form. Google Drive can be accessed from the apps drop down (top right corner) of the Gmail interface. Once in Google Drive, click the “new” button (top left corner) and navigate to More > Google Forms.
Step 3
Next you will want to create a name for the form. We’ll call this one “Content Production”. If you are operating from a Goggle Business Apps account, you will have the option to restrict users from viewing the form who are not in your domain. Make sure you check the box to collect the respondents email as well, the other check boxes are optional.

Step 4
Now it’s time to create inputs for the data you need to collect. Scroll down and click “Add Item”. You will have the option to choose several different question types and input options. For this example we are creating four simple questions to create a form for creating different types of marketing content. Make your questions as simple and user-friendly as possible.

Step 5
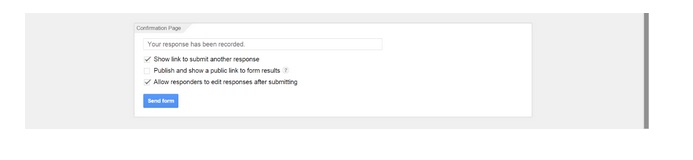
Finally to complete your form, scroll to the bottom and click “Send form”. This will create both a live link to access your form and a spreadsheet in Google Drive to collect the responses.
Step 6
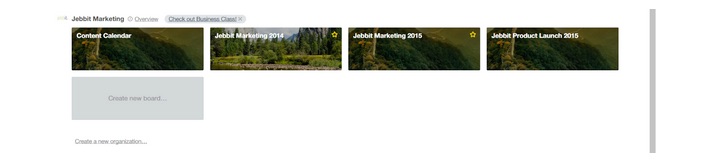
Next, log into Trello. If you haven’t done so already, create a new organization so you can start creating boards. From the main dashboard you will have the ability to “Create a new board”. Go ahead and click this to set up your board.
Step 7
Once you have your board setup, you are going to want to create a few lists depending on what you are trying to organize. In this example I created lists that outline the process of brainstorming content, creating copy, designing it, and pushing it to production. You have the ability to click and drag projects or “cards” from one list to another. This is a great way to keep stakeholders up to date with project deadlines. After you create your lists you’re all set with Trello (for now). The responses you collect from the Google Form will automatically create cards that populate the lists.
Step 8
Next you are going to need to log into Zapier. If you are unfamiliar with Zapier, I’ll start off by saying it’s one of the coolest and most effective tools to have in your tool belt as a marketer. It enables you to connect virtually any applications together to pass or collect data, saving you and your developers valuable time when creating integrations.
After you login, click “Make a New Zap” in the top right corner to get started.

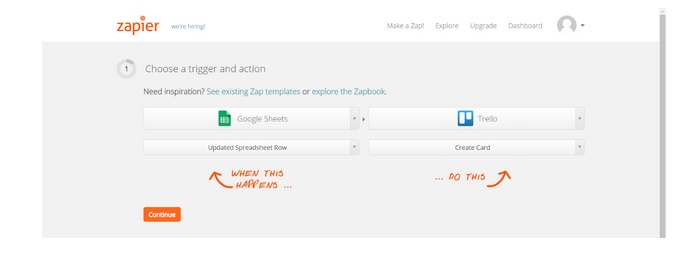
Step 9
Zapier does a good job of walking you through creating an integration, but we’ll still go walk through each step. First you need to choose a trigger and action. First find “Google Sheets” (because form responses are logged in a spreadsheet) and for the action select “Updated Spreadsheet Row”. Next find “Trello” and for the action select “Create Card”. As implied, this integration will create a new Trello Card when a Google spreadsheet is updated.
Step 10
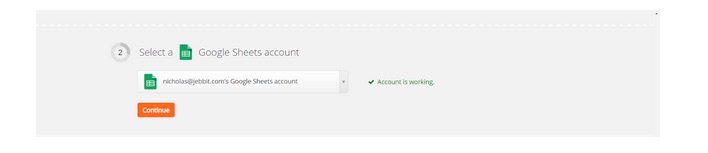
Next you need to connect your gmail account. Allow Trello access to your account, then click “continue”.
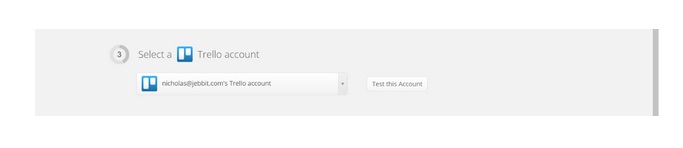
Step 11
Next, connect your gmail account. Allow Trello access to your account, then click “Test this Account” to make sure the integration is working.
Step 12
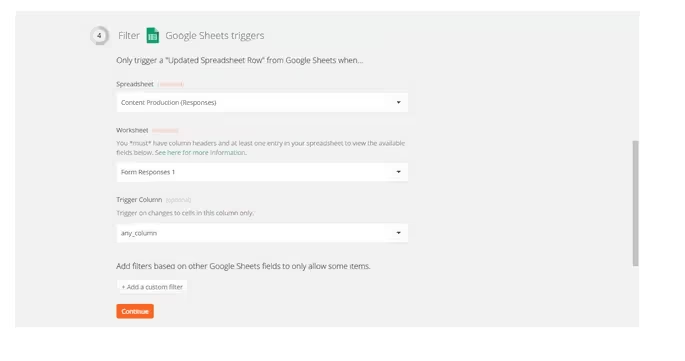
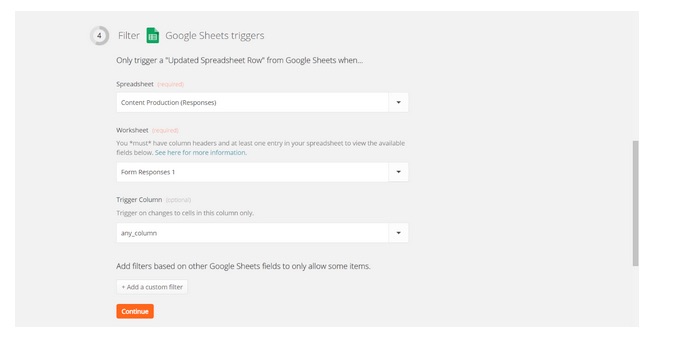
Now we are ready to pull in the spreadsheet you created with the Google Form. Under “Spreadsheet” select the one you just created, do the same for “Worksheet”. You can keep “Trigger Column” at the default option then click “continue”.
 Step 13
In this step we’ll set up the field mappings that push the data captured in the Google Form into a Trello card. First select the board and the list that you want the responses to propagate in.
The “Name” section is what appears as the name of the Trello card. Click “Insert fields” to pull the values of the field you created in the Google. In this example I’m pulling the question “What type of content is this” and “What is the name of the content” to create a clean title that will say something like “Infographic: 10 Ways to Optimize Your Digital Marketing Campaigns”.
Note: You can use static text in conjunction with the dynamic fields. I do this to keep things organized in Trello.
Apply the same method to the rest of the Trello fields and click “continue”.

Step 14
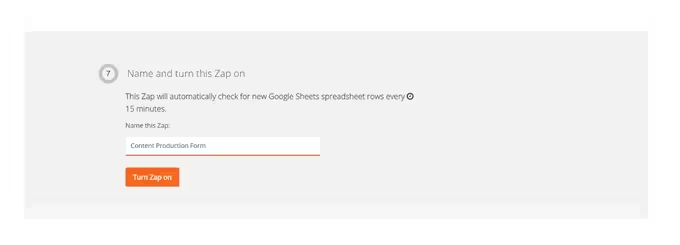
Once you are finished, name the Zap and click “Turn Zap on”. You can text the Zap from Zapier and then log out.
 Step 15

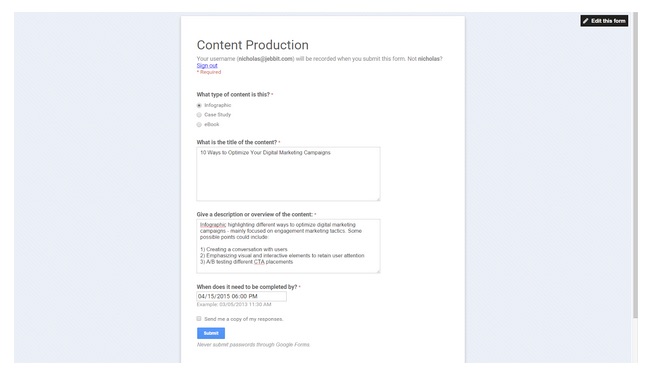
Now that everything is setup, it’s time to create a form response to test our new project management system! Log back into Google and navigate to the form you created. Fill out the form with whatever information you’d like and click “submit”.
Note: Zapier updates every 15 minutes so you may not see the card in Trello immediately.
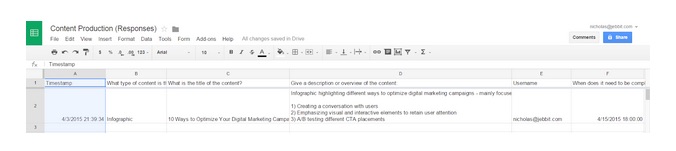
Step 16
Check your spreadsheet to make sure your Google Form submissions are showing up properly.
Step 17
Now log back into Trello and check out the board and list you designated for the integration. Submitting the form should have created a new card with the exact details you entered.

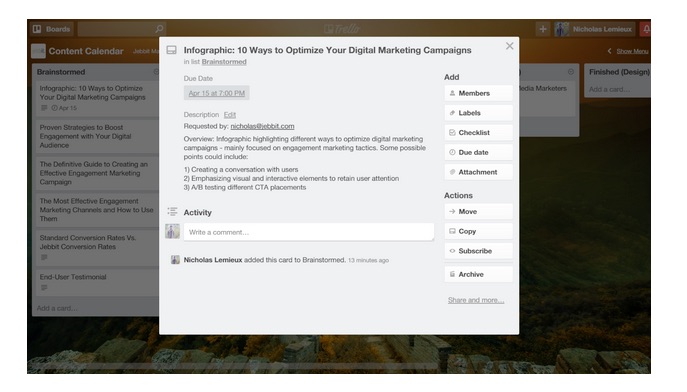
Step 18
Click the card to view the rest of the details you entered. All of the information should be there in the exact way you formatted it. Even the due date you entered will send you notifications when it’s approaching (you can turn this feature off in Trello if you wish).
You are all finished! Now you have a sleek new project management tool to help you stay organized and streamline tasks and requests that you take on every day. You can repurpose this tutorial in a number of different ways to accomplish your specific business objectives.
As marketers, we are always aiming to decrease costs and increase ROI by automating tasks as much as possible. One area often overlooked is the time you spend simply managing and organizing projects. If you can cut out a few hours every week digging through emails and documents just to get projects started, your production output will noticeably increase and your stress will decrease. Feel free to leave any questions, comments, or suggestions in the comments below.
Read Next: Google’s Cloud Console for Android lets you manage your App Engine projects on the go
Get the TNW newsletter
Get the most important tech news in your inbox each week.