
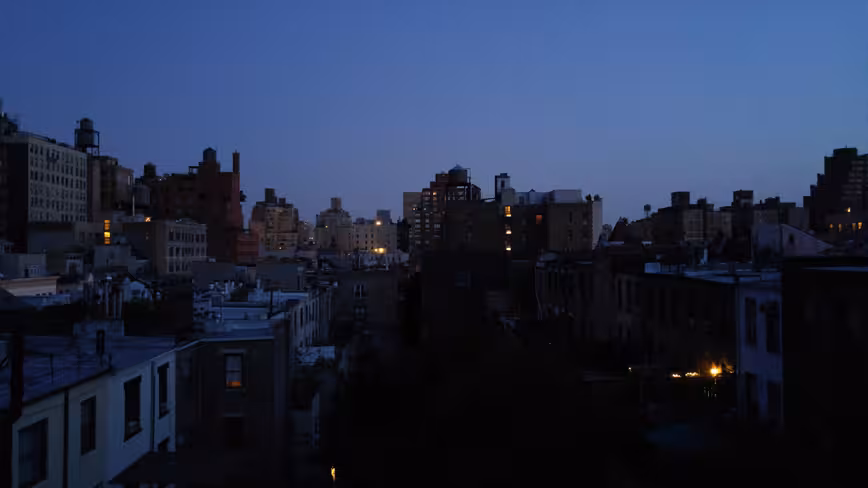
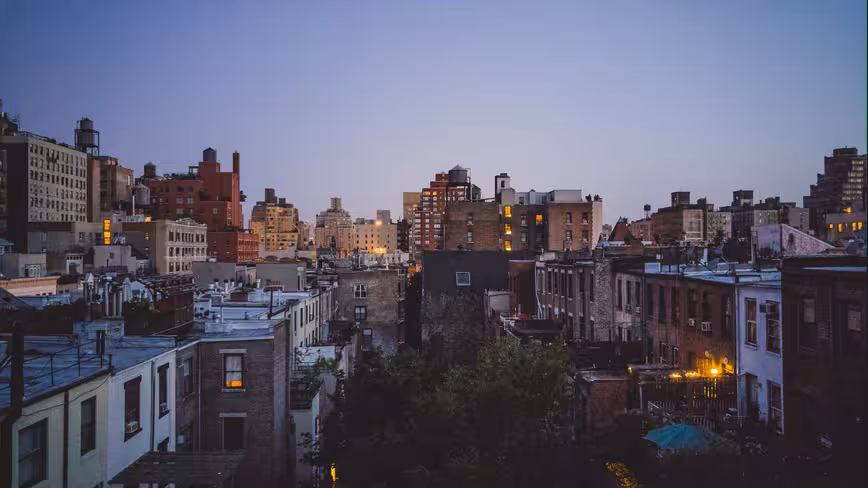
With July 4th coming up, you’ll want to make sure you can eke the best out of your phone’s camera for those nighttime fireworks.
Though phones vary in quality and features significantly, there are still some general tricks – both technical and common sense – you can pick up on to maximize image quality in low light.
Technical primer: Understanding exposure
Before we begin, you should understand the two main variables affect exposure (how bright the image appears) on your phone: shutter speed and ISO.
The shutter controls how long light hits the sensor. The longer the shutter is open, the brighter an image will be. However, you run the risk of blurring the image due to movement.
The ISO value, on the other hand, determines the sensor’s electronic sensitivity to light. Higher ISOs allow you to brighten an image without changing the shutter speed, but always at the expense of a noisier image.
Note: There’s a third important exposure variable called aperture, but as this can very rarely be modified on phones, we’re leaving it out for now. For a thorough look at three faces of exposure, check out Cambridge in Color’s great guide here.
Got that? Lets get started.
1) Expose correctly from the start
Make sure you actually tap on the subject on your phone’s screen so the camera sets the proper exposure (and focus).
If you need to, use the exposure compensation tools on your phone to get things just right; low light photos are less malleable for edits later, so make sure your subject is properly illuminated from the get-go.
2) Go manual
If you really want to get the most of your images, learn to manually adjust settings such as the aforementioned shutter speed and ISO.
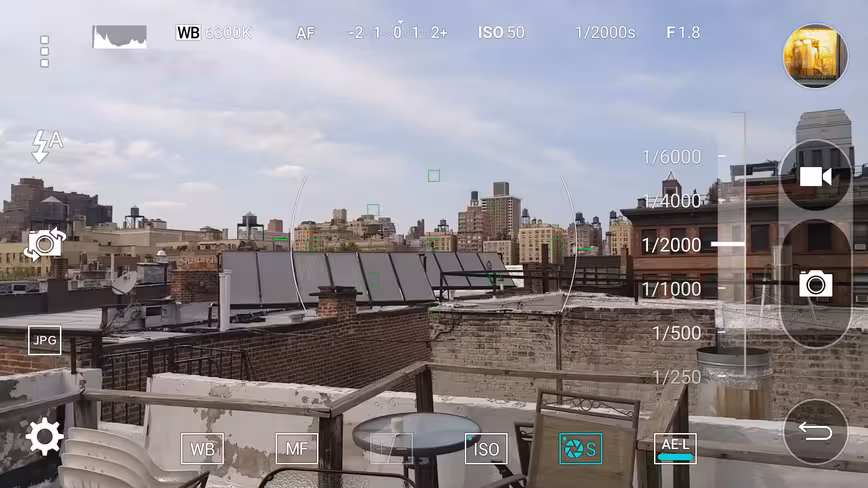
Many Android and Windows phones have a manual mode option built-in, whereas there are a plethora of apps on iOS (VSCO, Manual, and Obscura are some good ones) that let you do the same.
3) Keep your shutter open as long as reasonable
Since the ISO value directly determines how noisy an image is and apertures are fixed on smartphones, leaving the shutter open longer is your only option for getting cleaner images at a given exposure.
The longer the shutter speed, however, the more movement will be blurred, so this technique is best for static subjects – unless you want motion blur for artistic effect.
Theoretically, a long enough shutter shutter speed could result in nighttime photos as noise-free as those taken during the day. In fact, extending the shutter period is exactly how optical image stabilization works, which brings us to the next point…
4) Stabilize your shot
Lean on a stable surface to stabilize your shot whenever possible. Even if your phone already has optical image stabilization, this allows it to use an even longer shutter speed and/or lower ISO settings without your hand’s shakiness interfering.
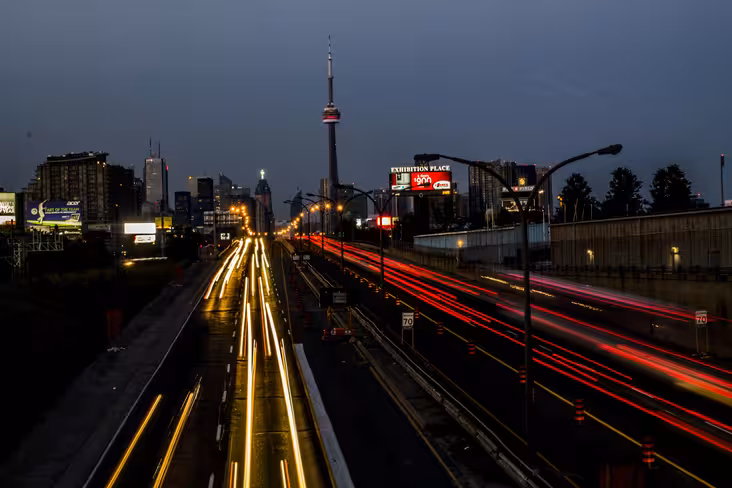
If you really want to be serious, carry a small phone tripod for phones in your bag. If you’re shooting in manual mode, you can even set the shutter speed long enough for cool light trails.
5) Nail the white balance
Good white balance can be the difference between natural colors and looking like you have alien skin and yellow teeth.
The lower the light, the harder it is for your camera to guess the correct white balance, so mess with your phone’s settings to see what works best.
6) Use environmental light to your advantage
Small lighting changes can make a big difference in your final image. When taking photos in low light, use whatever light that actually is available to illuminate your subjects.
Brighter objects show less noise, so if photographing people, make sure the light is hitting their face, not their backs – it can be as simple as asking someone to turn their body slightly to the side.
7) Use flash sparingly
While more light is generally good, when it all comes from a small point source, skin can look harsh and odd colored, particularly as the flash is often a different color from the surrounding light. Flash has its place, but try to stick to environmental light when possible.
8) Don’t zoom
Street photographers have a saying: “zoom with your feet.” If you need to get a better look at your subject, move closer. Besides being a quintessential artistic tip, it’s the better option as the digital zoom on smartphones is virtually useless.
With very rare exceptions, all your camera is doing is cropping the image before the shot is taken. Though you might get by in the daytime, in low light, this is triply problematic – digital zooming exacerbates any shakiness in your hands, amplifies noise and lowers resolution.
Of course, you can’t always move closer to your subject, but in that case it’s almost certainly better to just crop later. After all, you can’t uncrop a shot that’s been taken.
9) Use your native aspect ratio and resolution
Another apparent no-brainer: the higher the resolution, the more detail in your images. However, many people don’t realize that switching your aspect ratio could mean you’re cropping your images and lowering the effective resolution.
For example, many phones shoot with 16:9 aspect ratio by default to match the phone’s display, even though their sensors are actually 4:3. It’s not a negligible either crop either; you’re effectively making the sensor 25% smaller. The popular square crop yields the same loss.
Most Android phones and all iOS devices have a 4:3 sensor, but some devices like the G4 switch it up. You can find the native aspect ratio by looking at which setting shows the most environment in the preview. It will also have the highest final resolution.
10) Shoot Raw on Android and Windows
Apple cameras may have great image processing by default, but several Android and Windows devices now come with a huge advantage for tinkerers: Raw photography.
Unlike jpegs, Raw files are uncompressed and unprocessed. This means they can be modified a lot more, including setting your own sharpening, recovering crushed shadows, saving blown highlights and finding the perfect white balance.
Because there’s no noise reduction or sharpening applied to them automatically, Raw photos typically look worse out of the box, but you can then tune them to your exact preferences.
11) Use filters and edits wisely
Professional photographers may scoff at image filters, but they can help mitigate noisy images.
In particular, using the ‘Fade’ tool in many apps lessens the contrast in noisy shadows of the image, giving the illusion of cleaner final shot.
Some photographers also like to use a technique called exposing to the right, where they take a brighter-than-necesary photo and darken it later to reduce shadow noise.
In any case, keep the edits subtle and they can enhance your images rather than degrade them.
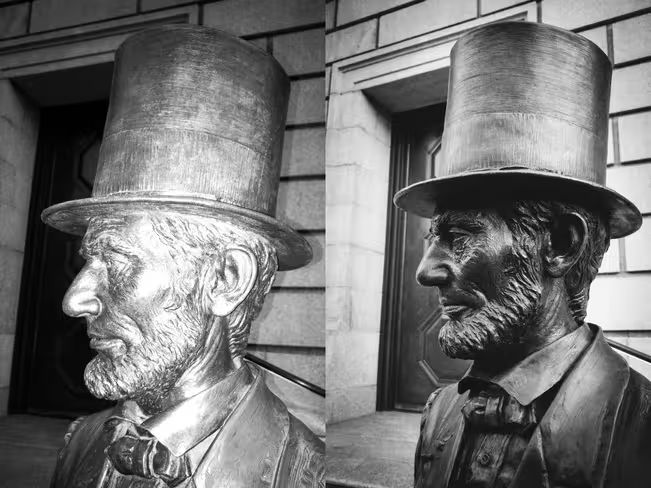
12) Convert to black and white
More than just being melodramatically artsy, black and white photos eliminate the harshness of digital color noise and make it look more like film grain.

It also removes worries about white balance or skin tones, and you can mess with exposure a good deal more before an image degrades past being acceptable.

Even if you don’t go full black and white, de-saturating your images slightly can also help them approximate how our eyes see in low light, when our eyes are less sensitive to color.
13) Know thy camera
Last but not least, every smartphone camera is different, so learn your gear’s strengths and weaknesses.
Some cameras have a tendency to under expose, others apply too much sharpening. Some apps give you control over everything including noise reduction levels, others are totally bare-bones.
Experiment to find what looks you prefer, and feel free to look into party apps if the default ones don’t meet your needs.
Featured Image Credit: Philip Leara / Flickr
Get the TNW newsletter
Get the most important tech news in your inbox each week.