When you boot up a Mac and use Mac OS X for the first time, the best you can do with the keyboard is type using the standard characters that form the English language and use a few keyboard shortcuts that you are familiar with. But your keyboarding abilities on Mac OS X can be taken quite a bit beyond that, in ways not obvious to many, and in this article we take a look at the various ways you can do that.
Keyboard Preference Pane
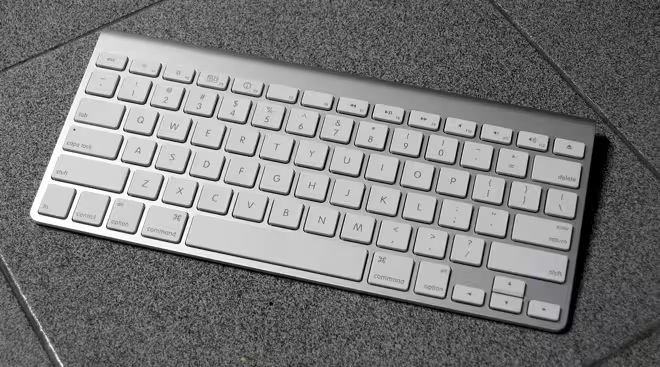
The Keyboard preference pane in System Preferences is the most obvious place to start and probably the one that most readers already know about, but here’s a recap. The most obvious thing expert typists would want to do is increase the key repeat rate and decrease the delay until repeat to make your typing faster. We’ve found that typing becomes much more efficient at the maximum settings for each, but you may feel comfortable at lower speeds.
The other thing you want to do is enable the “Show Keyboard & Character Viewers in menu bar” option; it’s a neat feature that we will get back to later in this article. If you hit the Modifier Keys button here, it’ll bring up a sheet that will allow you to change the function of your modifier keys like Caps Lock, Control, Option and Command. Two good uses are to (a) disable the Caps Lock key if you find it of little use; and (b) interchange the positions of the Command and Option keys if you are using a keyboard not optimised for Macs.


The 💜 of EU tech
The latest rumblings from the EU tech scene, a story from our wise ol' founder Boris, and some questionable AI art. It's free, every week, in your inbox. Sign up now!
Finally, if you are using an Apple keyboard, the “Use all F1, F2, etc. keys as standard function keys” setting lets you toggle their functionality between controlling system features and being normal function keys. By default, they control hardware features like the screen’s brightness and volume levels and other system features like music playback, Mission Control and the Dashboard. Depending on the choice you make, the alternative function can be accessed by pressing them in combination with the Function (Fn) key.
Custom Keyboard Shortcuts

The first thing you want to do in the Keyboard Shortcuts tab is switch the “Full Keyboard Access” setting to “All controls” (which can also be done using the Ctrl+F7 shortcut). The next time you are staring at a sheet with the options Cancel and Discard, the Cancel button will be surrounded with a light blue glow, indicating that the button can be pressed by hitting the spacebar. Pressing the Tab key passes the control to other buttons and interactive elements of the UI.
In this tab, you can see a bunch of apps and features of the system listed on the left side and their keyboard shortcuts on the right. This is a great way to familiarise yourself with the keyboard shortcuts available to you in various parts of Mac OS X. You can also go in and change any of them to something you’re more comfortable with. Apple furnishes you with a list of common keyboard shortcuts for Mac OS X, while graphics instructor and designer Dan Rodney has a much more comprehensive and well-organised list available on his website.
The real fun, however, is in adding keyboard shortcuts of your own. If you frequently use the Merge All Windows command in Safari, for instance, or the Export option in many apps, you may find yourself frustrated by having to reach for the menu bar over and over again to access them. Custom keyboard shortcuts let you solve that problem.

Go to the Application Shortcuts option and then hit the Add (+) button to start adding a new keyboard shortcut. Choose any app from the ones listed in the Application menu, or by going through your Applications folder using the Other option at the end of the menu. Once you’ve selected an app—say, Safari—you have to enter the menu title of the command you want to create a shortcut for. Be sure to enter it exactly as you see it in the app’s menus and then enter a keyboard shortcut in the next box.
If you select “All Applications” in the Applications menu instead of a specific app, the shortcut you create will be applicable to all apps on the system that have that option in their menus. The “Export…” command is a good one to start with—used in conjunction with the Cmd+Shift+S shortcut, it can bring back the Save As option to many of the apps that lost it in the transition from Mac OS X 10.6 Snow Leopard to 10.7 Lion.
Changing the System Language
If you use British English outside of the UK and want your computer not to spell “humour” as “humor” and “organise” as “organize”, launch the Language & Text preference pane and hit the Edit List button under the Language tab. Scroll down to find British English among the list of languages, enable it and hit OK. Back in the languages list, you’ll find that it has replaced English at the top spot. Next, switch to the Text tab and select British English from the Spelling drop down menu. You may also want to enable “Correct spelling automatically” if it isn’t already.
Text Substitution
A handy feature of Mac OS X is its ability to speed up your typing by allowing you to set up text substitution. To get started, enable “Use symbol and text substitution” under the Text tab in Language & Text and then scroll down the table below to take a look at some of the presets.
 To add your own, hit the Add (+) button and enter both the trigger text on the left side and the replacement on the right. If you want “tnw” to be replaced by “The Next Web”, for instance, enter the former on the left and the latter on the right. Good candidates for this list are names, usernames, email addresses, addresses, salutations and other things that you end up typing repeatedly throughout the day.
But you aren’t done yet! For some strange reason, Mac OS X does not actually enable the feature systemwide when you do so in System Preferences. You now have to right-click (or Ctrl+click) inside a text box in every app where you want to use the feature (Mail, Safari, TextEdit and Twitter, for example) and enable Text Replacement under the Substitutions menu. You can also enable the other options there based on your preference.

Thankfully, this is a one-time deal and, henceforth, text replacement will always be enabled within that app until you choose to disable it. You can now type “tnw” and hit the spacebar or return key to see it magically turn into “The Next Web”. The feature works in almost exactly the same manner on an iOS device running iOS 5 as well, so you may want to set up some text substitutions on your iPad or iPhone too.
Entering Special Characters
 Mac OS X has robust support for entering special characters and symbols while typing and there are several ways to do it. For entering accented versions of characters in the English alphabet, you can hold down the keys on the keyboard to bring up relevant options. If you hold down ‘E’, for instance, you’ll see a menu come up with options to type seven accented versions of the letter. You can use the arrow keys to navigate to one of those choices or hit the number associated with it to jump straight to it.
 For entering other special characters, you need to pull up the Keyboard Viewer. If you enabled the “Show Keyboard & Character Viewers in menu bar” option in the Keyboard preference pane as described above, you will now see a new icon in your menu bar that looks like the one in the screenshot on the right. Click on it and select Show Keyboard Viewer.
With the virtual keyboard displayed, you can press and hold the Option key to see the characters on it change to a different set. Press the Shift key in addition to it and you’ll see more characters still. This is a map of all the special characters you can enter using standard keyboard keys. For example, to enter the Euro currency symbol (€), you need to hit Option+Shift+2, while just entering Option+2 will get you the trademark sign (™).

With the Option key pressed, you’ll also see five keys on the keyboard coloured orange. You can use these to enter accented characters if, for some reason, you dislike the method described above. Hit Option+E to type the accent (´) and then follow it up with a letter that supports it (like ‘a’ or ‘e’). So Option+E, followed by an ‘e’ gives you ‘é’, and Option+N, followed by an ‘a’ gives you ‘ã’.
Entering Symbols
Now that you know how to type “exposé”, how about entering a fancy forward-facing arrow (➟) or a degree celsius (℃) symbol? For those you need the Mac OS X Character Viewer. It can be brought up using the same menu that you used to access the Keyboard Viewer and this is what it looks like:

Select any of the categories on the left and then drag in a symbol from the options in the middle section into your document. You can see the list of related characters and variations of the one you have currently selected. If you plan to use a character often, you can add it to your favourites to make it easier to access. The Recently Used menu is self-explanatory and the search field lets you type in the name of a character to find it (for example, searching for “franc” will bring up the symbol for the French Franc).
If you want even more symbols, click on the gear icon on the top-left of the window and select Customize List. From the sheet that comes up, you can select more categories of symbols and various scripts from all around the world. Whether you want characters from the phonetic alphabet or technical symbols or Greek or Tibetan scripts, it’s all there. Once you’ve enabled the categories you want, hit Done and they will appear in the Character Viewer.
Typing in a Different Language
If you want to type in a different language on Mac OS X, go into the Input Sources tab of the Language & Text preference pane and select the language/script that you would like to use. You can select as many as you want and then use the Keyboard Shortcuts button to assign them a shortcut that will easily let you switch between them. The other option is to press the menu bar button that you used for bringing up the character and keyboard viewers above and it will now have your newly enabled languages.

If you select ‘Bangla – QWERTY’, you will now be able to type in Bengali. To make it easier, bring up the Keyboard Viewer after you have selected the language (the icon in the menu bar will change to reflect your new selection) and you’ll see which keyboard key corresponds to which Bengali letter. It requires some practice, but you’ll soon be typing in বাংলা (Bengali), Ελληνικά (Greek), 한국어/조선말 (Korean) or русский язык (Russian) on your Mac.
Typing Shortcuts
None of the keyboards Apple ships with its computers by default today include the number pad and various other keys like Home, End, Forward Delete, Page Up, Page Down, etc., and new Mac users are often frustrated by the seeming lack of these options. You probably already know that Cmd+C copies text, Cmd+V pastes it and Cmd+A selects it all, but did you know that Cmd+Del erases a full sentence?
Here are some of the most commonly used Mac OS X typing shortcuts while doing text entry:
- Option+Delete: Deletes a whole word.
- Option+Left/Right Arrow: Moves the cursor by one word in either direction.
- Option+Up/Down Arrow: Moves the cursor to the beginning or end of the paragraph respectively.
- Cmd+Delete: Deletes a whole sentence.
- Cmd+Left/Right Arrow: Moves the cursor to the beginning or end of the sentence respectively.
- Cmd+Up/Down Arrow: Moves the cursor to the beginning or end of the document respectively.
- Fn+Del: Forward delete.
As a bonus, you can combine the cursor movement shortcuts mentioned above with the Shift key to select text as the cursor is moved. Once you get used to these keyboard shortcuts, you’ll find yourself navigating through lengthy documents much more efficiently.
Miscellaneous Tips
To conclude this article, we’d like to share with you a couple of tips that will make typing a little less frustrating with some of the features we have described above. If you have automatic spelling correction enabled, you’ll sometimes run into the system trying to correct a spelling that you have purposely misspelt. To ignore its suggested correction, hit the Escape key before you hit the Spacebar to continue. If you find yourself typing that word often, it’s a good idea to right-click (or Ctrl+click) on it and select Learn Spelling, so that the system never tries to automatically correct it for you again.

Another neat trick is to use text substitution in combination with the special characters supported by Mac OS X. When you have to open the Character Viewer repeatedly to get to a special character that you type often, it becomes tedious, even if you have it saved as a favourite. In such a situation, it may be a good idea to set up a text substitution for it as described above. I, for instance, often find myself typing the Indian Rupee symbol and have my Mac set up so that typing “rs” replaces it with the currency symbol (₹). It makes life a little bit easier.
We hope that we were able to teach you a neat new trick or two about your Mac today, but there’s no doubt other useful text entry and keyboard-based features on Mac OS X. We keep learning new stuff all the time, and will be sure to let you know if we run into more Mac OS X features that you should know about.
Get the TNW newsletter
Get the most important tech news in your inbox each week.