
1. Introduction
This text-based tutorial is intended for people who learn fast through a combination of reading and images — it’s possible to learn HTML and CSS foundations in 15 minutes through this tutorial. For a video-based intro check out this HTML/CSS/JS Crash Course on YouTube.
HTML (HyperText Markup Language) is a markup language that is used to structure content for presentation over the web. It’s important to note that HTML is not considered a programming language because it can’t perform mathematical logic or other features that are common in programming languages. The upside is that HTML is super easy to learn!
HTML is one of the main technologies used on the World Wide Web, and it’s an essential tool to know as a web developer. You’ll have to learn HTML and CSS if you want to build anything on the web.
HTML code is sent to the web browser which can understand it and render a web page accordingly. Another essential technology in web development is called CSS, which is used in combination with HTML to style the resulting webpage.
CSS (Cascading Style Sheets) is a style sheet language that is used to style (control the appearance) the presentation of a document that is written in a markup language like HTML.
In other words, we use HTML to define the structure and the meaning of a page, while we use CSS to specify its visual style.
CSS works in combination with HTML. We can create buttons, links, and other elements using HTML and then using CSS we can change those elements’ size, color, position, etc. We have to learn HTML and CSS together to really build anything that users can actually navigate!
To illustrate the roles of HTML and CSS, let’s take a look at a simple webpage. If we strip away all HTML and CSS, this is the underlying text for our example page:
Using HTML, we can add some structure to any webpage we build. We can specify which pieces of text are links and buttons. We can add form inputs, images, and many other elements though our webpage is quite…plain if we just use HTML.
Using CSS, we can add in styles to alter the appearance of the HTML elements we specified.
2. HTML
We write HTML in files that end with the .html extension (like homepage.html).
To write HTML and CSS code, you’ll want to install a code editor. Nowadays, one of the most popular free code editors is Visual Studio Code. Before writing any code, make sure to download and install it from this link. You can find more information about VS Code in this video tutorial. You can also use something like Sublime Text.
To see the resulting page, open the .html file in a web browser. You can do this by double clicking the html file, dragging it into the browser, or using the file → open menu in your browser.
One of the most popular web browsers among developers is Google Chrome. It comes with powerful debugging tools that make our lives easier. You can download and install it on your computer by following this link.
If you feel like you need a more curated version of a curriculum like this and/or mentored help to learn HTML/CSS, check out this HTML/CSS course.
2.1. Syntax
HTML provides tags that are used to create elements on a rendered webpage. Remember, we are “marking up” a document in order to define structure. We often wrap tags around text to indicate which portions of a document are links, headings, bullet points, etc.
An HTML element is an individual component of an HTML document that provides meaning for parts of a webpage. For example, there is an HTML element called title which is used to specify which block of text is the title of the web page/document.
This is the general syntax structure for defining HTML elements, with an opening HTML tag and then a closing HTML tag:
<tagName>Some Content</tagName>
2.1.1. Tags
Most HTML elements are written with a start tag (opening tag) and an end tag (closing tag), with content in between:
<h1>This is a page heading.</h1>
<p>This is a paragraph of text.</p>
<br>
The h1 (heading) element is written with the <h1> opening tag and the </h1> closing tag, where we place the heading content between those two HTML tags. An <h1> designates something as the most important heading on a page. We also have further subheadings from h2 to h6. This is what they look like rendered, though remember you can change fonts and sizes and colors via CSS:

Similarly, we use the same pattern but with <p> tags to create a paragram element, which represents a paragraph of text.
Some elements consist of self-closing tags, like br in the example above. The <br> tag is used to add a line break to our page, and it doesn’t have any custom inner content that we need to specify (like headings and paragraphs do).
As we have seen in the example above, tag names are surrounded by angle brackets. The start tag is placed inside angle brackets, as well as the end tag:
<p>This is a paragraph of text.</p>
The end tag will usually be the same as the start tag, but it will have a forward slash / prefix, as seen in the HTML code above.
2.1.2. Attributes
Many elements accept HTML attributes that allow of us to define additional properties for those elements.
Most attributes follow this basic pattern:
<tagName attribute="value"></tagName>
- <img> element
We can add an image element on our page using the <img> tag. We define the source (src) attribute of an image (img) element to tell the browser which image to render to the page. The browser will go and fetch the image data using the src attribute and then display it for a user. Notice that the <img> element consists of a single self-closing tag, rather than an opening and closing tag.
<img src="<http://c1.staticflickr.com/9/8450/8026519634_f33f3724ea_b.jpg>">
- <a> element
We can add a clickable link to our page using the <a> tag. The href attribute in an <a> tag (anchor tag/link element) defines where the link leads the user after it has been clicked:
<a href="[www.google.com](<http://www.google.com/>)">Click me to go to Google</a>
We can give our elements unique id or class attributes so we are able to specifically target and style them in our CSS code, which we will talk more about later when we learn HTML and CSS.
2.2. Page Structure
Each HTML document should start with a basic structure which is called the HTML skeleton or HTML boilerplate. You should put this in every HTML document you create:
<!DOCTYPE html>
<html>
<head>
	<!-- Our metadata goes here -->
  <title>Page Title</title>
</head>
<body>
<!-- Our content goes here -->
</body>
</html>
The first <!DOCTYPE html> tag tells the browser that we are using HTML5 code (the latest ‘version’ of HTML).
The next mandatory element is the <html> element. It has a closing </html> that should enclose ALL the remaining content on our page. It represents the root element of our document.
Inside the html element, we always want to place the head and body elements.
In the <head> element, we place metadata about the HTML document which isn’t supposed to be visually rendered and shown by the browser. For example, we define the <title> element which is not shown on the rendered page, but the browser uses it as the window/tab title when the page is loaded. The <head> is also where we include references to external stylesheets, fonts, and scripts.
On the other hand, we place elements that should be visually rendered to the page itself inside the <body> element.
Now, let’s combine things that we learned to create our first valid web page:
<!DOCTYPE html>
<html>
<head>
  <title>Page Title</title>
</head>
<body>
  <h1>Hello World!</h1>
  <p>This is a paragraph of text.</p>
  <img src="<http://c1.staticflickr.com/9/8450/8026519634_f33f3724ea_b.jpg>" width="300" height="300">
	<!-- This is a comment in HTML. It's not shown on the page. -->
</body>
</html>
Open your code editor and place the following code into a new file. Save the file under the .html extension on your hard drive. index.html is a conventional filename, but you can use any name you like.
Even though it’s not technically required for the code to work correctly, we indent the nested elements for readability.
Next, navigate to the folder where you saved the index.html file and open it in your web browser to see the page rendered.
This is the rendered result you should see in the browser!
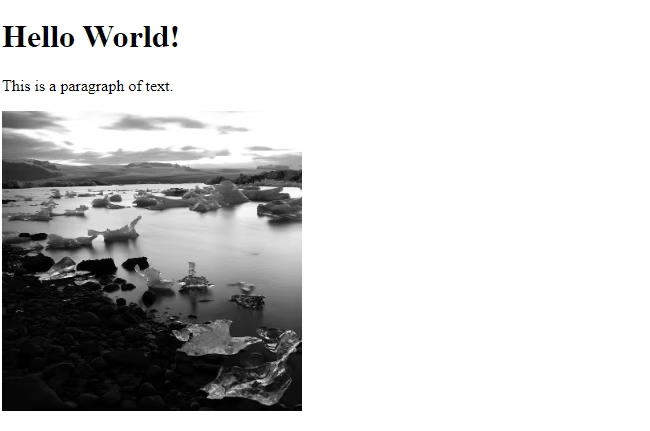
Note that we used the width and height attributes to specify a size for the image element in this simple example. In the real world, once we’ve done more on our quest to learn HTML and CSS, we would use CSS to style and specify the size of our image (img) element.
2.3. Elements
In this section, we will cover some other important HTML elements and their tags.
Make sure to check the MDN page about HTML to read more.
2.3.1. The div element
The HTML element <div> represents a division or a section in a document. It’s used to divide content on our page into ‘chunks’ or ‘sections’
<div>
	<h1>Hello World!</h1>
	<p>Example paragraph.</p>
</div>
We can wrap elements in our page inside div elements and then use CSS to style those sections of the page.
The <div> element should be used only when no other semantic element is appropriate. You can learn about semantic elements in HTML on this link.
2.3.2. Headings
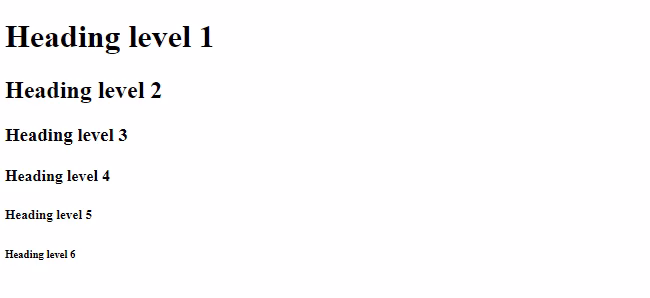
The HTML <h1>–<h6> elements represent six levels of section headings. <h1> is the highest section level and <h6> is the lowest.
Here is the code demonstrating all six heading tags which are used in HTML documents:
<h1>Heading level 1</h1>
<h2>Heading level 2</h2>
<h3>Heading level 3</h3>
<h4>Heading level 4</h4>
<h5>Heading level 5</h5>
<h6>Heading level 6</h6>
When you save that code and open the HTML file in the browser, you should get the following result:
To automatically reload your HTML page after you save any changes in the Visual Studio Code editor, check out the Live Server extension presented in this video tutorial.
It’s important to note that we don’t want to use the heading tags just to change the size of the element. These elements should be used to define headings on our page and provide semantic meaning. Content in an <h1> should be a more “important” heading than content in an <h2>, for example. We can use CSS to change font-sizes when needed later on when we’re more advanced in our progression of learning HTML and CSS.
2.3.3. Paragraphs
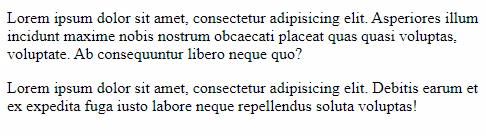
The HTML <p> element represents a paragraph of content.
Here’s an example with two paragraph elements:
<p>Lorem ipsum dolor sit amet, consectetur adipisicing elit. Asperiores illum
	incidunt maxime nobis nostrum obcaecati placeat quas quasi voluptas, voluptate.
	Ab consequuntur libero neque quo?</p>

<p>Lorem ipsum dolor sit amet, consectetur adipisicing elit. Debitis earum et ex expedita
	fuga iusto labore neque repellendus soluta voluptas!</p>
The code above would yield the following result in the browser:
Paragraphs are block-level elements which means that each <p> element will take a new line and a separate block on the rendered page. Similarly to that, heading (h1–h6) elements are also block-level. If we write two headings one after another in the code, they will still be placed in separate lines on the page that is rendered in the browser.
On the other hand, we also have inline-level elements in HTML. These don’t take up their own line, but they instead get placed in the same line (content on the left and the right side of the inline element is allowed). Try putting an <a> tag inside a <p> and see what happens!
Read this Stack Overflow answer to learn more about inline and block elements.
2.3.4. Lists
We can also write lists in HTML, which come in two main flavors: ordered and unordered.
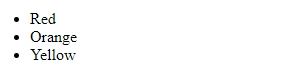
To make an unordered list (with bullet points) we first write a parent <ul> element. We then add individual <li> (list item) elements as children of the <ul>. Each <li> becomes a bullet point in our list:
<ul>
  <li>Red</li>
  <li>Orange</li>
  <li>Yellow</li>
</ul>
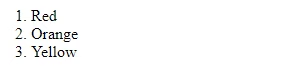
To make an ordered list (numbered) we follow the same pattern but use an <ol> element as the parent:
<ol>
  <li>Red</li>
  <li>Orange</li>
  <li>Yellow</li>
</ol>
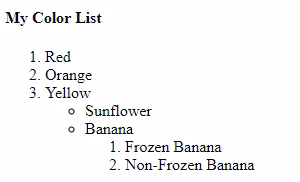
We can even combine and nest lists:
<h4>My Color List</h4>
<ol>
  <li>Red</li>
  <li>Orange</li>
  <li>Yellow
    <ul>
      <li>Sunflower</li>
      <li>Banana
        <ol>
          <li>Frozen Banana</li>
          <li>Non-Frozen Banana</li>
        </ol>
      </li>
    </ul>
  </li>
</ol>
There is also an HTML <dl> element (description list) which you can learn more about on this MDN page.
2.3.5. Tables
In HTML, we can use the <table> element to create tables and display tabular data in rows and columns of table cells.
A word of warning: the markup for creating tables can be a little difficult to remember when you’re just starting out. We often end up using multiple elements, including <table>, <thead>, <tbody>, <tr>, <th>, and <td>. You can refer to existing HTML tables in other websites if you need a refresher on this.
Inside of the <table> tags, we use the <thead> element to specify a table header, and the <tbody> element to specify the table body.
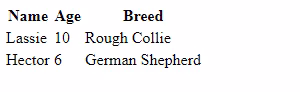
Each table row is specified by the <tr> element, and every cell by the <td> element. Here is an example structure of a HTML table:
<table>
  <thead>
  <tr>
    <th>Name</th>
    <th>Age</th>
    <th>Breed</th>
  </tr>
  </thead>
  <tbody>
  <tr>
    <td>Lassie</td>
    <td>10</td>
    <td>Rough Collie</td>
  </tr>
  <tr>
    <td>Hector</td>
    <td>6</td>
    <td>German Shepherd</td>
  </tr>
  </tbody>
</table>
2.3.6. Forms
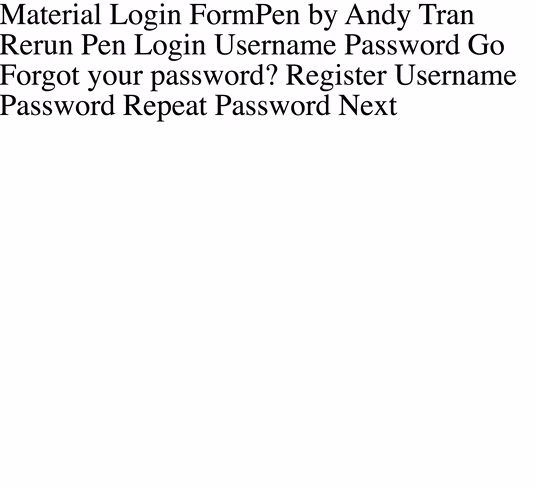
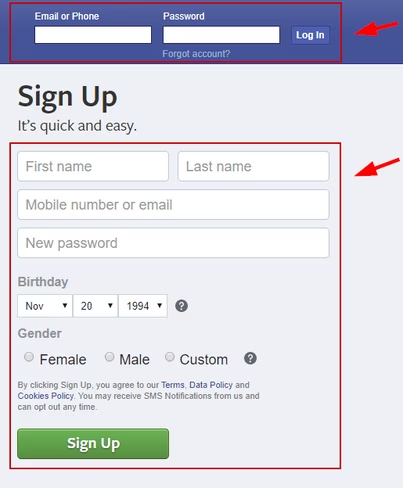
The <form> element is used to create forms. On its own, the form won’t look like much until we add in different inputs. We can fill a form with text fields, radio buttons, checkboxes, dropdown selections, submit buttons, and many other types of inputs.
Here are examples of two forms (login and sign up) which are present at the Facebook homepage:
The <form> tag has two main attributes: action and method:
<form action="/login" method="POST">
	<!-- all inputs go here -->
</form>
- **action** attribute – specifies the address or the path where the form is submitted.
- **method** attribute – specifies the type of the HTTP request which is used when the form is submitted.
If you’re just starting out, don’t stress too much about how forms work. To make them functional, we need to learn server-side development so we can create back-end code that can accept and process the forms that we submit. Alternatively, we can use JavaScript to handle form submissions. Either way, with just plain-old HTML our forms aren’t going to do anything for us except look pretty.
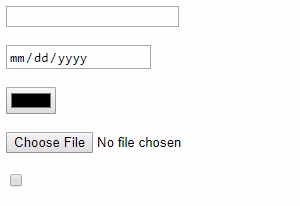
The <input> element is the most common form element.
It’s an extremely versatile element. By simply varying the type attribute we can create many different kinds of inputs. Here are some examples:
<input type="text">
<input type="date">
<input type="color">
<input type="file">
<input type="checkbox">
You can learn about the available input elements on this link.
Here is an example login form:
<form action="/login" method="POST">
	<label for="username">Username:</label>
	<input id="username" type="text">
	<label for="password">Password:</label>
	<input id="password" type="password">
	<button>Login</button>
</form>
We can use the <button> element or the <input type="submit"> element to create a button which the user can click to submit the form.
Per the rules of HTML, each input element should have its <label> element which you can read more about on this MDN page. A label’s for attribute and an input’s id attribute enable us to connect the label element with the corresponding input. This is particularly important for people who rely on screen readers. Labels will help screenreaders “understand” the purpose of a given input.
To learn more about forms in HTML, make sure to check all the MDN guides available on this page.
3. CSS
CSS (Cascading Style Sheets) is a style sheet language used for website layout and design. You can think of CSS as a way to add ‘adjectives‘ to our HTML document, to style it and make it look better visually. To learn HTML and CSS effectively, we have to understand how the two languages combine, one as structure, the other as style.
Similarly to HTML, CSS is not considered a programming language because it doesn’t have common programming logic features. Because of this, the basic syntax of CSS is super easy to learn. The main challenge in learning CSS is remembering the hundreds of different style options you can alter.
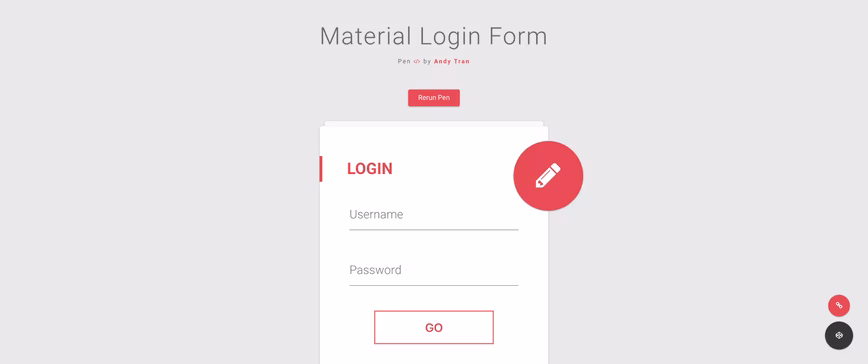
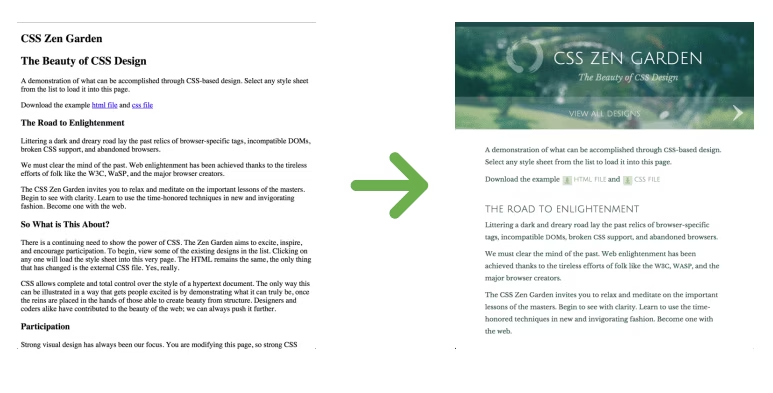
Image: Example of an HTML page before and after using CSS:
3.1. Introduction
In CSS, we write code to target and select specific HTML elements on our page. We can then use a huge number of available CSS properties to style those elements. To learn HTML and CSS properly, we have to understand how CSS interacts with HTML — I would compare HTML to the structure of a house, and CSS to the paint and material you use to modify the walls to make it look like anything you want.
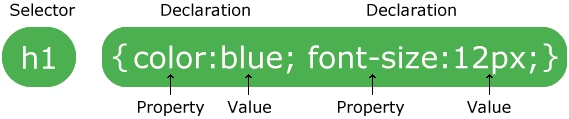
The general syntax structure of CSS looks like this:
selector {
  property: value;
  anotherProperty: value;
}
Here are some examples:
/* Make all h1 elements purple and 56px font */
h1 {
  color: purple;
  font-size: 56px;
}

/* Give all img elements a 3px red border */
img {
  border-color: red;
  border-width: 3px;
}
3.1.1. How to add CSS
Before diving deeper into the CSS syntax and all its power, let’s first review where to write CSS code and how to add it to our HTML documents to complete our understanding of how to learn HTML and CSS.
There are 3 main wayward s we can write our CSS styles: inline CSS, internal CSS, and external CSS.
- Inline CSS (not preferred)
We can use the style HTML attribute to add styles to a specific element, directly inside the HTML code (adding styles directly to the HTML tags).
This is considered bad practice because it makes our code messy and harder to read. Generally, we want to separate our CSS code from the HTML code to make things more organized and reusable.
Here are some examples of inline CSS added directly to HTML tags:
<h3 style="color: pink;">blah blah blah</h3>
<h3 style="color: pink;">knock knock</h3>
<p style="color: yellow;">blah blah blah</p>
- Internal CSS (not preferred)
We can also write our CSS styles inside of a css <style> element which we typically place in the <head> element of our HTML document.
It’s better than the previous approach because our code is isolated inside the <style> element in the <head> of our document, rather than being spread across individual HTML elements.
<html>
  <head>
    <title>Example Title</title>
    <style>
      h1 {
        color: red;
      }
    </style>
  </head>
  <body>
    <h1>Test Heading</h1>
  </body>
</html>
- External CSS (preferred)
The conventional and recommended way of writing CSS is to use an external file. This allows us to separate our HTML and CSS code, and it makes it much easier to reuse the same CSS stylesheet across multiple HTML documents.
Start by writing your CSS in a file ending in the .css extension. To include those styles in an HTML document. To link to an external CSS file in our HTML document, use the <link> element with an href attribute referencing the path to your CSS file, as shown in the example below:
- index.html
- style.css (located in the same folder)<html> <head> <title>Example Title</title> <link rel=”stylesheet” href=”style.css”> </head> <body> <h1>Test Heading</h1> </body> </html>
3.2. Colors
h1 {
  color: red;
}
There are hundred of CSS properties we can use to style our HTML elements, which can be a little overwhelming at first. A good place to start is color. In CSS, we can use the color property to change the color of elements.
We can use built-in CSS color names, hexadecimal color codes, or RGB color codes (there are even more options, but we’ll start with those three).
- Color names
CSS recognizes many pre-defined color names like ‘red’, ‘pink’, ‘violet’, and even ‘blanchedalmond’. These built-in colors useful for quickly changing the color of something, but they aren’t used much in professional applications which have their own brand colors and scheme.
The following example makes all <h1> elements red:
h1 {
  color: red;
}
You can find a list of CSS colors on this link.
- Hexadecimal (HEX) colors
To specify your own colors, you can use hexidecimal color codes. A hexadecimal color is specified with a color code following the format #RRGGBB
RR (red), GG (green) and BB (blue) are hexadecimal values between 00 and FF specifying the color. (Hexadecimal is base-16, meaning that each digit has 16 possible values).
h1 {
  color: #FF0000;
}
In the example above, we get the red color because the red component is set to the highest value (FF), while the green and red channels are set to the lowest (00) value. Most of the time, you’ll find a color that you like using a visual color picker and then copy and paste the hex color code into your stylesheet.
You can play more with HEX colors using this calculator.
- RGB colors
An RGB color value is specified with rgb(red, green, blue)
Each parameter (red, green, **and blue) defines the color, as an integer between 0 and 255.
h1 {
  color: rgb(255, 0, 0);
}
This will also set the h1 to the red color because the red channel has the highest value specified (255), while two other channels are set to 0.
Read more about RGB and other CSS colors on this link.
3.3. Fonts and text
In CSS, we have different properties that we can use to manipulate text and fonts in our document.
Some of the most commonly used text-related CSS properties include:
- font-family – changes the font of the targeted text
- font-size – controls how big the font is
- font-weight – controls how thick the font is (for example, we can make bold text using this property)
- line-height – controls how much space a line of text takes up
- text-align – sets the alignment of the text (left, right, center)
- text-decoration – to add decorative lines on text { font-family: “Arial”, sans-serif; font-size: 20px; font-weight: bold; line-height: 2; text-align: center; text-decoration: underline; }
Google Fonts provides a variety of free fonts.
3.4. CSS Selectors
In CSS, we have three main types of selectors: element selectors, class selectors, and id selectors.
3.4.1. Element selector
We use the element selector to target all the instances of a given predefined HTML element. It looks like this with a div and paragram element:
<div>
  <p>You say yes</p>
  <p>I say no</p>
</div>

<div>
  <p>You say goodbye</p>
  <p>I say hello </p>
</div>

div {
/*Give all divs a purple bg*/
  background: purple;
}

p {
/*Make all p's yellow*/
  color: yellow;
}
To change the background of an element, we use the CSS background property. You can set your background to colors, images or even gradients in CSS.
3.4.2. Class selector
As we have briefly mentioned in the HTML section, we can use the class HTML attribute to give one or more elements a class which we can then use to target those every element tagged with that class and style them in CSS together.
Here is a code example:
<div>
  <p class="highlight">You say yes</p>
  <p>I say no</p>
</div>

<div>
  <p class="highlight">You say goodbye</p>
  <p>I say hello </p>
</div>

div {
/*Give all divs a purple bg*/
  background: purple;
}

.highlight {
/*Make anything with class 'highlight' yellow*/
  background: yellow;
}
The class selector starts with the dot . prefix followed by the class name that we are targeting.
3.4.3. ID selector
Similarly, when we want to target a single, unique element on the page we can give it an id attribute in HTML. We can use the specified id to target the unique element via CSS and give it its own style:
<div>
  <p>You say yes</p>
  <p>I say no</p>
</div>

<div>
  <p>You say goodbye</p>
  <p id="special">I say hello </p>
</div>

div {
  background: purple;
}

#special {
/*Make the element w/ id 'special' yellow*/
  color: yellow;
}
The id selector starts with the hash # prefix followed by the unique id name.
It’s important to note that id attributes should be unique on a page. We shouldn’t use a single id more than once in an HTML document. If we need to target multiple elements, we should use a single class to define and target them all.
3.4.4. More advanced selectors
There are also more advanced selectors available in CSS, other than the three main ones that we covered (element, class, and id selectors) – like the attribute selector.
Make sure to check out the following MDN page to learn more about the other available CSS selectors, combinators, pseudo-classes, and pseudo-elements.
When dealing with conflicting selectors, CSS has a way of calculating which style overrides the other styles. To learn more about that, make sure to check out this video on CSS Specificity.
3.5. The Box Model
In a document, each element is represented as a rectangular box. In CSS, each of these rectangular boxes are described using the standard box model. This is a very important intersection between HTML and CSS that is essential to grasp as we learn HTML and CSS.
Each box has four edges: the margin edge, the border edge, the padding edge, and the content edge.
We can style each piece individually using CSS (click each property to learn more about it):
Image: Graphical illustration of the box model
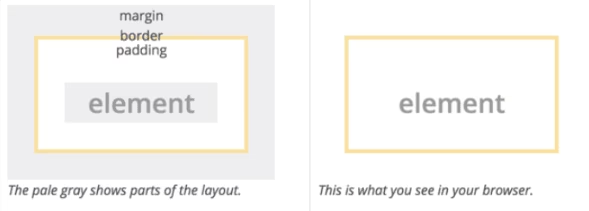
Based on this model, we can change each component via the corresponding CSS properties.
Here are some examples of how to manipulate these properties using CSS:
div {
  /* Content - width and height */
  width: 300px;
  height: 200px;

  /* Border */
  border: 2px solid blue;

  /* Padding */
  /* padding: 10px; */
  padding-left: 40px;

  /* Margin */
  margin: 100px;
  /*margin-top: 500px;*/
}
4. Conclusion
HTML and CSS are two essential technologies in web development. In this tutorial, we breezed through the fundamental topics related to HTML and CSS development in our quest to learn HTML and CSS in 15 minutes, but this is only the start! It’s worth noting that these technologies are foundational to modern web development, and there is much more to learn about HTML and CSS moving forward — but hopefully you have the foundation now.
For example, we can use CSS to create animations, page layouts and grids, make our page change on mobile browsers, and much more. It’s easy to build and extend on what we learned Check out some of the existing tutorials to learn more about some of these topics:
- CSS Specificity: What You Need To Know
- Why You Should Be Using CSS Variables
- CSS Grid
- CSS Calc()
- Sass Crash Course
- The Only 2 CSS Properties You Should Animate
- I Just Learned a New CSS Property
After you feel like you have a good grasp of the HTML and CSS fundamentals, you may want to look into learning JavaScript. If HTML represents the skeleton (structure) of our page, and CSS represents the visuals/styles, then we can consider JavaScript the brain of our page. We use JavaScript to add interactivity to our page – it’s a way to add programming logic to our web pages. If you want to leverage your knowledge of HTML, CSS and JavaScript to a software engineering career with a more curated curriculum and personalized mentorship, this software engineering bootcamp might help. There are also tons of courses on Udemy, tutorials on freeCodeCamp
These 3 major technologies (HTML, CSS, and JS) combined give us endless possibilities and a lot of power when it comes to web development and web design. With this knowledge, you can start practicing with your skills — and eventually, you’ll build whatever you want on the web.
Get the TNW newsletter
Get the most important tech news in your inbox each week.