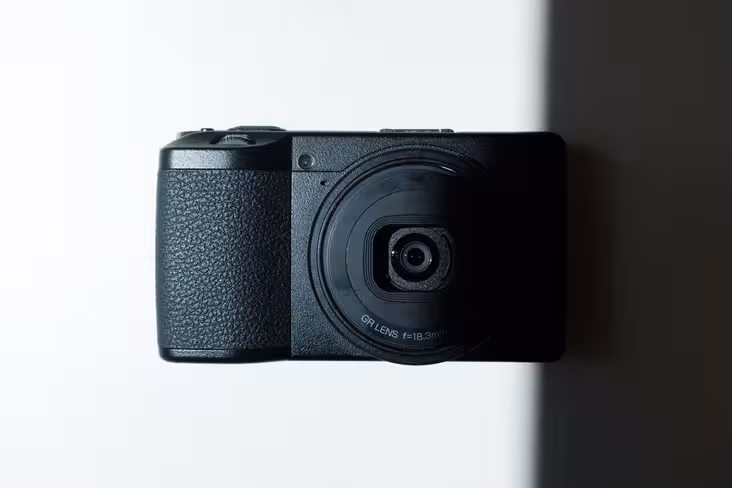
Ricoh might not be the first brand that pops to mind when thinking about photography, but its GRII camera won the hearts of photographers around the world with its excellent image quality, sturdy but stylish build, and enviously compact body.
To many, it was – and still is – the best alternative to exorbitantly priced Leica street-shooters and bulky DSLRs. In fact, its stellar reputation has kept it among the top options for street photographers years after its release in 2015.
So when earlier this year Ricoh announced the successor to this iconic piece of tech, the GRIII, I knew I had to get my hands on one. The camera-maker was kind enough to lend me a GRIII review unit in April, and after spending two and a half months with it, I’m finally ready to share my thoughts.
But before we get into the technicalities, let me walk you through my review process.
How I review cameras
For starters, I’m more of a photographer than an actual tech reviewer. Although I will go over the list of specs and some of the GRIII’s more noteworthy features, my piece mostly zeroes in on my experience with the camera – and the pictures I got out of it.
You can read more about my approach in my review of Fujifilm’s XT-3; I talk more about it under the “Do camera reviews even matter?” section.
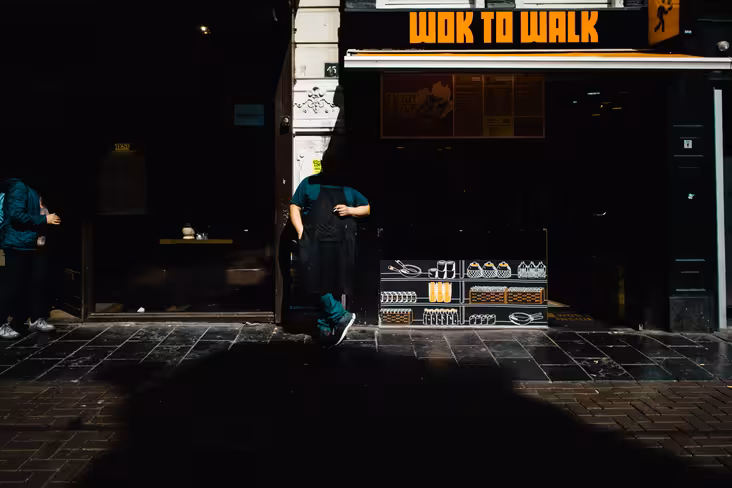
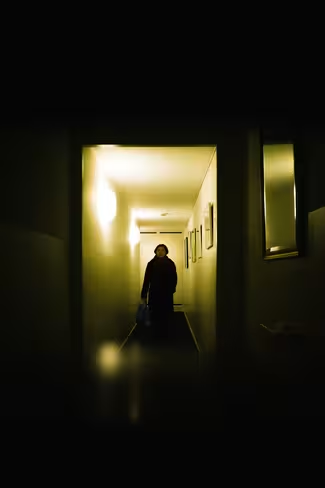
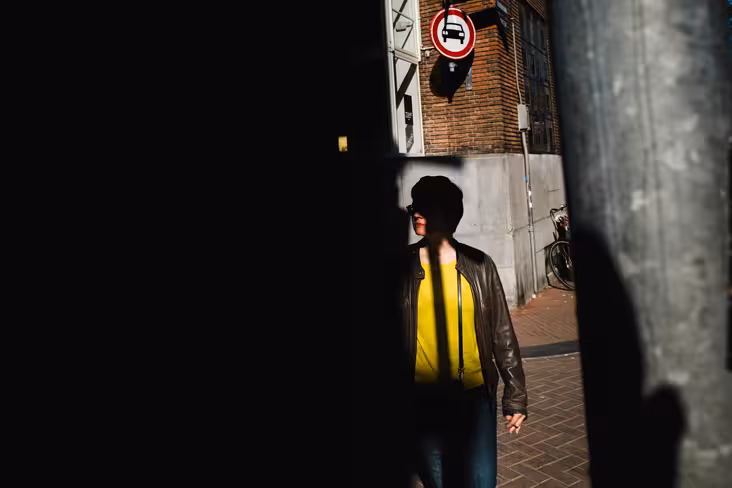
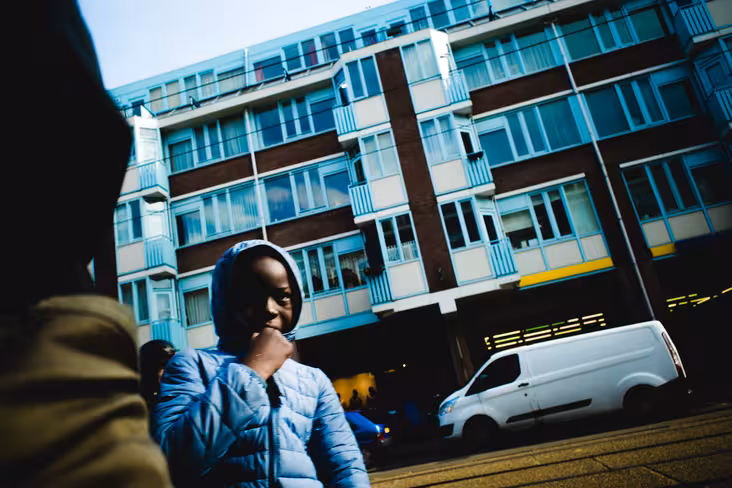
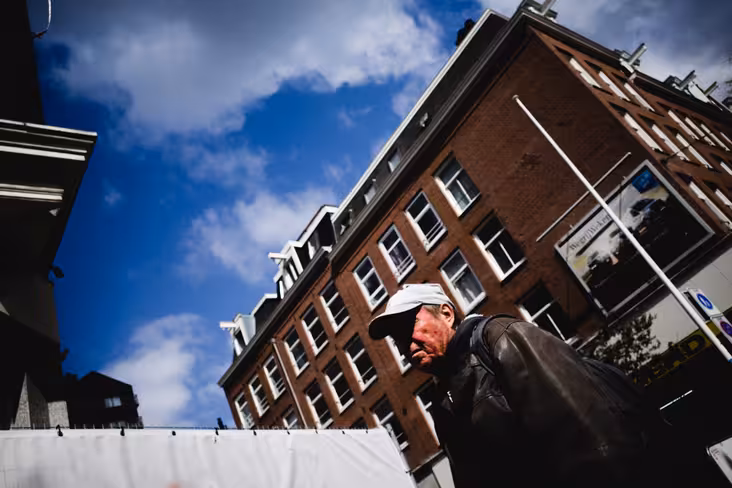
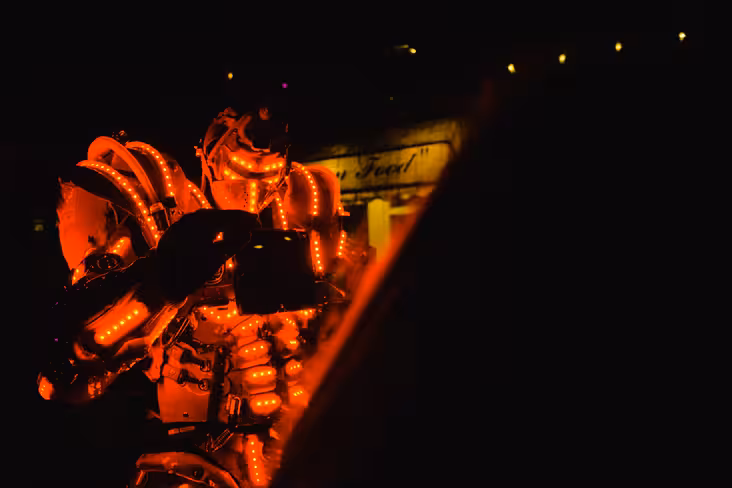
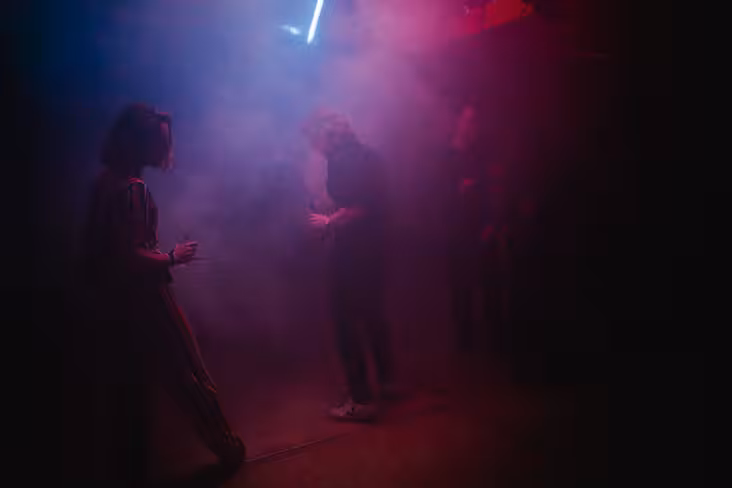
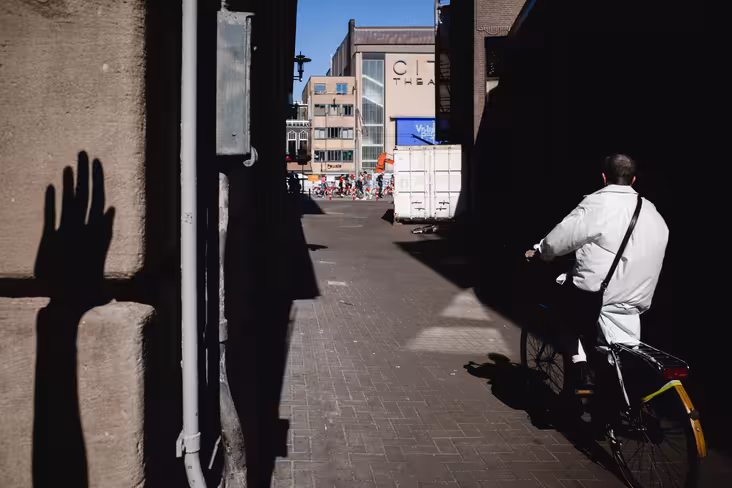
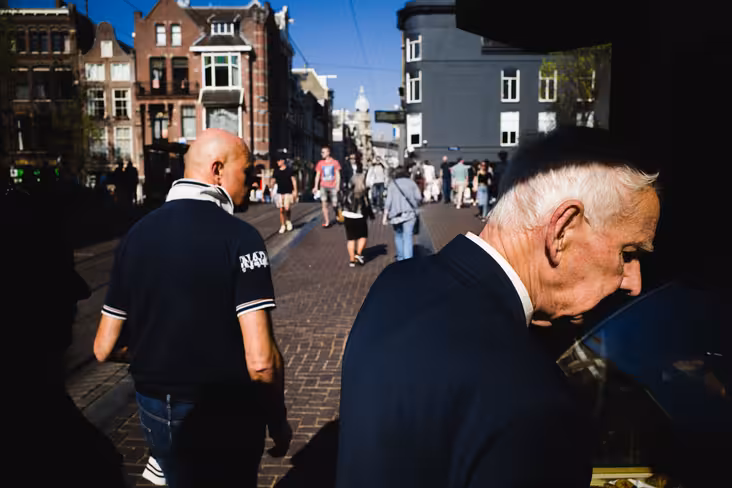
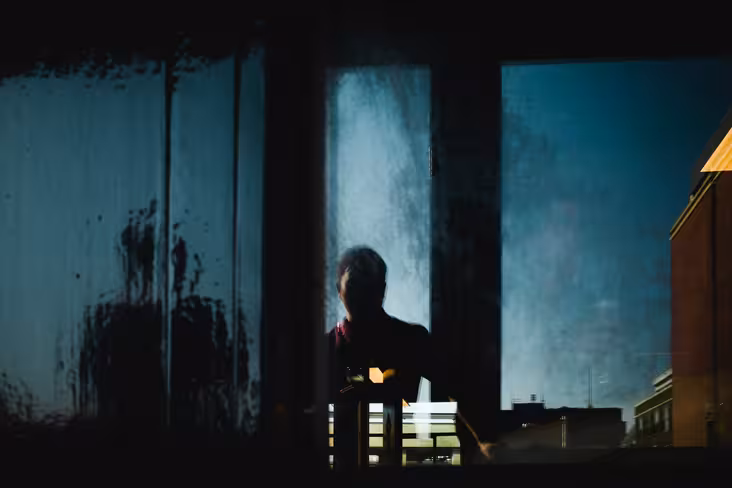
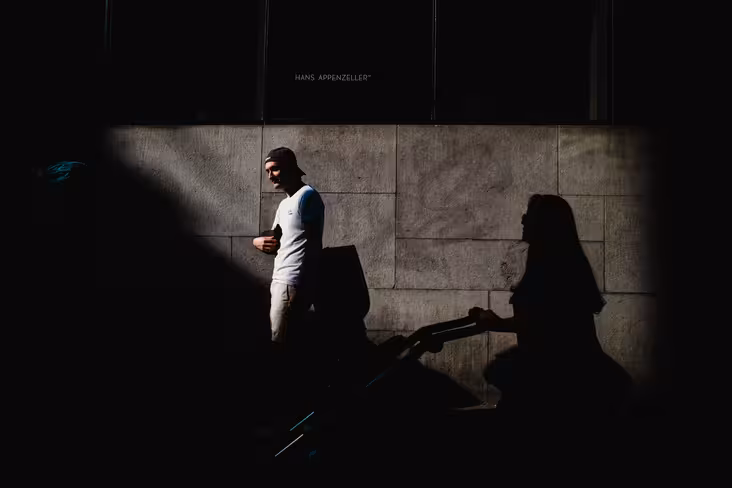
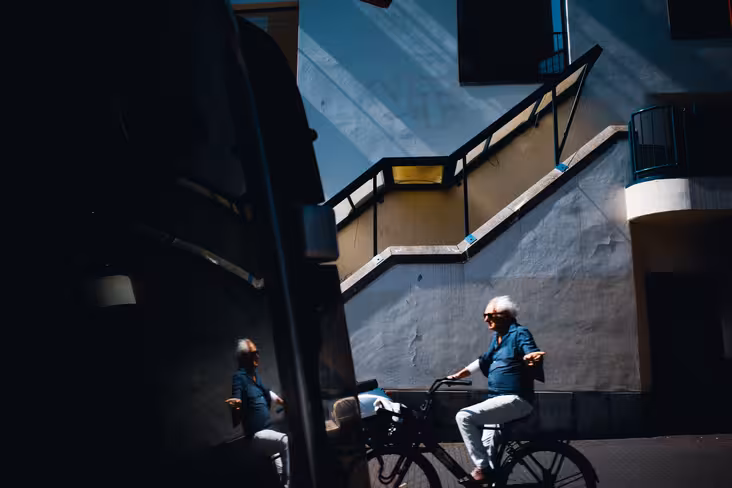
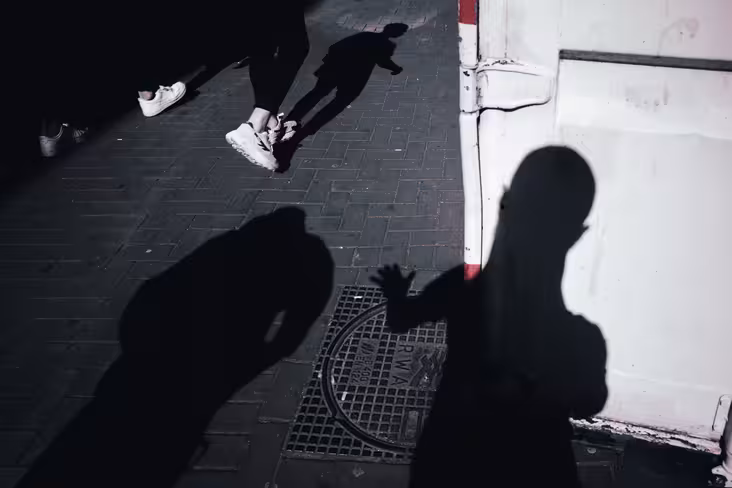
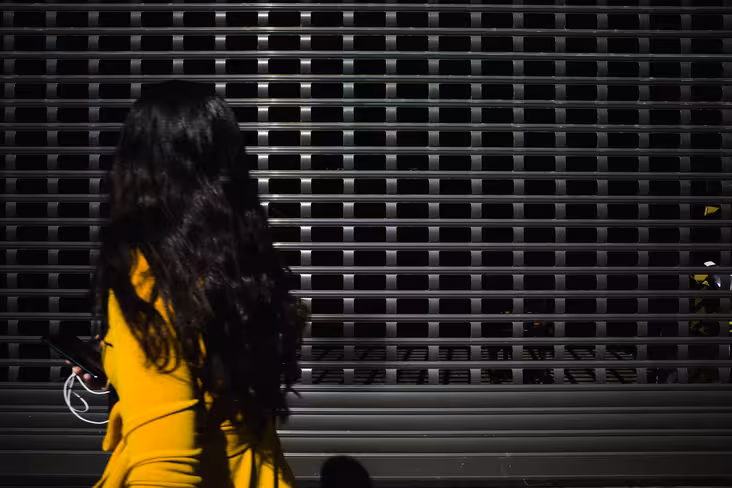
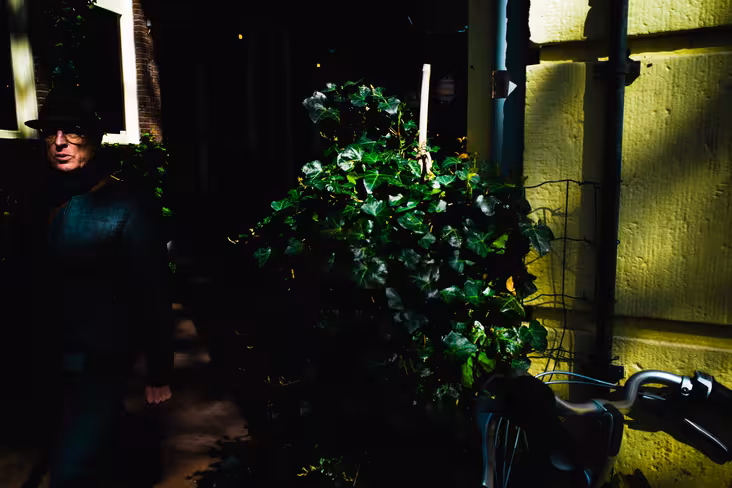
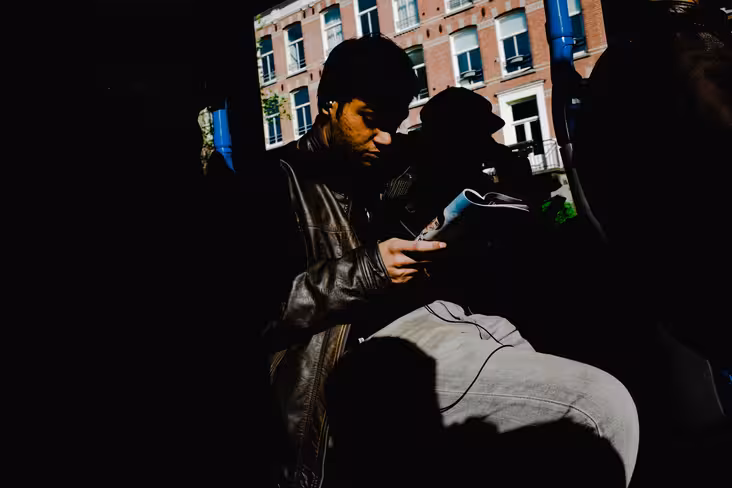
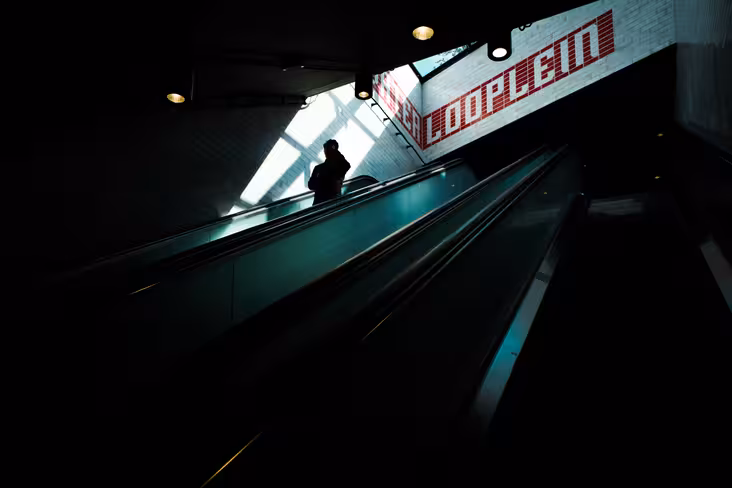
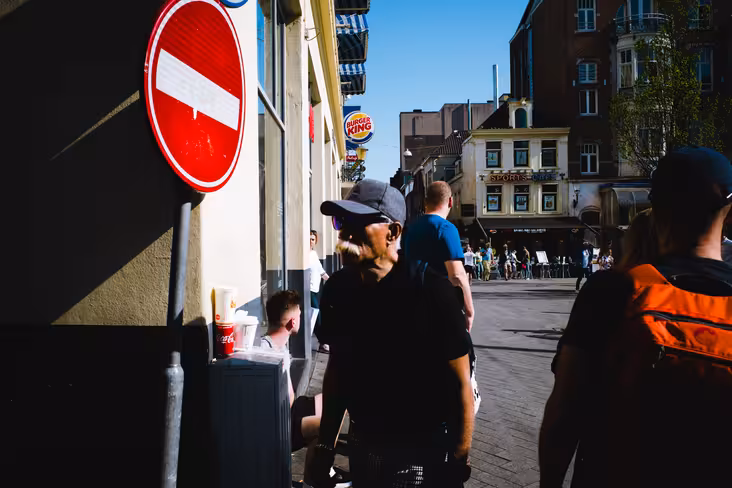
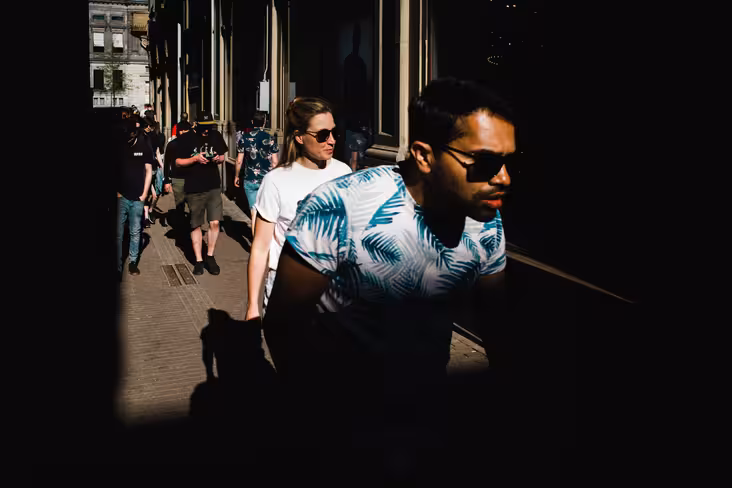
All images in this write-up have been edited to my taste, but I have also included out-of-camera samples for the sake of transparency. That ought to give you a better idea of how the camera processes images internally, and what you can expect to achieve by toying around with the RAW files in Lightroom.
So what’s new about the Ricoh GRIII?
Those familiar with the GRII will swiftly notice that not much has changed with its successor on the outside. Indeed, Ricoh has kept the simplistic design, and souped up the innards of the camera.
That said, there are a few significant changes, the most striking of which is probably the removal of the GRII’s signature pop-up flash – so if you were hoping to shoot with flash, you will have to cop an external module and attach it to the hotshoe.
Now onto the new additions.
The most notable improvement over its predecessors is that the GRIII comes with a small in-body image stabilization (IBIS) system, which works surprisingly well – even in slow shutter speeds of 1/10 and below. You can feel the IBIS by shaking the device slightly while holding it.
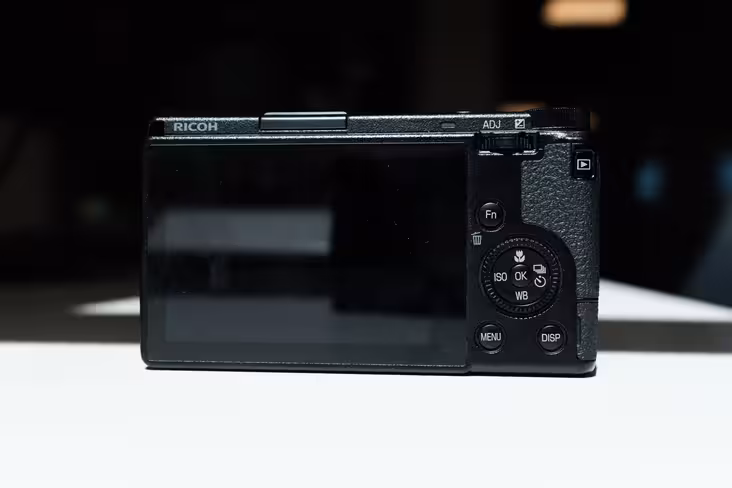
The camera also sports a revamped 3-inch LCD touchscreen with 1,037,000 dots. Sure, this isn’t anything special, but the screen is remarkably responsive to touch, which makes it easy to focus on subjects in fast-moving environments.
As far as the rest of the specs go, here is the rundown:
- 24 megapixels (up from 16 megapixels in the GRII)
- Maximum resolution of 6,000 x 4,000 pixels
- Base ISO of 100 (capable of shooting RAW up to ISO102,400, though it should be noted image quality drops significantly in the higher settings)
- APS-C sensor (23.5mm x 15.6mm) – so 1.5x crop factor
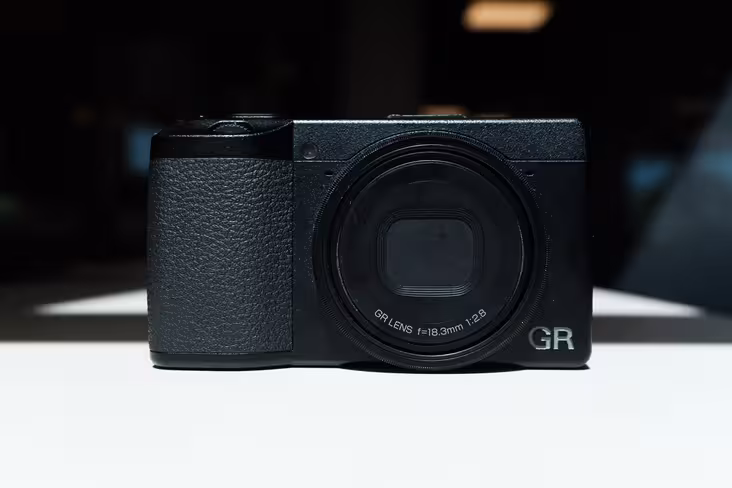
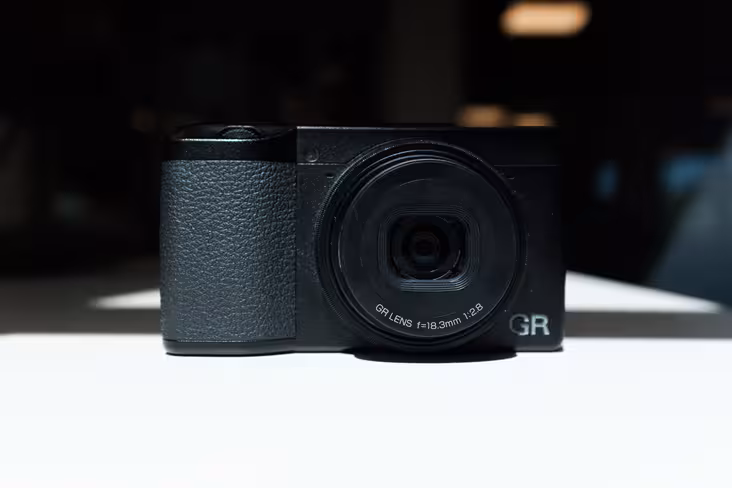
- Approximately 28mm lens equivalent (18.3mm native)
- Maximum aperture of F2.8
- Ability to shoot video in up to 1,920 x 1,080 pixels and 60 frames per second for up to 25 minutes
- Built-in stereo microphone
- Built-in dust removal feature
- 1,350 mAh battery
- USB-C connector
- Dimensions: (W) 109mm x (H) 62mm x (D) 33mm (4.29″ x 2.44″ x 1.3″)
- Weight: 257g including the battery
Okay, that about sums it up. But how do these specs translate in performance. Let’s find out.
The GRIII in action
In line with its simplistic design, the GRIII is incredibly intuitive to use.
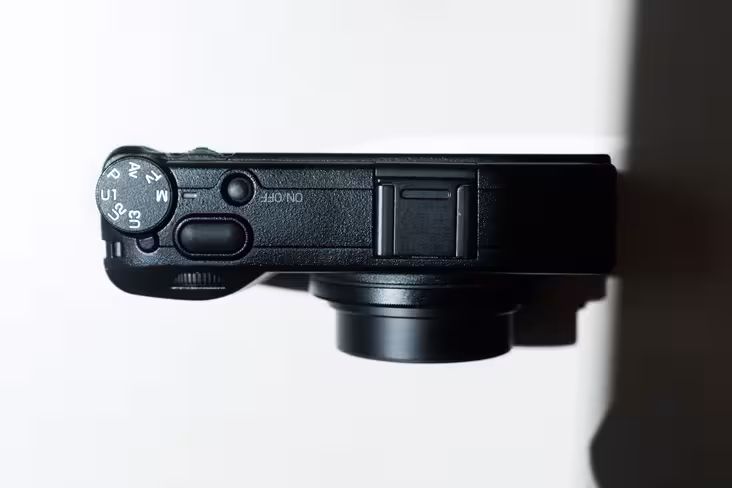
The camera has a nifty control lever on the upper-right rear side, which lets you comfortably adjust the shutter speed on the go. You can also play with the aperture settings with the front e-dial lodged right next to the shutter release button.
There is also a command dial on the rear side of the unit, which you can use to control the focus or switch between pics in playback.
Pressing the rear control lever will open up the quick menu, where you can toggle between GRIII’s built-in camera profiles, focus modes, and other shooting settings.
While you can’t switch between the built-in camera profiles when editing photos in Lightroom, the GRIII lets you swap between different profiles directly from the device. This is pretty convenient in case you need to upload the images online, but only have access to your phone.
While I was pleasantly surprised by the colors of the built-in camera profiles, the HDR Tone simulation didn’t seem to handle skin tones particularly well. Indeed, it made the face of one of my (perfectly healthy) colleagues appear somewhat sick and ghostly.


Really though, that was a minor nuisance at best – and hardly an inconvenience considering that I prefer to shoot in the standard camera profile.
Coming from the Fujifilm X100F, the only thing that took some getting used to was shooting without a viewfinder.
For the record, Ricoh sent me an external optical viewfinder to try out, but my experience with it was far from smooth. Since none of the screen contents are reflected on the viewfinder, shooting with it becomes more of a guessing game. It’s also worth noting that both external viewfinder options Ricoh offers come with a limited rate of view (so you won’t see the full frame).
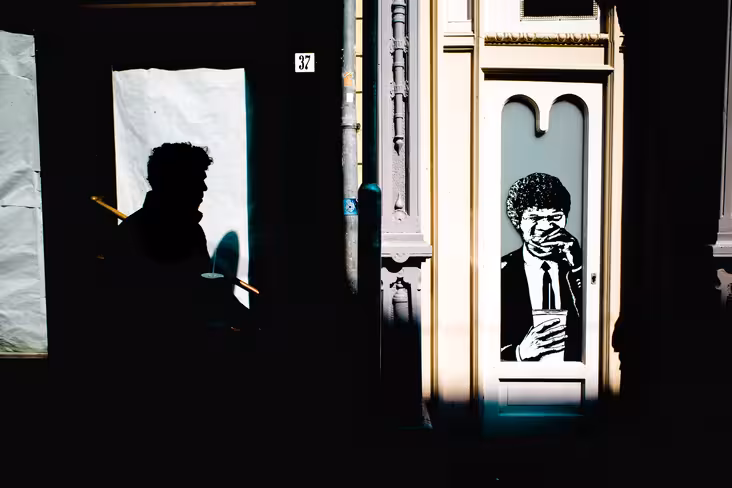

Once I got accustomed to looking through the screen though, I absolutely loved shooting with the GRIII. It forced me to be a lot more responsive to my environment and take snaps that I might’ve otherwise skipped on.
The camera also comes with a snap-focus feature, which lets you focus on a pre-set distance when you hard-press the shutter release. Combined with the IBIS system, that feature made me take a lot more shots one-handed or from waist height (hence the skewed angles in some of the pictures in the review).

What makes the snap-focus feature especially neat is that you can still autofocus on your subject of choice by half-pressing the shutter release; the GRIII will only default to the pre-set distance, if you hard-press the shutter quickly.
Speaking of the autofocus, the GRIII is pretty snappy. It’s on par with other compact street-shooters like the X100F in decent lighting conditions, and perhaps a fraction slower in low light.
Excluding the few photos I snapped with the HDR Tone film profile, the GRIII produces sharp, well-toned images straight out of the camera. That said, RAW files are also pretty flexible, so you can always touch pictures up to your liking in post-production. I was impressed with the details I was able to recover in underexposed images.
To be fair, I did notice some heavier-than-normal vignetting when bringing down the shadow levels, but that was hardly noticeable unless I pushed it to the limits.
The GRIII does alright in the battery life department, but don’t expect wonders from its 1,350 mAh capacity. On good days, I averaged about 300 images with burst mode, but the number will likely drop to 150 to 200 images if you shoot in single frames.
Ricoh advises sticking to the charger included in the box, but I routinely used my USB-C phone charger to juice up the GRIII without any issues. Of course, you can always bring a power bank to breathe some life into the camera on the go – or grab a couple of backup batteries.
There is a huge upside to the puny battery though: the GRIII is unbelievably compact. It’s so lightweight that I often found myself reaching for my pocket to make sure it was still there; and thanks to the retractable lens design, it literally fits into any pocket.
What about the downsides?
Crispy image quality and ultra-compact form factor aside, there were a few things about the GRIII that genuinely bugged me.
For one, the lens ring – the plastic piece you remove to install lens adapters and other accessories – gets awfully rickety after screwing it on and off a couple of times.
Even though I used the camera somewhat moderately, mine got so wobbly it eventually started falling off randomly. It’s a miracle I didn’t lose it while shooting on the streets (though I came close on a few occasions).
The leafs of the retractable camera cover also feel worryingly feeble, and open up as soon as you apply the least amount of pressure. Some users have also had mishaps with the leafs getting stuck, though I didn’t encounter this issue when using the GRIII.
Manual focus is also pretty cumbersome. Ricoh has nailed the autofocus system, but relying on manual focus is a truly rage-inducing affair. Since the lens comes without a focus ring, you have to use the command dial to fine-tune the focus – and this could be a hassle.
The worst part about the GRIII’s manual focus is its focus peaking system. Ricoh offers two separate peaking options – highlight edge and extract edge – which are supposed to make it easier to pinpoint where your lens has focused, but neither is particularly helpful.
The highlight outline is tough to spot, and there is no option to change the default peaking color, which – for some reason – Ricoh has set to white. Fujifilm, Nikon, and Canon systems, for instance, let users choose between several different colors, which is handy since you can opt for a color your eyes are more responsive to.
The GRIII focus peaking system is so poorly designed I have legitimately seen better alternatives on smartphones. Indeed, the focus peaking implementation in my Samsung Galaxy S8 is miles ahead of the one in the GRIII. How ridiculous is that?

This brings me to my biggest qualm with the GRIII: the new dust removal feature.
Unlike its predecessor, the GRIII packs a built-in dust removal function, which wipes your sensor each time the camera is turned on and off. Despite this addition, though, I noticed a tiny speck of dust had gotten stuck on my sensor – only a couple of months after using the camera. Executing manual dust removal didn’t seem to shake off the speck either.
The GRII notoriously suffered from dust issues and Ricoh enthusiasts hoped the dust removal option will solve these. Unfortunately, that doesn’t seem to be the case so far.
Ricoh warns the camera comes without weather sealing, but it’s disappointing the dust removal feature in a $900 camera struggles to perform as intended – especially when servicing is pretty steep.
In all fairness, the speck on my sensor is pretty tiny – and might even go unnoticed by most people. Still though, I’ve been unable to unsee it since laying my eyes on it a few weeks back. So much so, I’ve gone back to shooting with my X100F.
If you’re less finicky about this stuff than I am, then I won’t worry about dust all that much. But if you’re a perfectionist, buckle up to shell out a couple of hundred bucks to get the dust out of the camera.
Should I get one?
Despite its shortcomings, the GRIII undeniably remains one of the strongest contenders in the hobbyist and street photography markets.
Its intuitive design, pocketable body, and sharp images make it an ideal choice for both newbies and seasoned professionals – but perhaps not for the same reasons.
While the GRIII will easily fulfil the needs of beginners looking for a snappier camera than the one on their smartphones, experienced photographers (like Sean Tucker, for instance) will likely prefer using it as a secondary shooter – a handy addendum to their main photography kit.
At $900, the GRIII isn’t exactly cheap, but it’s still relatively affordable factoring in the value it offers. Those less obsessed with pixel density and camera-shake blurring can always opt for the older GRII, which retails at about $550 these days. Personally though, I’d go for the GRIII.
You can grab the GRIII for $900 bucks from Amazon by clicking here or from B&H by clicking here.
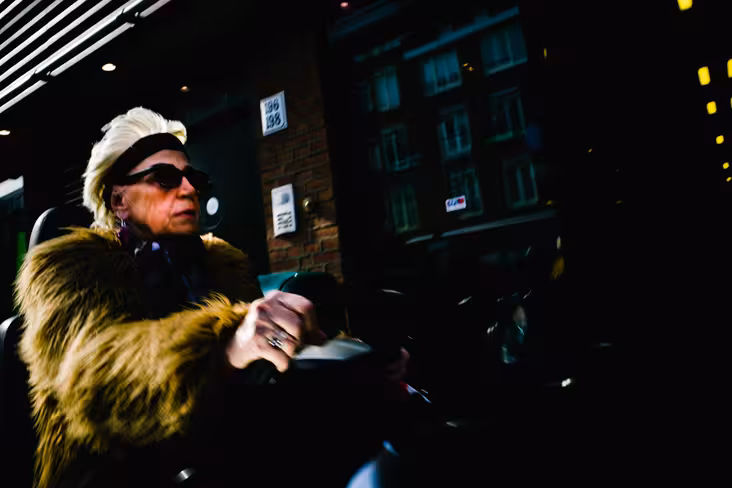
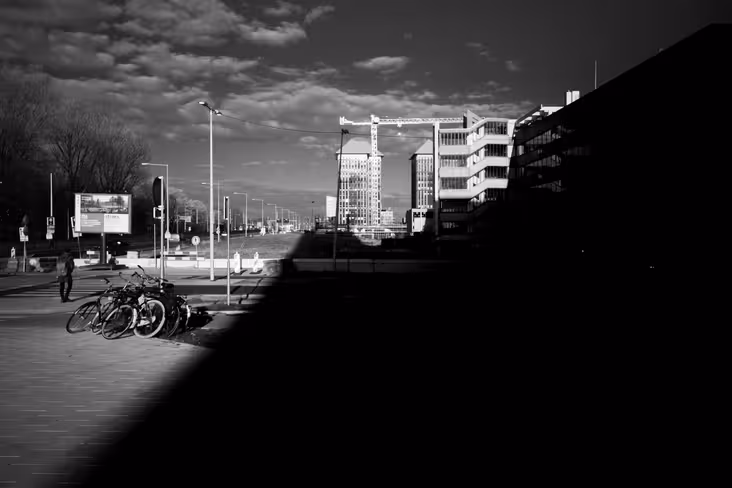
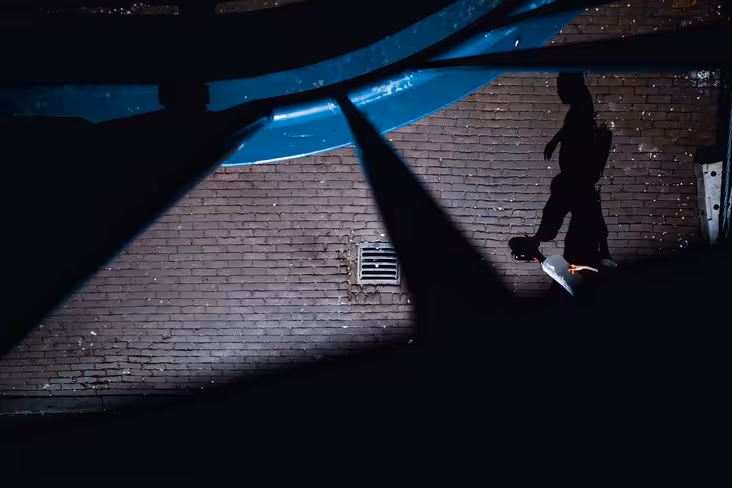
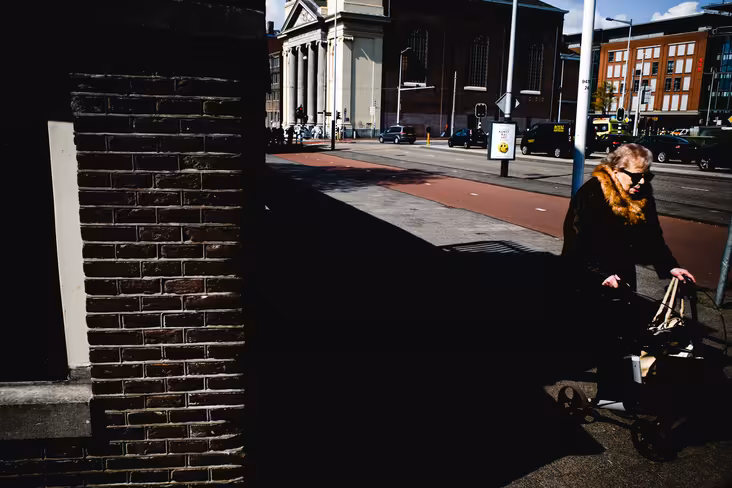
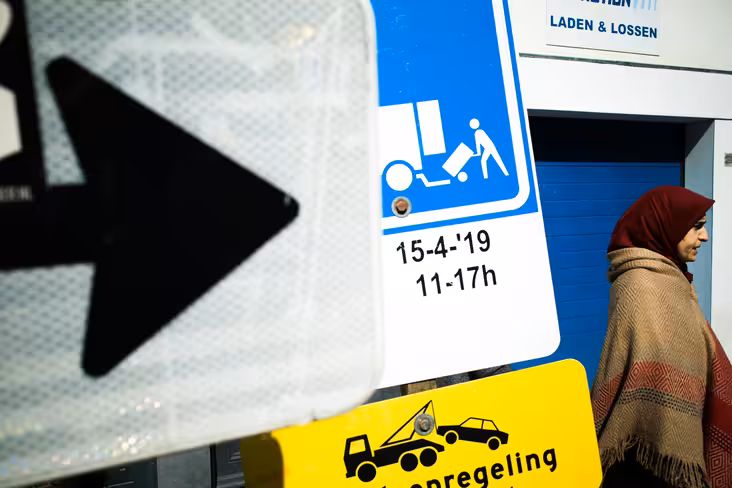
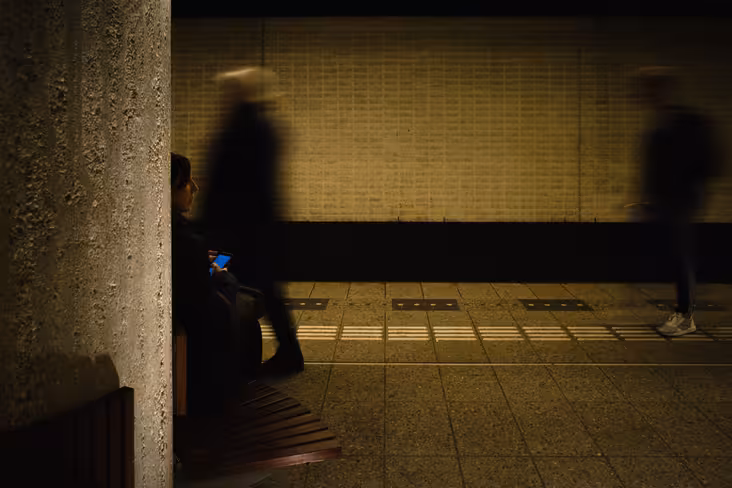
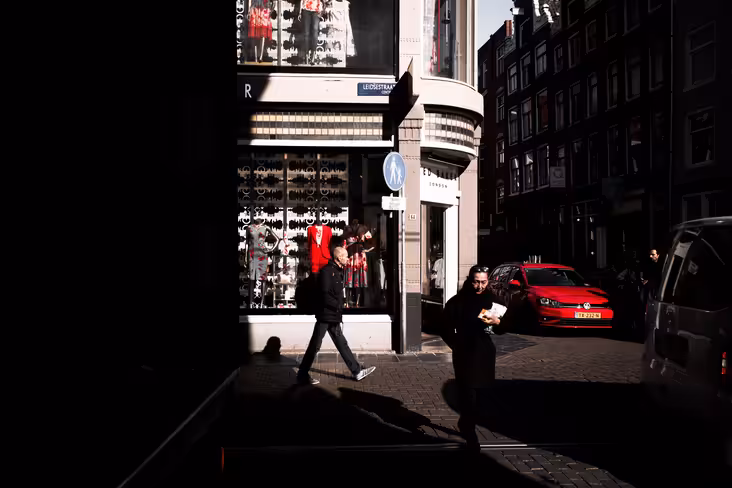
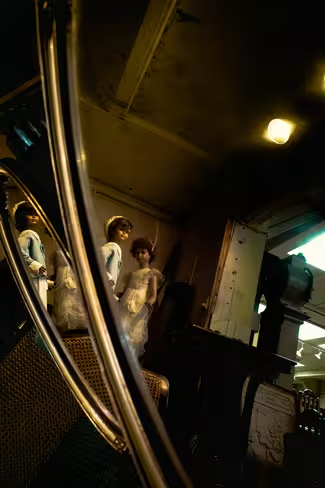
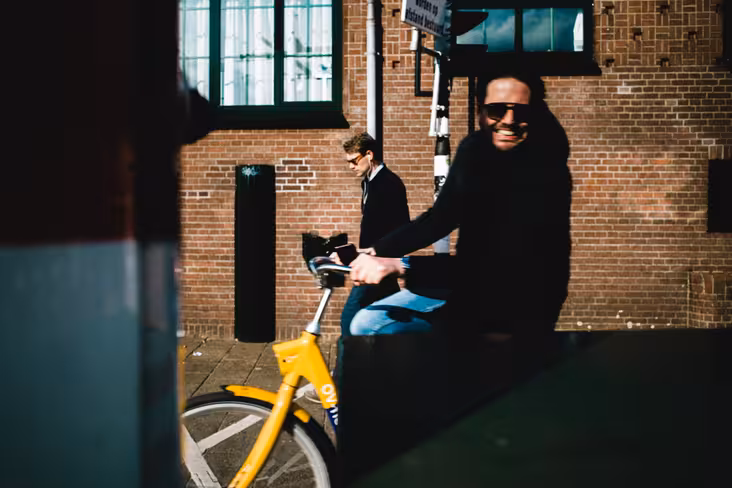
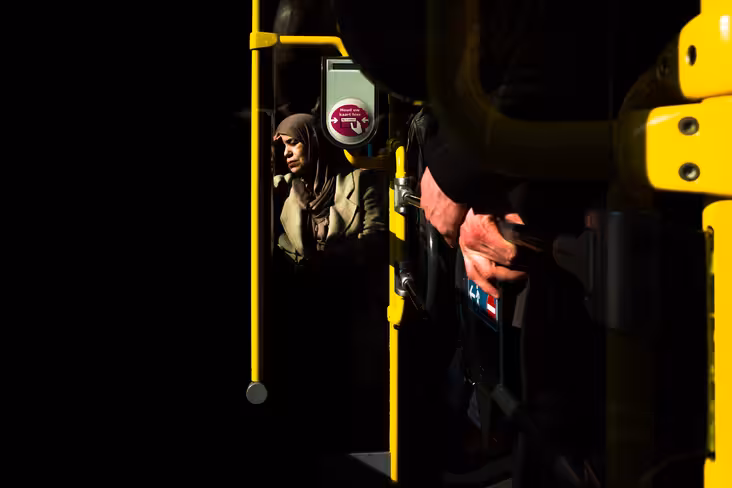
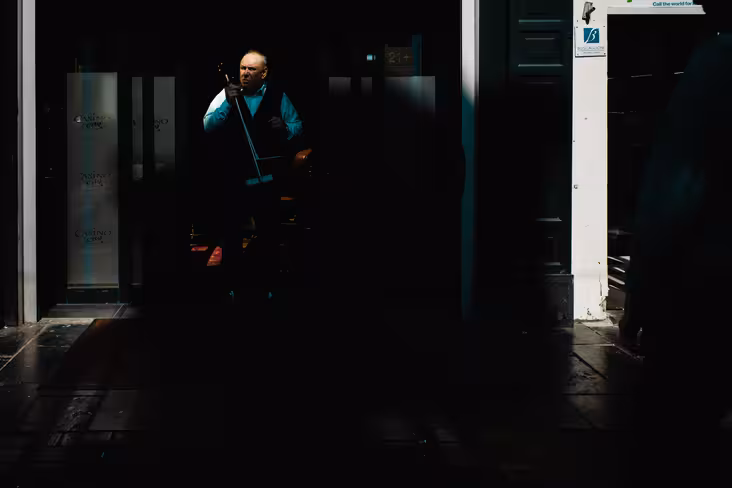
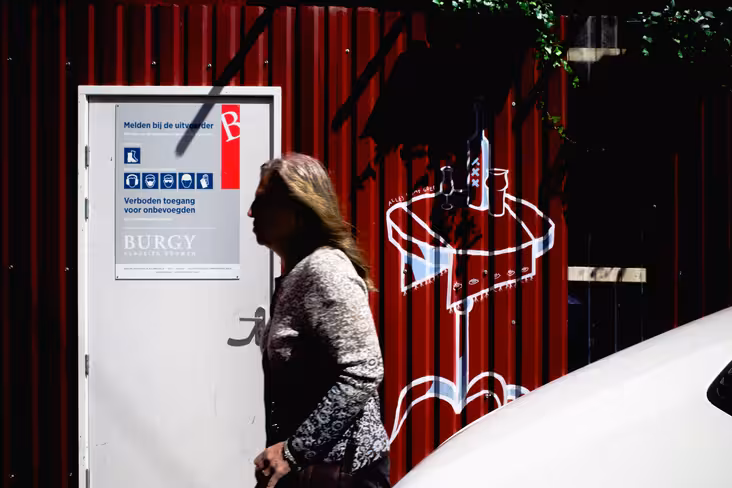
Oh, and if you enjoyed browsing through the photos I took with the GRIII, feel free to follow me on Instagram for more of where that came from!
Here are a few more shots before you go though:
This post includes affiliate links to products that you can buy online. If you purchase them through our links, we get a small cut of the revenue.
Get the TNW newsletter
Get the most important tech news in your inbox each week.