Welcome to Plugged Basics, a collection of tips, tricks, guides, and advice on how to easily get the most out of your gadgets, apps, and other stuff.
Despite all the promises of us living in a paperless world, hard copies of documents are still a part of our lives.
Whether it’s signing a new job agreement, sending receipts for expenses, or even sorting out a lease on your house, there are always times we need to quickly turn something physical into something digital.
Yes, you can take a normal photo with your phone, but often these are hard to read and just look, well, rubbish. Luckily, we’re here to show you how to get professional-looking scans on your phone.
This works on both Android and iOS, but we’ve illustrated it using an iPhone.
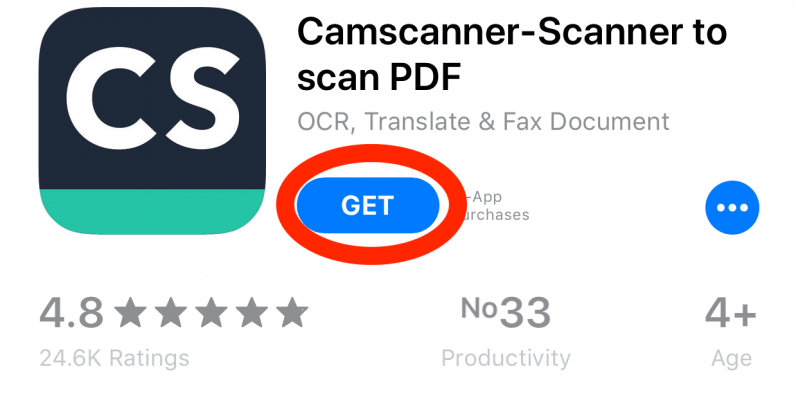
Step #1: download CamScanner
Head to the App Store on iOS, or Google Play on Android. Then simply search “CamScanner” (all one word) and download that app.
Don’t worry, it’s free!
Step #2: choose the photo source
You can select a photo from your library…

… or take a new one:
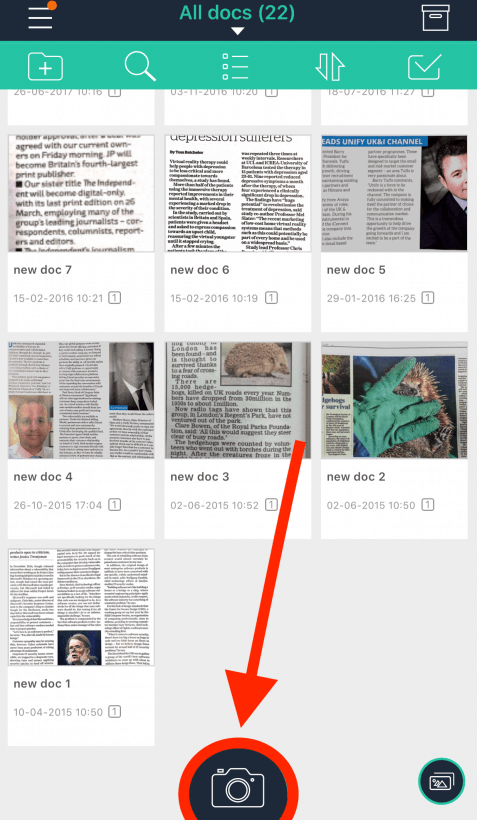
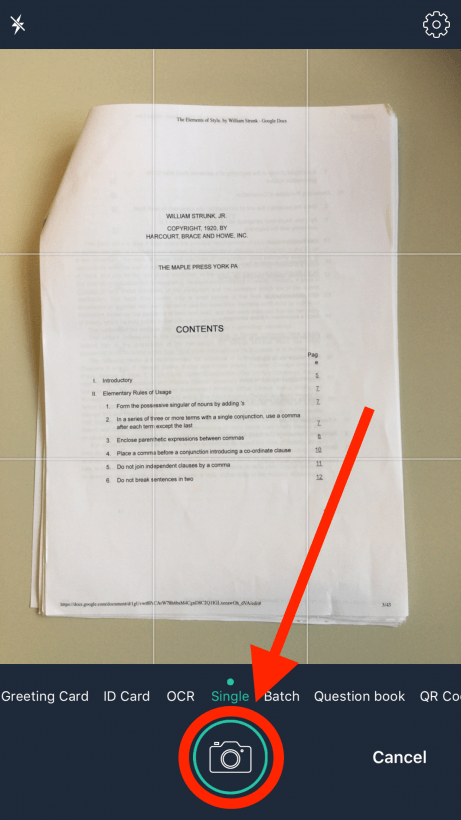
Step #3: snap away!
In this instance, we’re going to take a new photo. So, click on the appropriate icon and allow the app to access your camera.
You’ll see on the bottom of the screen that CamScanner has a range of different modes, but we’re going to take a single shot. I’ve chosen the contents page from William Strunk’s ‘Elements of Style’ as an example.
Now just click that button!
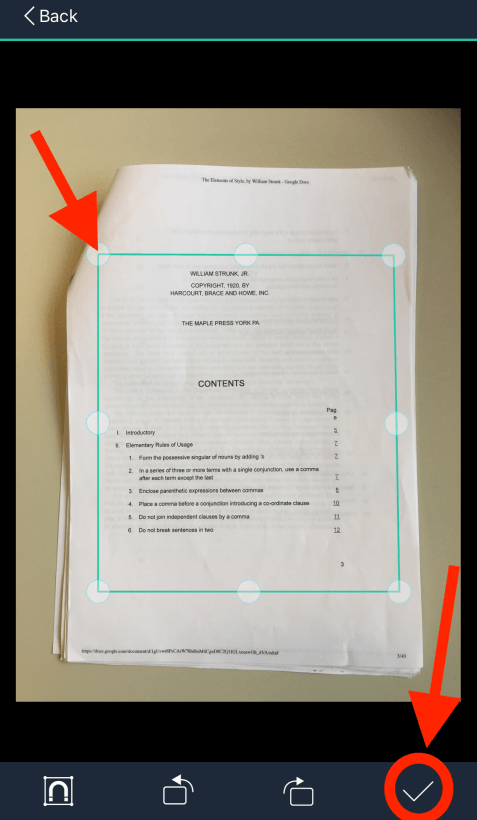
Step #4: select the relevant part of the image
I always enjoy this part. CamScanner lets you crop the picture, so only the relevant part of the scan shows.
Do this by moving the clear circles around the image until you get it perfect. Then click the tick in the bottom right corner.
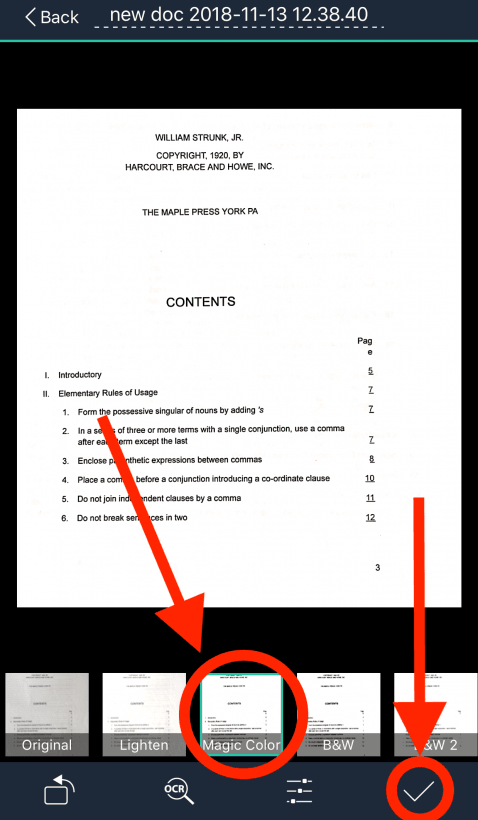
Step #5: put the ‘Magic Color’ filter on
You’ll now be on a screen that gives you a variety of filter options. Choose ‘Magic Color’ here. This sorts out the contrast and brightness, making the document easy to read. It looks like you’ve used a proper scanner.
Anyway, once you’ve selected ‘Magic Color,’ click the arrow in the bottom right to continue.
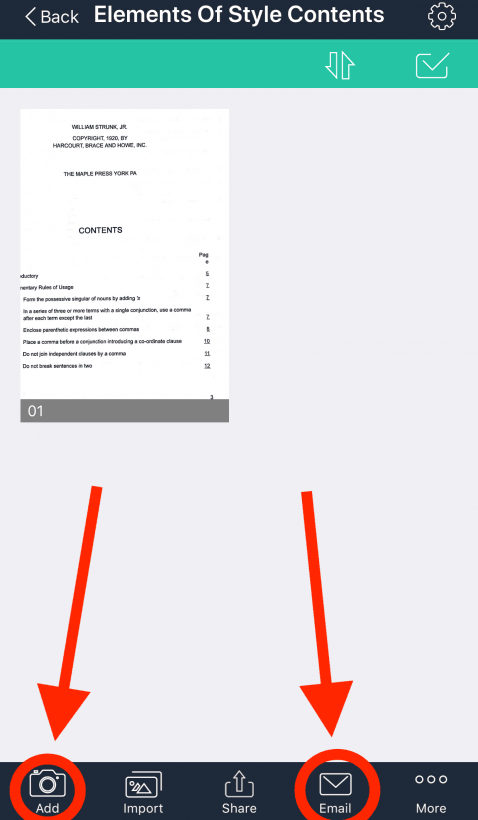
Step #6: add more or send!
You’ll then be taken to a screen that collects your document. From here, you can either add more photos to create a collection or share the scanned document.
If you click the email icon on the bottom, you can quickly send it to yourself as a JPEG or PDF.
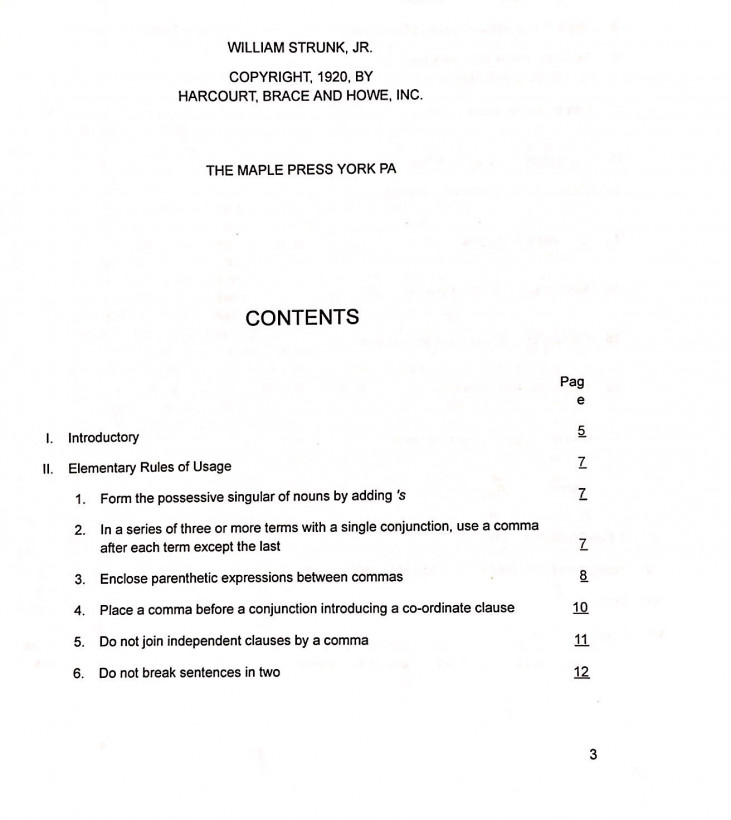
Step #7: bask in the glory of your document
Just look at it, so crisp and readable and scanned:
There are a range of other options in free version of CamScanner too. For example, OCR (optical character recognition) will enable you to search through your scans. You can also put watermarks on the images you scan. You can find out more CamScanner, including the premium versions, here.
If this doesn’t grab you, others at TNW use Google’s PhotoScan to do a similar thing. Head over here to learn more about that.
For everyone else, hopefully this guide will make transitioning important documents from paper to digital as painless as possible. Enjoy!
Want more Plugged Basics? Let us know what you’d like to learn about in the comments.
Get the TNW newsletter
Get the most important tech news in your inbox each week.