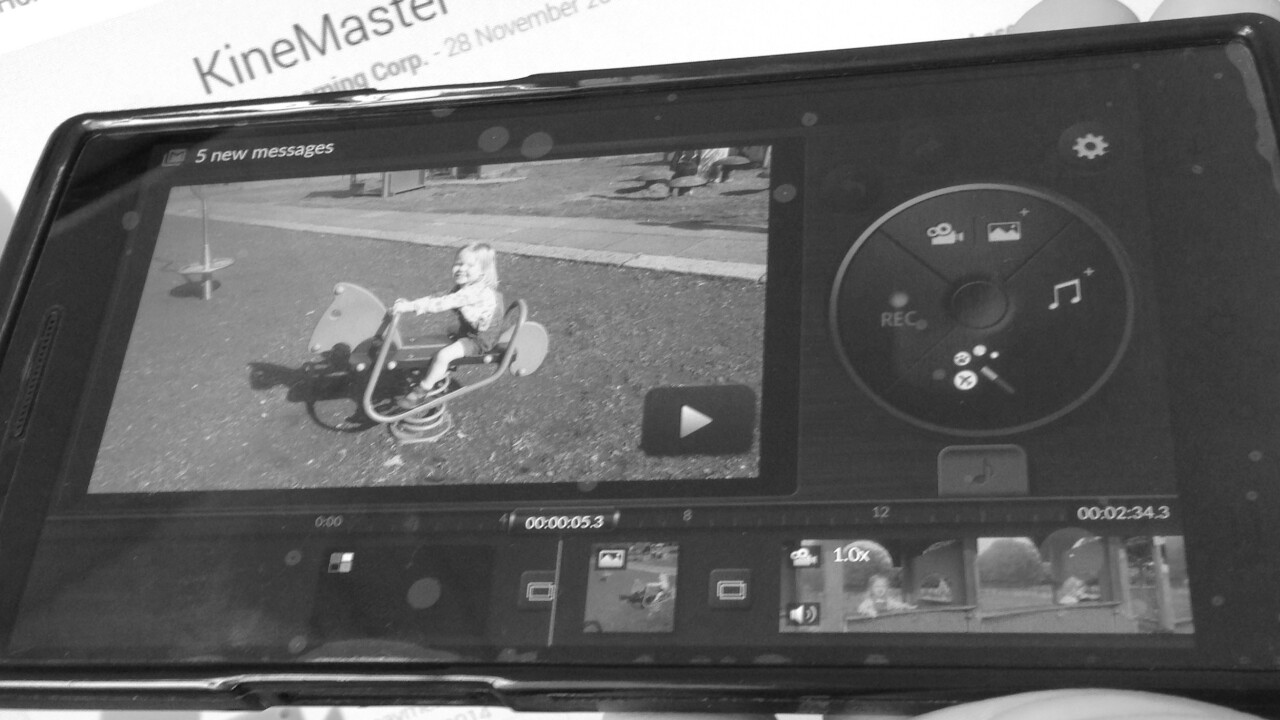
Smartphones are getting bigger and more powerful, and the lines between ‘PC’ and ‘phone’ are very much blurred. While everyone now has the potential to be a one-man film crew, you’re only as good as your tools permit, which is why I’ve been on the hunt for the best video-editing app Android has to offer. And it’s been a tough old slog.
In my quest to find the ultimate video-editing app, I tried pretty much everything there is out there. And if I’m being honest, there is a lot of trash.
There are a number of pretty good social-focused apps that help you mash clips together with soundtracks and spit out a Facebook-friendly cacophony, but that wasn’t what I was looking for. What I was ultimately looking for was a user-friendly, good-looking, Adobe Premiere or iMovie-esque application that gives me very granular control of my clips and edits, with full effects and publishing features.
I stumbled upon KineMaster earlier this year, and it has become a staple tool in my armory, both for work and play. While editing and publishing from a phone will never be quite as easy as doing so from a PC, the speed and convenience of being able to shoot a good-quality skit on my pocket rocket, edit it on the fly and publish direct to YouTube more than makes up for it.
Here’s a quick look under the hood.
Video Gaga
When you first launch the video editor app, you’re invited to venture down the ‘New Users’ route, which guides you through the basics of adding media to a new project. After the first time, I just skipped this though and went straight to the main ‘new project’ view.
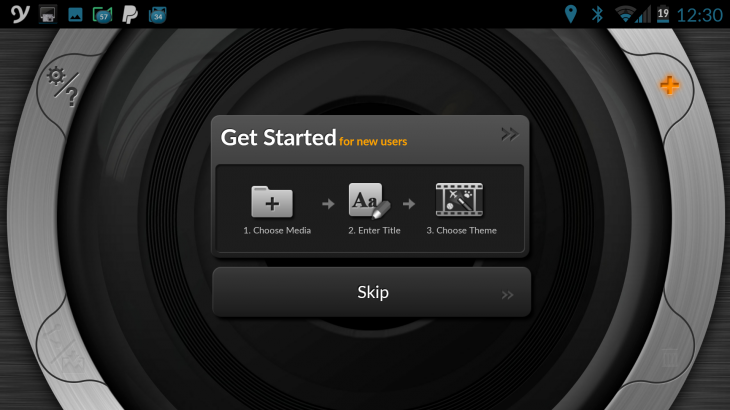
If you already have a number of projects created, you will see these in a horizontally-scrolling list first, before you decide you wish to create a new project by hitting the little ‘+’ icon.

When creating a new project, you can choose to view all photos and videos on your device from the myriad of folders you may have, or you can elect to just view the video clips. This suits various uses – if you want to create a photo slideshow with music, you can do so easily.
In terms of supported formats, well, with video you can choose from .mp4, .3gp and .mov, while you’re restricted to .jpg and .png for images. For sounds you have .mp3, .mp4a and .aac at your disposal.

With all your clips selected, you simply order them in your timeline as you would with any other editing app. Long-press and hold a clip to shift or delete it, hit the ‘Add Media’ icon to reel in new content, add music from your device, or add a ‘theme’ to your video, which includes pre-made animation effects.
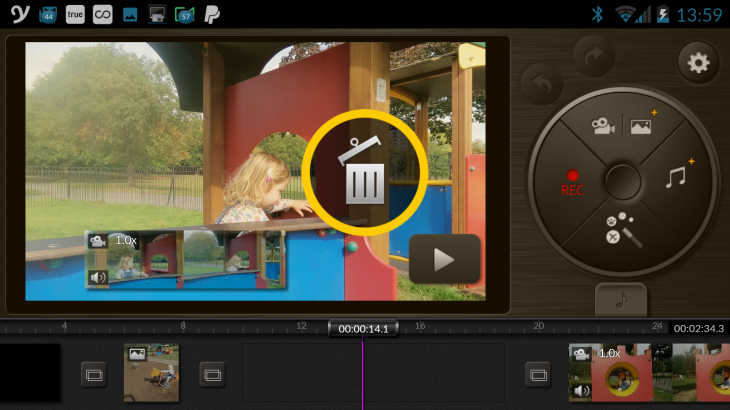
However, you can also capture content on the spot to add to your video – so this could be video or photos from your camera, or even audio. This means you can record voiceovers and commentary atop the on-screen action in real-time.
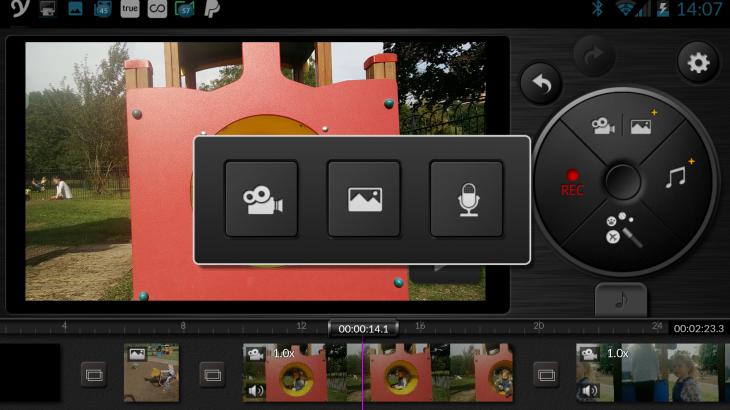
To edit, you just tap a specific clip, and you’re presented with a number of options. You can raise/lower the hue, brightness or saturation on a specific part, trim it down, add titles, lower/increase the volume, control the speed, add effects/transitions and more.
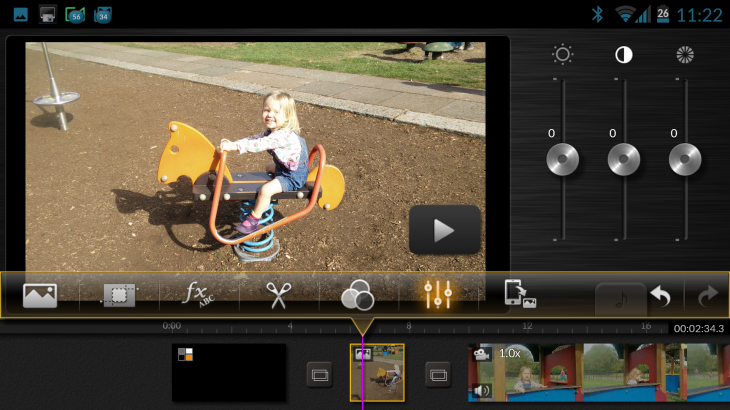
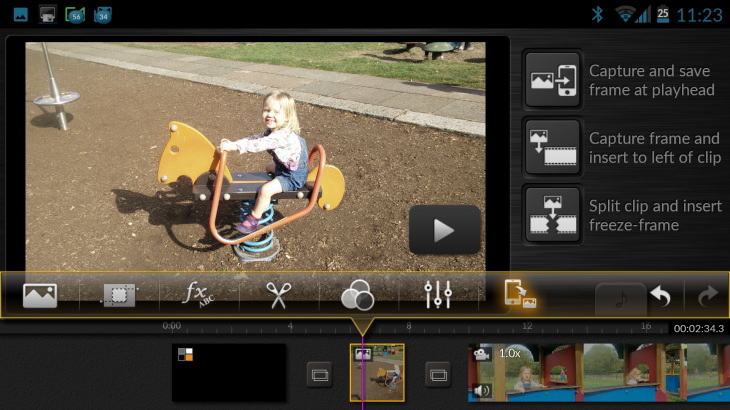
There are also a number of extra features that could prove useful for power-users, such as the ability to capture and insert a specific frame to create a ‘pause’ effect in the video, or to include in opening/closing credits.
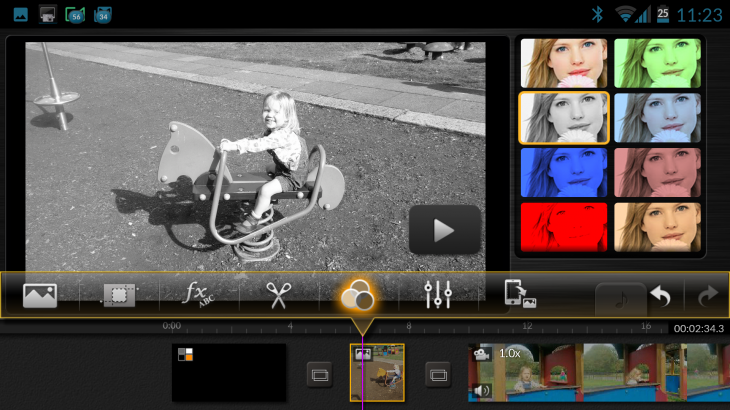
You can also give your video a color makeover, or convert it to black-and-white.
In terms of exporting, you can do so in low-quality (640 x 360), high-definition (1280 x 720) or Full HD (1920 x 1080), direct to Facebook, Google+, YouTube, Google Drive, Dropbox and any other compatible apps via the general ‘share’ button.

While you can save the video directly to your device to upload manually to YouTube, Vimeo or wherever, it is useful being able to export directly to these services from within KineMaster too, with the ability to give your creation a title, description, tags and more.

Though KineMaster does offer a pretty powerful set of editing tools, it isn’t without its flaws. In search of some pretty basic functions, I sometimes encountered problems. For example, having a fade-in and fade-out function at the start and end of a video is pretty standard in my view, but there is no dedicated function for this – only a cross-fade for in between clips.
After doing a little sleuthing, however, I did find a workaround – there is an option to add a black background clip to your video, which you must insert at the beginning and end of the video. Then all you do is create a cross-fade between that and the first/last proper clip in your creation.
I also expected there to be a save button for each project, but after much seeking, I discovered there isn’t one – anything you create is automatically saved, so if you wish to return to the main projects’ homescreen, you can just hit the back-button on your device without fear that all your hard graft will be lost.
There are a handful of other counterintuitive aspects to KineMaster I came across, but it’s all really part of a learning process like anything.
You’ll also no doubt be curious about the costs. The good news is KineMaster is completely free to use – however, you will have to tolerate a KineMaster watermark on all your videos. A pretty reasonable monthly/yearly subscription of $4.99/$39.99 removes this though.
The one thing I would maybe add here regarding the costs is that a one-off payment feature to remove a watermark in a single video would be good – not everyone will use this app as regularly as I do, so the ‘value-for-money’ aspect perhaps won’t be as pronounced for others.
All in all, KineMaster is a fantastic tool for mobile video-creators – it really does offer a lot of bang for your buck. I haven’t encountered anything that comes close to it in terms of features.
Get the TNW newsletter
Get the most important tech news in your inbox each week.


