Ah, portrait mode. Ever since Huawei pioneered the depth-sensing tech and Apple ran with it, it seems every other Instagram photo has that faux-DSLR look.
Unfortunately, our smartphones aren’t exactly perfect at imitating the shallow depth of field of a real large-sensor camera, so it’s important to help the tiny sensors out when we can. And even when things do go right, there are some basic photography tips can help you make the most of your images.
That’s what I’m here for; I’ve amassed some basic tips to get you started taking better portraits. Keep in mind that every phone is different so I’m not getting into device specifics, but these tips should get you on the path to taking better photos with any device.
Chase good light
Lighting is crucial to all cameras but moreso on our smartphones with their tiny sensors. Depth sensing is significantly less reliable in low light, leading to edge detection errors, in addition to the usual noise and detail issues with low light photos. On many phones, portrait mode uses a secondary sensor with worse optics, compounding the problem.


The 💜 of EU tech
The latest rumblings from the EU tech scene, a story from our wise ol' founder Boris, and some questionable AI art. It's free, every week, in your inbox. Sign up now!
This goes both ways though; too much light can be a bad thing. I find beginner photographers often assume shooting direct sunlight is a good thing. It’s usually not.
This is especially true with clear skies during the high mid-day sun, the light will often be harsh and unpleasant. Unless you’re going for a particularly artsy effect, look for some even shade. There will still be enough light to take a good portrait without accentuating every pore on your face. And contrary to popular belief, cloudy days are some of the best days to take portraits thanks to the even, diffuse light – it’s the nature’s version of a softbox.
Get the exposure right
Now that you’ve found some good light, you want to make sure your phone is taking the best advantage of it. Phones have gotten a lot better at detecting people in an image and exposing the around them, but it doesn’t hurt to give your phone a hand.
For example, here’s an underexposed image:

And here it is with some exposure compensation (I went a little overboard, but it’s a better starting point):

A simple tap on your subject’s face from your phone’s screen – not their actual face – can noticeably improve your photo’s exposure. If this doesn’t work, you can try using the exposure slider for finer control until the subject is properly illuminated. And of course, you can brighten the shot after it’s been made, you just risk introducing additional noise.
Separate your subject from your background
Each phone’s Portrait mode generally works by measuring depth using something called parallax. Long story short, the further your subject is from the background, the easier it is for your phone to measure depth.

Taking a few extra seconds to ask your subject to move forward can make a big difference between jagged depth artifacts and a realistic image.
Alternatively, try placing your subject perpendicular for a cool focus transition that can look impressively DSLR-like.
Choose the right background
Along with the above, you’ll want to make sure you’re choosing the right background in the first place. Generally speaking, the best backgrounds won’t detract attention from your subject, but will still compliment it.
This doesn’t mean your background needs to be a blank white wall – that’s boring – but something with uniformity of colors and/or texture helps. You can add some pizzazz by picking something with interesting colors or lights sources – the latter will look particularly cool once the depth-of-field effect is applied.
Get up close
There’s no need to photograph up your friend’s nostril, but as a general rule, it helps to get closer to your subject. Fill the frame with your subject for a more powerful image; it’s okay if you end up cropping off part of their body.
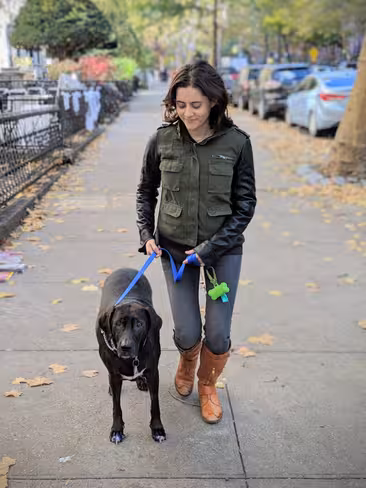
For example, take the image below. The photo is fine, but my girlfriend gets kind of lost in the busy background, despite the depth of field.

Taking two steps forward makes for a much better portrait:

You can definitely go for that full-body shot too, but make sure you’re filling the frame adequately. A small crop can make a big difference.
Aside from being a good compositional technique, this helps with parallax measurements as well. It’s a lot easier for smartphone systems to measure depth from the waist up than with an entire body.
Cut down on the bokeh
Many smartphones now allow you to adjust the strength of the depth-of-field effect after a photo has been taken. While you might be tempted to add more background blur, often, the opposite is best.
The stronger the background blur, the more jarring it is when your phone screws up the edges. Turning down the shallow depth-of-field can actually yield a more pleasant and realistic image.
Accessorize
If you’re really serious about your smartphone photography, you might want to consider investing in some add-on lenses for your smartphone such as Moment’s or Olloclips. These will give you different fields of view you normally can’t get on a smartphone.
I’m particularly fond of Moment’s new 58mm Tele lens, which actually gets decent background blur from my Pixel 3 before even turning on Portrait mode, and makes for a more flattering field of view.
Use filters wisely
Using filters isn’t just about being artsy – they can transform an image. You can use monochrome images to help mask a busy background with unpleasant colors or to highlight textures in an image. Some color filters can have a similar effect.
Adding a bit of grain can also go a long way. Because portrait mode blurs the background after an image has been captured, the blurred area is devoid of any natural noise, making it look even more artificial.

But a DSLR or mirrorless camera, blurred areas will share noise with the rest of the image. So adding a filter with a bit of grain can go a long way towards making a portrait mode photo look more cohesive.

As long as you don’t go overboard, filters can save an otherwise boring image. I’m particularly fond of the tools in VSCO and Snapseed.
Fix poor edge detection
If you took a really great photo where portrait mode failed to detect the edges correctly, the image can usually be salvaged with a little bit of TLC. Applying a bit of a blur brush around rough edges can turn a good image into a great one
Take more photos
The best advice I can give is the simplest: Take more photos.
I mean this in two ways. Take more photos when shooting a portrait – you increase the odds of getting a good shot and letting your phone’s AI detect edges properly.

But I also mean it in the more general sense: Take photos more often. As above, the more photos you take, the greater the likelihood you’ll find one you like. But more importantly, it’ll make you a better and more consistentphotographer, and soon composition will become second nature. Practice makes perfect.
Get the TNW newsletter
Get the most important tech news in your inbox each week.