
Welcome to TNW Basics, a collection of tips, guides, and advice on how to easily get the most out of your gadgets, apps, and other stuff.
Google has been offering safe browsing protection in its browsers for a while. This essentially means that you’re protected from harmful URLs, or dangerous events that might result in data-stealing
There are multiple levels of security provided by Google under this protection feature. Here’s how you can check yours:
- Open Google Chrome on your desktop.
- Head to Settings > Security.
- Scroll down to the Safe browsing section.
- Under that, you can choose, ‘Enhanced’, ‘Standard’, or ‘No Protection’ option. However, no protection is not usually recommended.
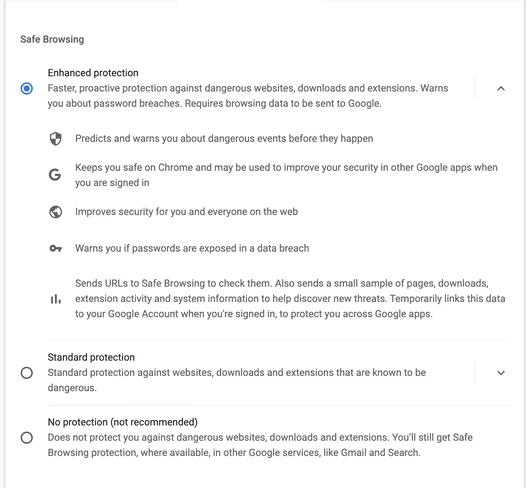
By default, Chrome works on the Standard level of safe browsing protection. However, the Enhanced level of protection that provides better security for other Google apps you’re using, improved protection from malicious URLs, and alerts for when your stored password is found in a data breach.
The security settings also let you set your own DNS and manage your security keys.
If you don’t want to use Chrome’s own password manager, we have a guide on how to use Apple’s Keychain password manager in the same browser. Stay protected.
Get the TNW newsletter
Get the most important tech news in your inbox each week.