
So you just downloaded Snapchat. Now what?
The photo app that everyone wants to copy and yet no one can manage to fully destroy is still a little obscure for those who didn’t get onboard during its initial rush of popularity.
I’ve actually been asked by multiple people who know my profession to “explain Snapchat” to them. That’s not something that can be done in a short conversation, so here we are.
Here’s a complete guide to Snapchat, including what it does, how to use it, and a bunch of other details you didn’t think you needed to know.
Also, full disclosure: I’ve only ever used Snapchat on an iPhone. I’m given to understand that the essential experience between Android and iOS versions of the app are the same, but let me know if I’ve got anything in particular wrong.
Dictionary
Let’s start by getting you familiar with the Snapchat lingo. Here are the most basic terms you need to know when you’re using (or talking about) Snapchat:
- Snap: These are the pictures/videos you send to friends, followers, and your Story. They last until the viewer closes, after which they can be replayed, but will disappear completely after a max of two days.
- Story: A collection of publicly-viewable Snaps you’ve taken and saved in the last day. When you view a person’s Story, you see the Snaps in a chronological reel.
- Chat: Snapchat’s messages. Like Snaps, they disappear once viewed, and unlike Snaps, they can’t be replayed.
- Filter: An image or graphic that is placed over a Snap when selected. Filters can be holiday-themed, location-specific (these are called Geofilters), or just something fun to look at.
- Lens: These are augmented reality images that can be placed in frame while you’re taking the Snap. Several Lenses alter the face specifically.
- Memories: A gallery of your saved Snaps, which only you can see. Snaps saved Memories can be shared to Chat and Stories after they’re taken, and are one of the only ways to subvert a Snap’s short lifespan.
- Snapcode: The yellow-and-white square icon that is your unique calling card on the app. When someone wants to follow you on Snapchat (and doesn’t know your username), they snap a pic of your Snapcode, then scan it within the app menu.
Opening the app
Now that you know what you’re going to be looking at, it’s time to take a look. The app loads in camera mode, ready to go when you need to capture a Snap. The actual camera functions the same as any other photo app, but for now let’s look at the other things on display.
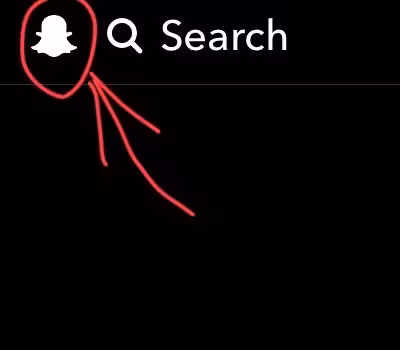
For starters, at the top left of the screen is a ghost icon — that’s Snapchat’s mascot, Ghostface Chillah. Tapping on him will take you to the app menu.
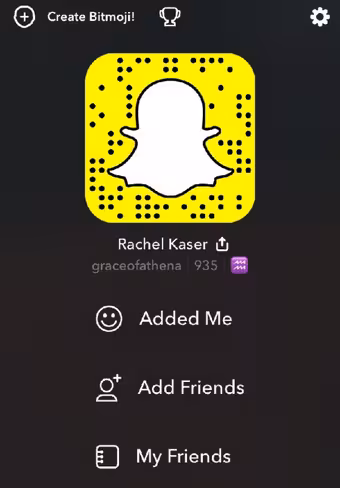
In the menu, you can see who’s added you, access the contact menu so you can add people yourself, and see all of your essential Snapchat info, such as your Snapcode. The gear icon on the top right gives you access to all the basic stuff like password, login credentials, and some of the app’s secondary functions, which we’ll get to later.
Now we’ll go over the functions, screen by screen.
Main Screen
The primary screen, which is open when you pull up the app, is the camera screen. This is where you take Snaps, embellish them, and send them into the wild.
Posting a Snap
Snaps are the lifeblood of Snapchat. 90% of the app’s functions revolve around helping the user send the perfect Snap.
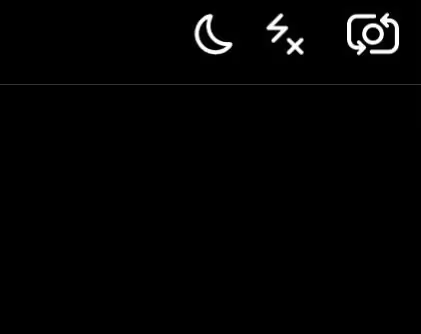
When you’re taking a Snap, you use your phone’s camera the way you ordinarily would to frame the image. The buttons at the top right let you (from left to right) engage Low Light mode (for taking pics when the lighting isn’t so good), toggle Flash, and flip between front- and back-facing cameras.
When you want to add a Lens, you hold your finger down on the screen over the area you want to enhance. Most Lenses are focused on the face, so when you tap on your face, it maps the surface and shows you a series of different Lenses you can apply.

Some Lenses are timely, while others stick around forever. Here’s me with a Major Lazer Lens that will probably be gone from the app by the time the article is published (it’s part of a promotion):

When you’ve taken the picture, that’s when you can really start to make adjustments.
Filters, Stickers, Emoji, and More
After you’re finished taking the picture, or filming the short video, a host of new buttons pop up on the sides of the screen. Let’s go over what they do.
From the top: The T in the top right is how you add text to an image. You can write just about anything, and choose the color of the text.

You can tap the T to adjust the size of the text.
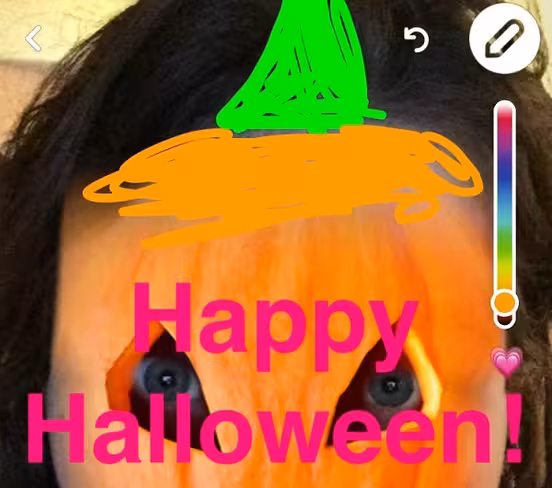
The pencil-looking button will let you draw on the image in the color of your choice, which you do with the tip of your finger or a stylus. Here, I’ve completed the fall pumpkin filter by giving myself a lovely stem.
Next, the little button that looks like a piece of paper with the corner turned up is the sticker button. There are so many stickers in the menu that I don’t dare show you all of them for fear the amount of images would crash every computer in the vicinity. Here’s a look at some seasonal stickers:
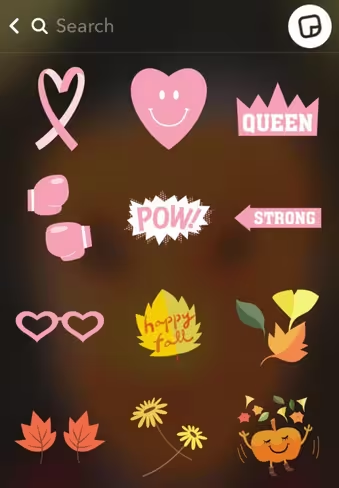
Once you select one, you merely place it anywhere in the image.

Next is the scissors tool, which acts as an eraser and a make-your-own sticker tool. See instructions here on how to make your own stickers. The scissors can be used to erase things from images, and to create custom overlays by allowing you to erase parts of a filter to let certain parts of the image show through. To use it, hold your finger down and outline the image you want to cut out, or isolate.

The paperclip button allows you to put a URL on the page. To use it, type the URL into the search tool and attach it to your Snap.
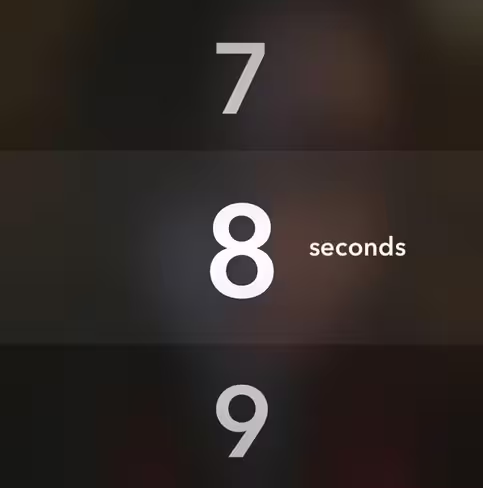
Finally, the stopwatch button lets you set how long someone can view the Snap. You can set the timer from 1-10 seconds, or set it to loop infinitely.
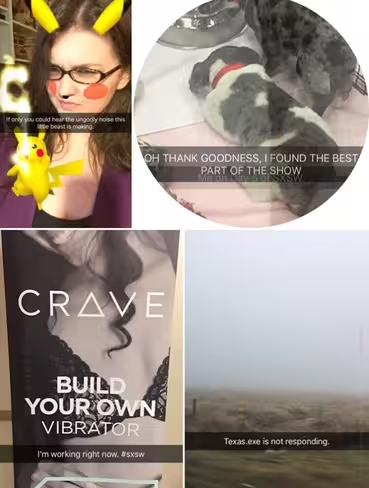
Filters are the other major change you can make from this editing screen. To use a Filter, swipe right or left from the editing screen. Filters can range from black-and-white color washes to location-specific icons to temperature and speed read-outs (excuse the cutesie selfie pose here):
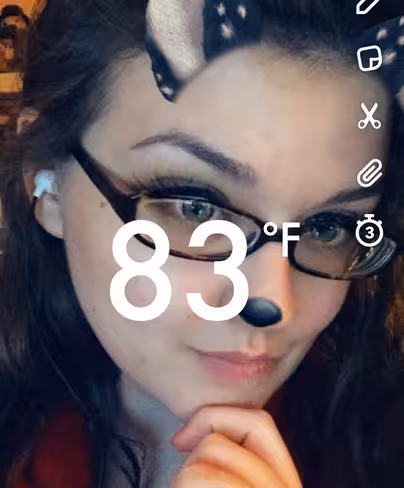
Just to reiterate, the difference between a Lens and a Filter is that a Lens can move with you, while a Filter is static and applied after the image is captured.
Sending the Snap
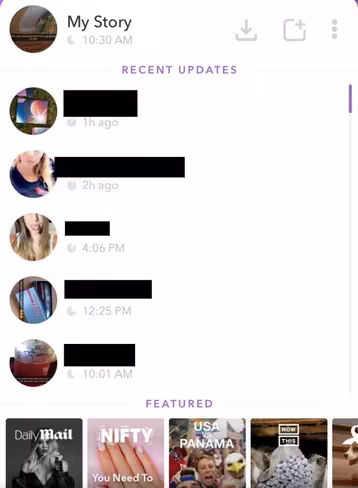
Once you’re done creating your Snap, you can send it. Hit the blue arrow at the bottom right of the screen, and your contact list will come up showing who you can send the image to. You’ll also have options for “My Story,” which is your public Snap reel, and “Our Story,” a collection of Snaps curated from users in a specific area or attending the same event.
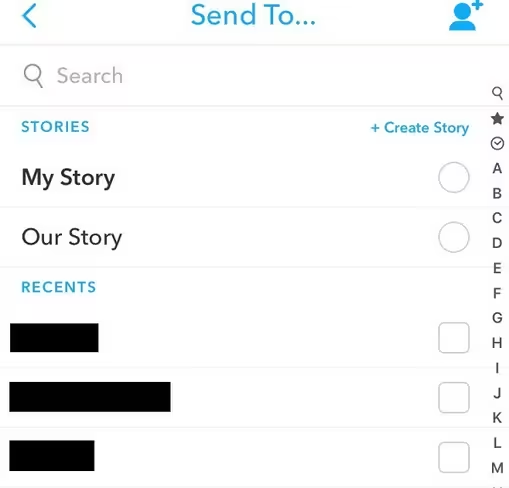
Once you’ve selected who you want to receive the Snap, you hit the blue arrow again, and you’ve sent your Snap.
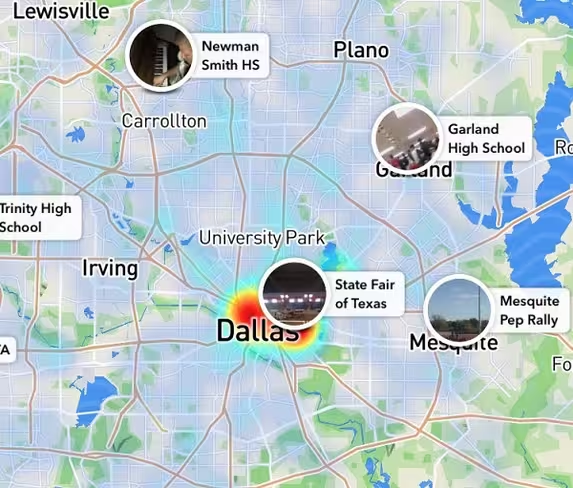
Also, if you want to see what the “Our Story” gets you, you can pinch the main screen to see the Snap Map, which shows you Snaps from everyone in a certain area — which is where the curated Snaps go. Clicking on one will let you see all the Snaps from the people in that area who have submitted Snaps to “Our Story.”
That’s all for the main screen. Now for the auxiliary functions.
Search
Swiping down from the main screen opens the search function. This is just what it sounds like — you can search for your friends, their stories, popular users to follow, hashtags, and other things. It’s a goldmine of information for those just starting out.

Contact List
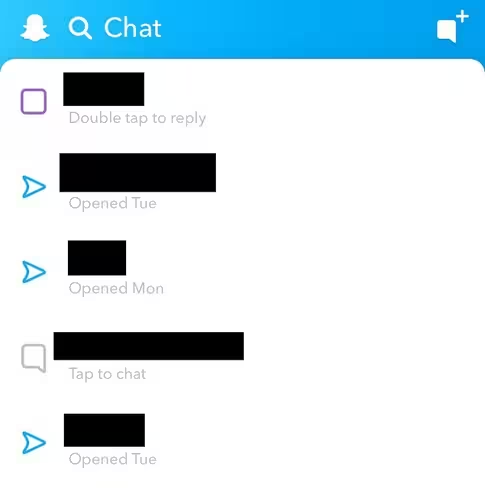
Swiping left on your main screen takes you to your contact list, along with the Chat screen.
Texting
In addition to Snaps, you can also send text messages, short video clips, and stickers directly to your contacts. All you have to do is tap their name in the list, and you can correspond with them directly. Keep in mind that any messages you exchange will disappear once read, just like Snaps.
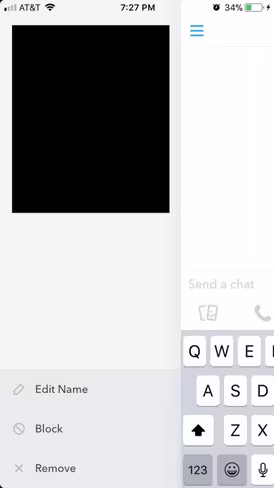
Swiping left from this screen will bring up their contact page. From here, you can see their details, and block or remove them as necessary.
Stories and Discover
Swiping right from the main screen takes you to everyone else’s content. Namely, you can see your friend’s stories, watch the short shows that Snapchat has produced, and find other content creators to follow. It’s fun to explore, as there are a number of great creations to be found in this section, and I recommend giving it a look yourself, lest I spoil the experience for you.
Memories
Swiping up from the main screen takes you to your Memories, a gallery of all the Snaps you’ve preserved.
When you’ve taken a Snap and want to save it, you can hit the button which looks like an arrow pointing down and it’ll go into your Memory reel. The button is on the bottom left for unsent Snaps, and the bottom right for sent Snaps.
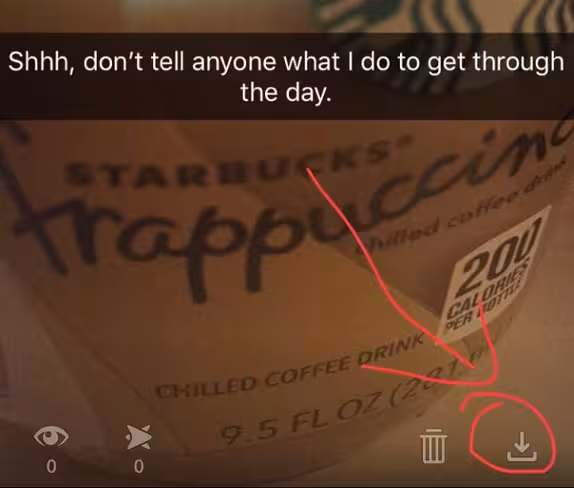
You can save a Snap even if you don’t actually send it or post it to your Story — but you’ll be able to send it from your Memories later if you want to.
Other stuff you might not use, but should know about anyway
There are a few other functions of Snapchat you can use if you really want to dig deep. Here’s a short list:
- Snapcash: This lets you transfer money to people on your contact list via an attached credit card. It can be done via Chat.
- Bitmoji: You can create your own cartoon avatar with the help of the third-party app Bitmoji. Doing so will unlock new stickers and filters.
- Video Calls: The app has a primitive video call function you can use through Chat. It’s not exactly Skype, but it gets the job done.
Here are a few more fun things you can do with Snapchat if you really want to take your Snap game to the next level.
So now you know enough about Snapchat to get you started. Good luck, and getting Snapping!
Get the TNW newsletter
Get the most important tech news in your inbox each week.