Welcome to TNW Basics, a collection of tips, guides, and advice on how to easily get the most out of your gadgets, apps, and other stuff.
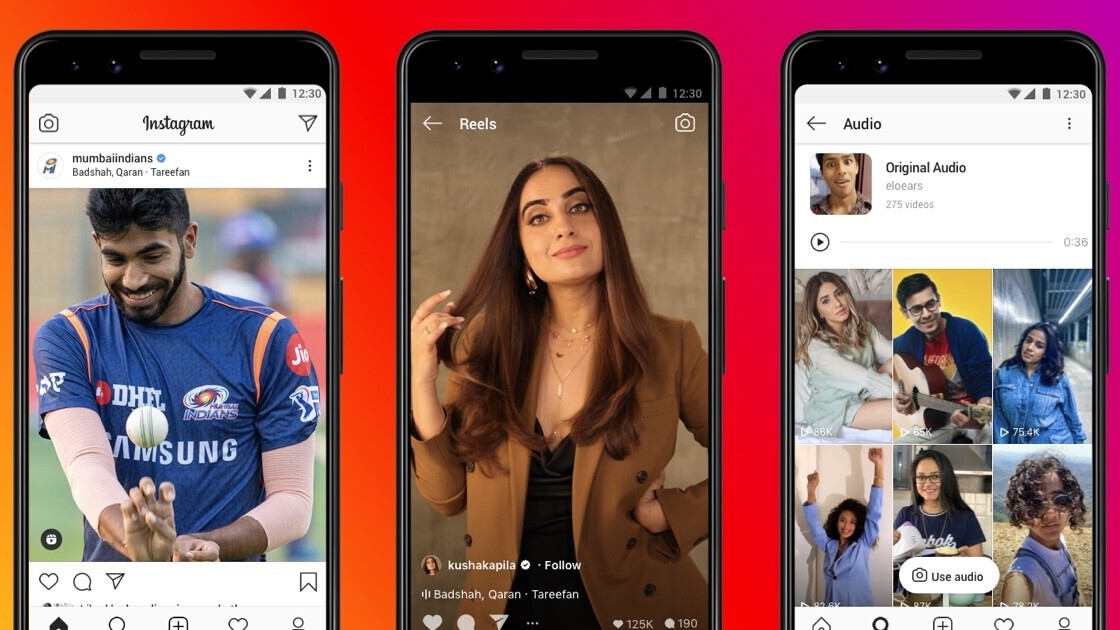
Instagram has rolled out its Reels feature to everyone. Now you can make your own music videos within Instagram itself. Here’s how to get started.
Reels is a feature that allows you to record and edit short videos set to songs. You know TikTok? Yeah, it’s basically TikTok. It’s so very much TikTok that, if you’re already on TikTok, then I’m not sure if you’re going to get much out of using Reels.
Still, whether you want to wriggle free of TikTok’s insidious grip, or you just want to check out the latest feature Instagram swiped from a competitor (no, I’m not cynical; perish the thought), we’re here to help. Here’s how to make your first Instagram Reel — or your first Reels. The singular is unclear.
First, access the Instagram Camera by swiping from the main timeline. At the bottom of the camera, you’ll see the options “Live,” “Story,” and the new one, “Reels.” Live and Story you probably already know about, so swipe over to Reels and get started. From this camera, you can record clips of yourself which you can then edit together to create the Reel in question. You can either record the clips yourself within the camera, or select from videos in your catalog.
Tools
You’ll notice some icons on the left. These are your Reels tools, which help you set up the video to your whimsical specifications. Let’s run through them.
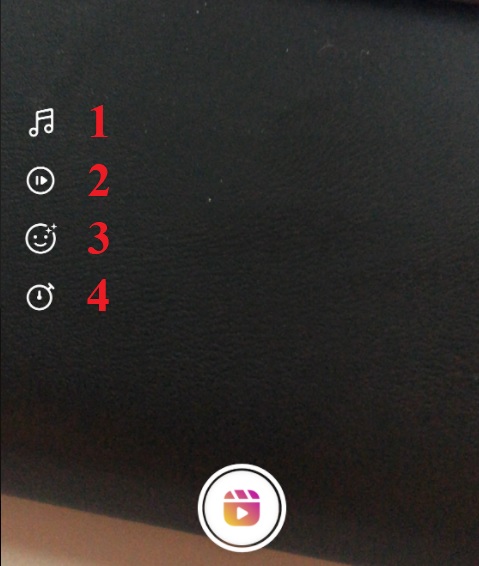
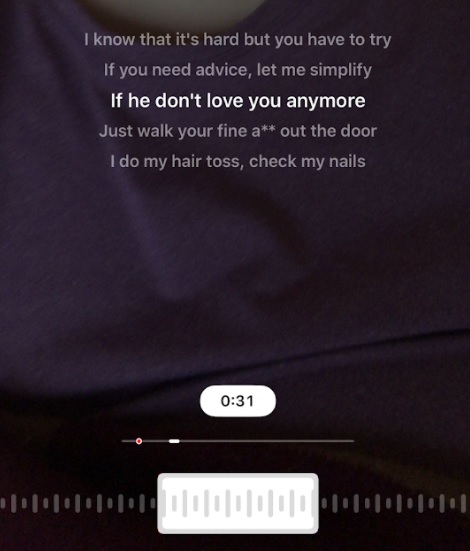
The first tool is audio. Music has been part of Instagram for a long time, and this tool allows you to choose what song to use from a massive licensed library. The audio select has a cool feature that allows you to scrub through the song by showing you the lyrics of whichever part you’re on.
The second tool is speed. This controls the speed at which the clip you record is played back. You’ll record in regular time, but when you look over the clip for editing, it’ll be in the time you selected.
The third tool is effects. Effects are more or less like the filters you can use on normal Instagram (or Snapchat), just a bit more elaborate. They change your appearance or add some flying icons to the video. I noticed that one of the user-made effects I downloaded for this article was also usable in a Reels clip, so you can add basically any kind of effect.
The fourth tool is a timer. You can set a timer that allows you to film for a certain period of time. The timer also counts down, giving you a moment to get in position before it starts recording. I should also mention you can upload video clips from your own gallery at any time.
On top of these tools, you can still use the other IG tools, such as texts, drawing, and stickers. You can also add a filter when you review the Reel before uploading by swiping over the footage.
Editing
Reels doesn’t have editing per say. You basically have to film yourself in chunks, and the app will string them together to the song clip you’ve chosen. You can access the most recently filmed part by tapping to the left of the record button and discarding the clip as you choose. It’s worth noting you can adjust the song after you’ve already filmed the clips in question, if they don’t match the sound. Speed and effects can’t be adjusted after filming, however.
You’ll see a magenta bar at the top of the screen that fills up the longer you film. This is essentially the progress bar for your Reel, and when it’s full you can’t record any more. Once you’re ready to share the Reel, tap the right-pointing arrow next to the record button. You’ll be prompted to watch the whole thing again, to make sure it’s perfect. Here’s where you can add the color filter, and your last chance to add stickers and text if you so choose.
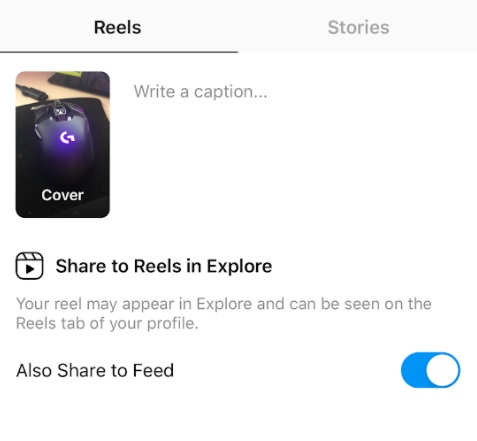
Next, you can choose where to share the Reel. You can upload it to the general Reels feed, where it can be found by anyone using the Explore tab, if you have a publicly visible profile. You can also share it to your Story, or directly to any of your friends.
Where to find Reels
At the moment, Reels are scattered throughout the Explore tab on the IG app. Likely they’ll be a separate option to search for at some point, assuming they become anywhere near as popular as Facebook’s undoubtedly hoping. To see Reels in general, tap any video on the Explore tab that has the Reels clapboard icon on it and swipe up to move to different videos in the public feed. It’s very much like that *cough* other short-form video app, the name of which I forget.
As for your own Reels, you can post them to your Stories for your friends and followers to peruse. Anyone looking for your Reels can also find them on your profile, under a separate Reels tab with the clapboard icon. Here’s what it looks like:
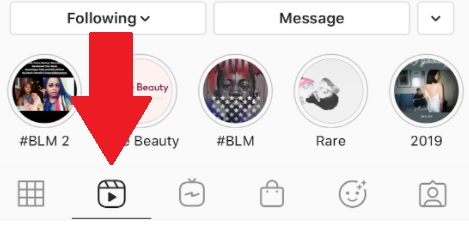
And that’s it! That’s everything you need to know to get started with Reels. Good luck!
Get the TNW newsletter
Get the most important tech news in your inbox each week.


