
Welcome to TNW Basics, a collection of tips, guides, and advice on how to easily get the most out of your gadgets, apps, and connected services.
PDFs are great for when you need to share official documents, but they can be more difficult to work with than other file formats when you need to edit or fill them out. Thankfully, we’re here to help with that.
I frequently need to sign PDF letters and forms from folks like courier companies and visa agencies for work, and I know I’m not alone in this. But who’s got the time to print, sign, scan, and then send these back? Heck, who’s got a printer?
My solution is to use either a PDF editor with a signature I’ve scribbled and scanned with my phone, or to just use my phone from start to finish. Neither method will cost you a cent, and they’re a whole lot easier than finding a print shop. Let’s get started.
Scan your signature
This is arguably the most versatile method for signing documents and forms: once you’ve got a scanned version of your signature, you can add it to letters that you write, or to applications that require your John Hancock. You can do that in just a few steps for free with your phone.
I’ve found CamScanner’s iOS and Android apps to be the best tools for this job. It lets you save an image file of your signature so you can use it digitally on any document you need to sign.
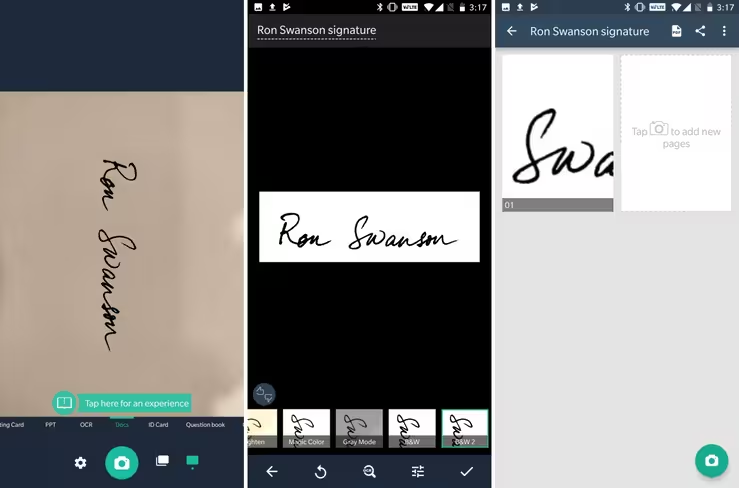
- Sign your name on a plain white sheet of paper.
- Open CamScanner on your phone, tap the Camera button and take a picture of your signature, preferably in a well-lit area.
- Crop the captured as necessary, and choose the filter that works best with your image. I went with ‘B&W 2’ as it helped generate the cleanest monochrome result.
- On the next screen, tap the Share button at the top-right corner to export your signature as a PDF or image, and to send it to yourself via email or by saving it in your cloud storage app of choice. I’ve found images to be easier to add to documents, so I exported a JPG of my signature and sent it to my Google Drive account.
Sign your letters and other personal documents
If you’re creating a document on your own by using tools like Microsoft Office or Google’s suite of productivity apps on your desktop, you can easily add your signature to it.
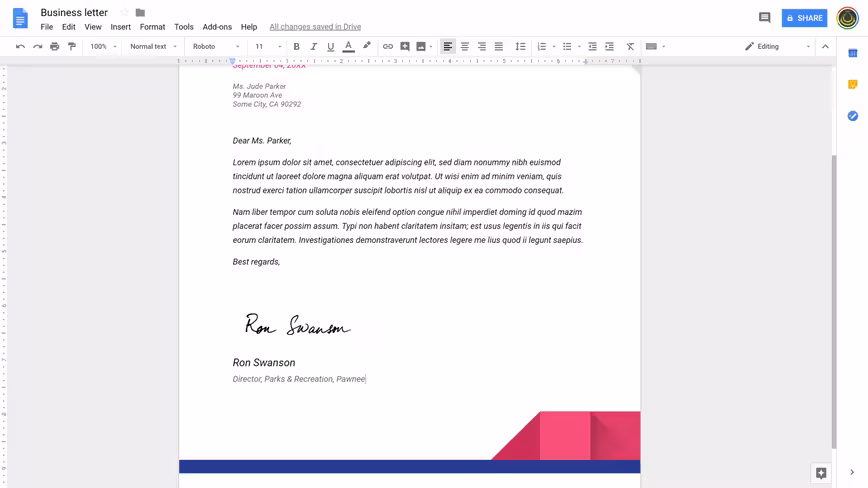
- Download the signature file from wherever you saved it in the previous steps.
- In Microsoft Office, Google Docs, or other apps, open your document, and scroll to the portion where you need to add a signature., Choose Insert > Image, and then locate your scanned signature.
- Resize it to fit the area designated for your signature, and you’re done.
How easy was that? This method also works when people send you forms in DOCX or similar editable formats: they can be opened in your document editor of choice, and you can insert your signature as described above.
Sign PDF forms
So you’ve received a form as a PDF, and you need to sign it – but you can’t open it in an editor like Google Docs. Don’t sweat it – you can rely on any of several free PDF editors available online.
My app of choice is Sejda, which you can use in your desktop browser for free. Here’s how to use it:
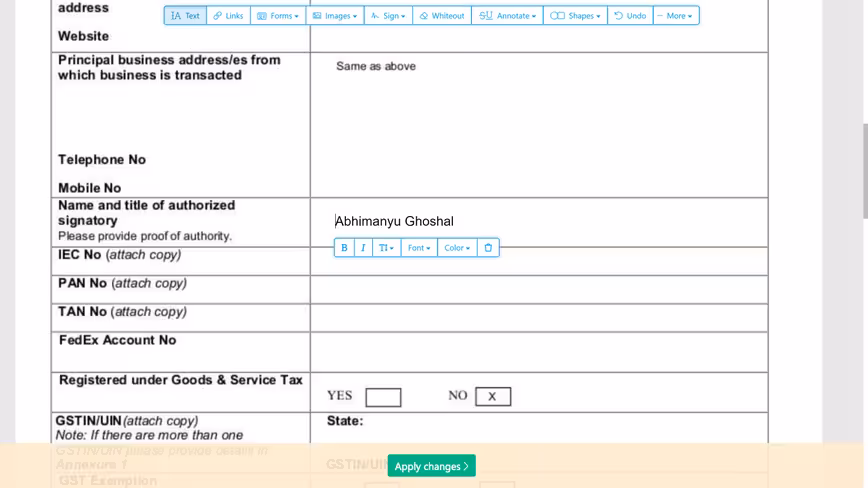
- Point your desktop browser to sejda.com, and choose ‘Fill & Sign.’
- Drag your form PDF onto the web page to get started.
- Use the text tool to fill out fields in the form. It’s selected by default, so you can add text just by starting to type. You can then click and drag the text to move it around the form, and align it correctly in each text field.
- Click the Sign button to add a signature. If you’ve scanned your signature as detailed above, you can upload it using the ‘Image’ option.
- Alternatively, if you’ve got a touchscreen and a stylus, you can simply choose the ‘Draw’ option and create a digital signature right away.
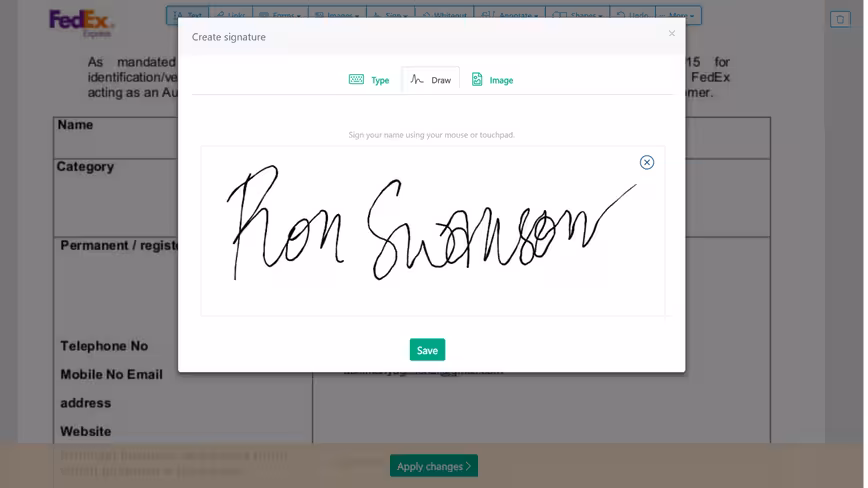
- Drag the signature into position, and resize it to fit the appropriate field.
- Click ‘Apply changes’ at the bottom of the web page, and then click ‘Download’ to grab the signed file.
Skip your desktop entirely and just use your phone
Adobe’s Fill & Sign app is a godsend: it’s free, works on iOS and Android with PDFs, and doesn’t require you to register to use it. Oh, and you can also scan printed forms and sign them on your device. Just download it from Google Play or the App Store to get started, and then follow these steps.
- Launch Fill & Sign, and open a form saved on your device by tapping ‘Select a form to fill out’; images in your camera roll work as well.
- Alternatively, take a picture of a printed form by choosing the option in the menu that pops up.
- Tap anywhere to begin adding text; long-press on the text to begin moving it around on the document. You can also adjust the text size by tapping on the buttons that pop up above.
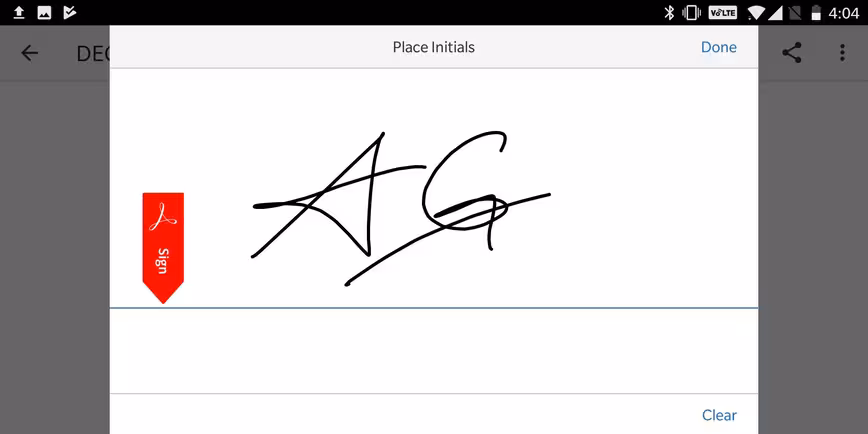
- To create a signature, tap the pen button at the top right; you’ll then need to draw it on your touchscreen in landscape mode using your finger or a stylus. Tap ‘Clear’ to try again, and ‘Done’ when you’re finished.
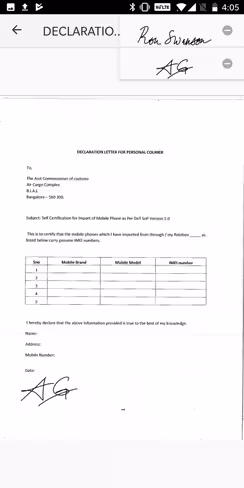
- Tap the pen button again on the next screen to bring up your signature; choose it in the menu that appears, and then move it to the right spot on your form.
- When you’re done with your form, click the share button at the top right corner, and choose where you’d like to save the PDF.
That’s it – no printer or scanner necessary!
Want more TNW Basics? Let us know what you’d like to learn about in the comments.
Get the TNW newsletter
Get the most important tech news in your inbox each week.