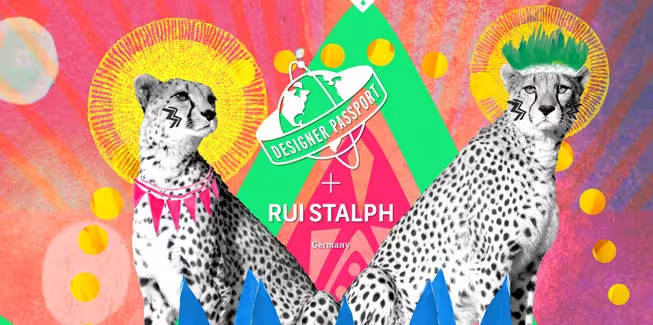
Rui Stalph is an artist and Web designer based in Germany and Japan. She loves to create designs that involve animals and colors with a little bit of quirkiness. This post was originally published on the Shutterstock blog and has been reprinted with permission.
Rui Stalph is an illustrator who loves to spread her passion for animals, colors, and a bit of quirkiness through her designs. She was born in Japan, grew up in Kenya, and currently lives in Germany, while traveling a lot for inspiration. It was on one of those trips that she came up with the idea for this piece.
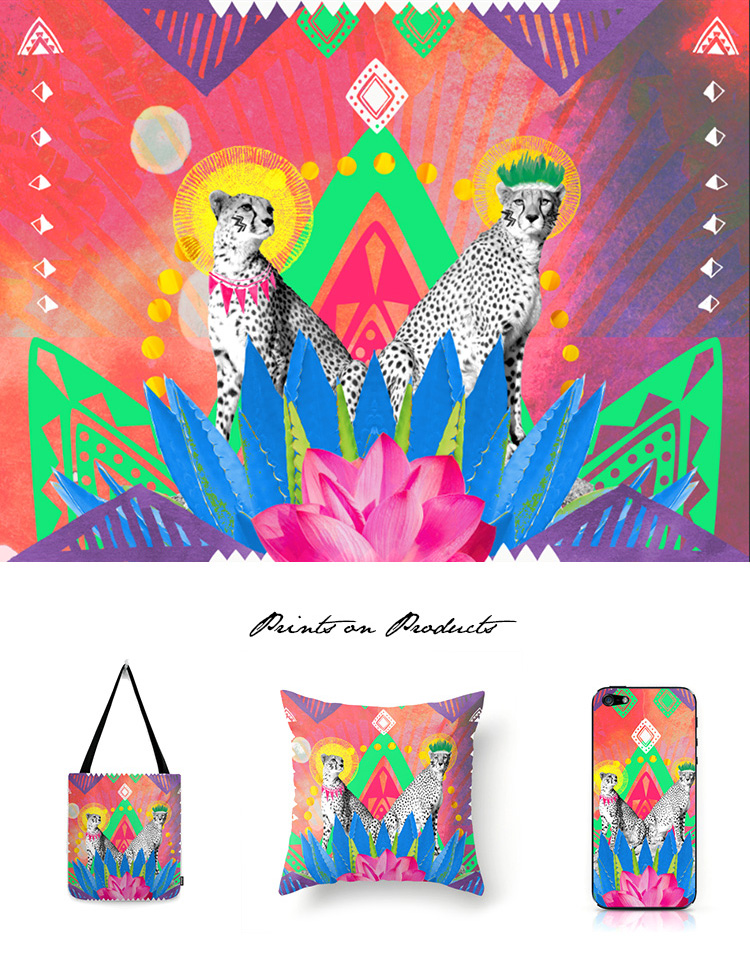
“Inspired by the beautiful cheetahs I met on a safari journey in Africa, this pattern has been designed so that it can not only be used as wall art, but also on various fabrics and objects for interior goods, filled with bright colors and unique shapes.”
Step 1
Create a new Photoshop document at 4000 x 3000 pixels at 300dpi. (The larger the size, the more opportunities you’ll have to print on various objects.) Color the background with a light pinkish color (I used #fed2d2). Now place in the banana-leaf image and use a guide to make sure the plant is centered in width. Select Hue as a blending mode for this layer.
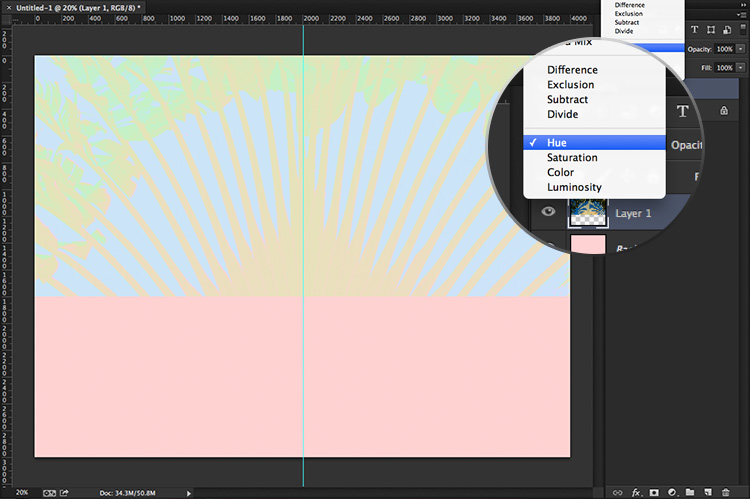
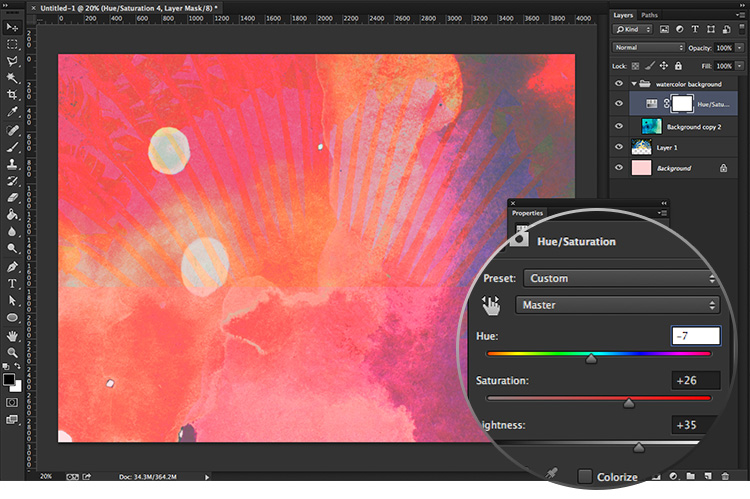
Step 2
To create background texture, place a watercolor image on top of the document. In this case, the original watercolor was blue-based, but I felt it wasn’t quite right, so I decided to play around with the colors until I was happy with it. In the end, I decided to go with hue/saturation adjustment as shown here, setting the blending mode of the watercolor layer to Hue. This way, you get to see a tint of the banana leaf image behind.
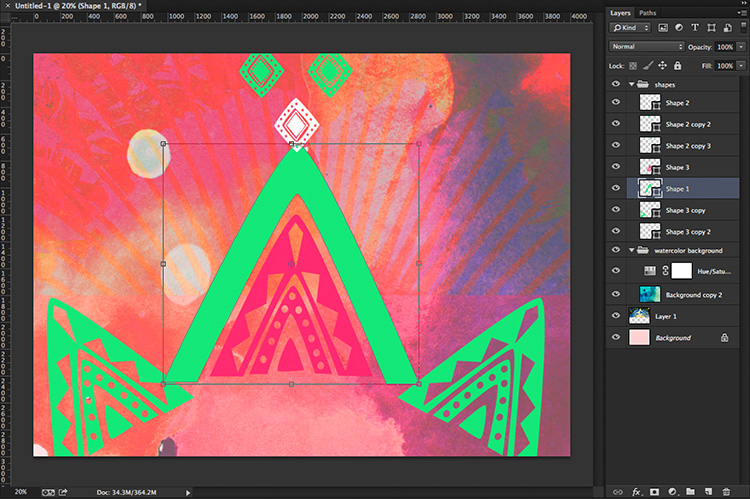
 Step 3
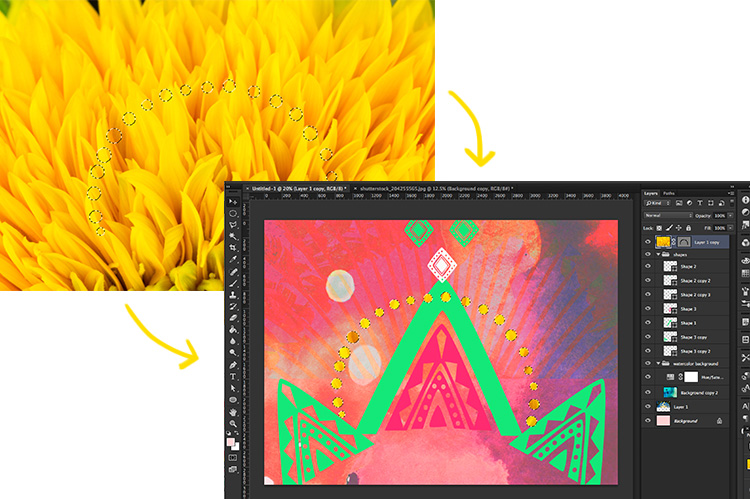
Now we need some elements to go above the watercolour. Open the vector pattern in Illustrator and Select All > Object > Ungroup. Select the shapes you like with the selection tool and copy them on the side. I selected the triangular and diamond-shaped patterns.

Step 4
Paste the shapes individually into your Photoshop document. To do so, simply select the shapes in Illustrator, copy, and paste onto the document as a shape layer. This will allow the shapes to paste in a vector format, which is great for resizing and editing. Now play around with the shapes: duplicate, resize, rotate, and change colors so you have a dynamic background before you add on the cheetahs.
Step 5
Open the yellow flower image and make some randomly sized circles with the elliptical marquee tool (hold Shift to make multiple circles at once). Mask this flower layer by selecting Layer Mask mode, and drag this onto the center of the artwork.
Step 6
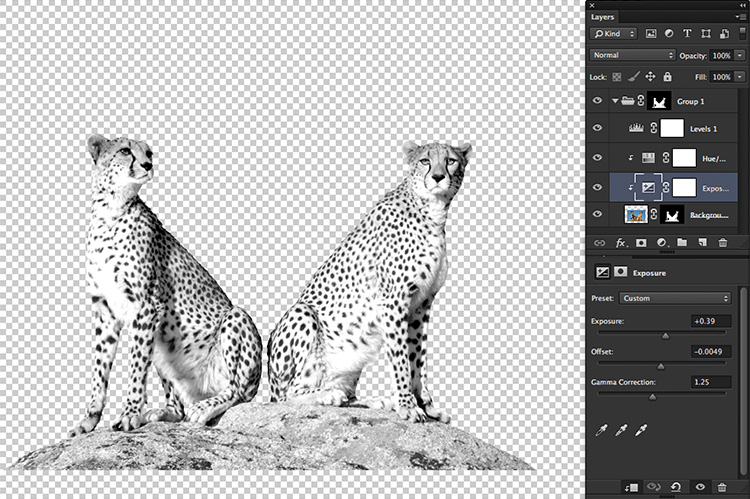
Although the art so far has been symmetrical, this image is perfect to break that pattern. Open the cheetah image and use the pen tool to cut out the background. Place an adjustment layer of hue/saturation and set the saturation to -100. Play around with the exposure and levels to get a nice contrast of the black and white, being careful not to overexpose. Drag the cheetah into the center, on top of the background you have created.
Step 7
Now the cheetahs need some accessories. You can add your own illustrations, or vector shapes, or both. I used a shape from this image to place behind the animal’s head, then also added my own illustrations on both of the cheetahs to add a little bit of personality. I usually draw shapes in a sketchbook, scan them, and edit the shapes further in Photoshop to make them fit the object I’m working with.

Step 8
Open the aloe image and cut out the background with the pen tool. I want this aloe plant to be symmetrical on both sides, so first mask the left half of the plant. Duplicate this layer and go to Edit > Transform > Flip Horizontal. Place the two layers side by side and combine both layers into a single smart object. Drag that to the artwork document and align it to the center with the help of the guide. Next, open this pink flower image, cut out the flower, and drag it onto the document before moving to step 9.

Step 9
Since the green aloe blends in with the green shapes, it’s better to adjust the color. Add a hue/saturation adjustment layer to edit the image to a bright blue. Set this adjustment layer’s blending mode to Light Color. This makes the middle part of the aloe green, which I like.

Step 10
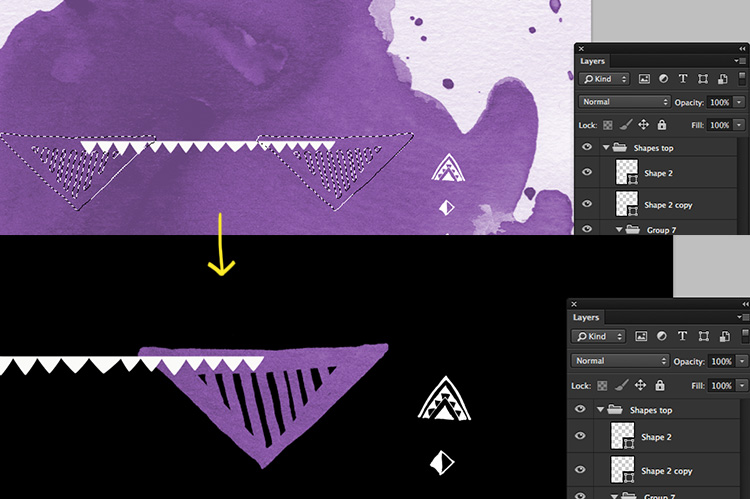
Scan in illustrated shapes and cut out the background in Photoshop. Add a watercolor layer and mask the layer to the shapes. This can be done by command-clicking the shapes to create a selection, then clicking on the watercolor layer and selecting the Quick Mask mode. You can do so much here — just be careful not to overdo it, or the cheetahs will lose their focus.
Step 11
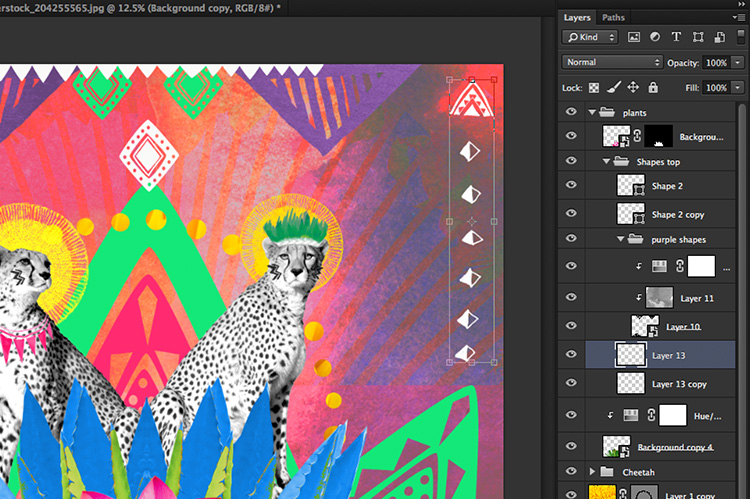
Drag these illustrated elements onto the artwork. Play around with the placement, but don’t enlarge them if it’s not a vector image, as the quality of the shapes will decrease. Make sure the shapes are even on both sides of the whole document.
Step 12
Done! As I mentioned, this artwork is great for items such as pillows, mugs, or duvet covers, as it has a focus point in the center, with decor on the sides. Many websites offer services where you can upload your JPEG image and have it produced on products, so why not have a go and brighten up your home with some of your original artwork?
Check out Rui’s lightbox to view all of the images used in this tutorial »
Get the TNW newsletter
Get the most important tech news in your inbox each week.