
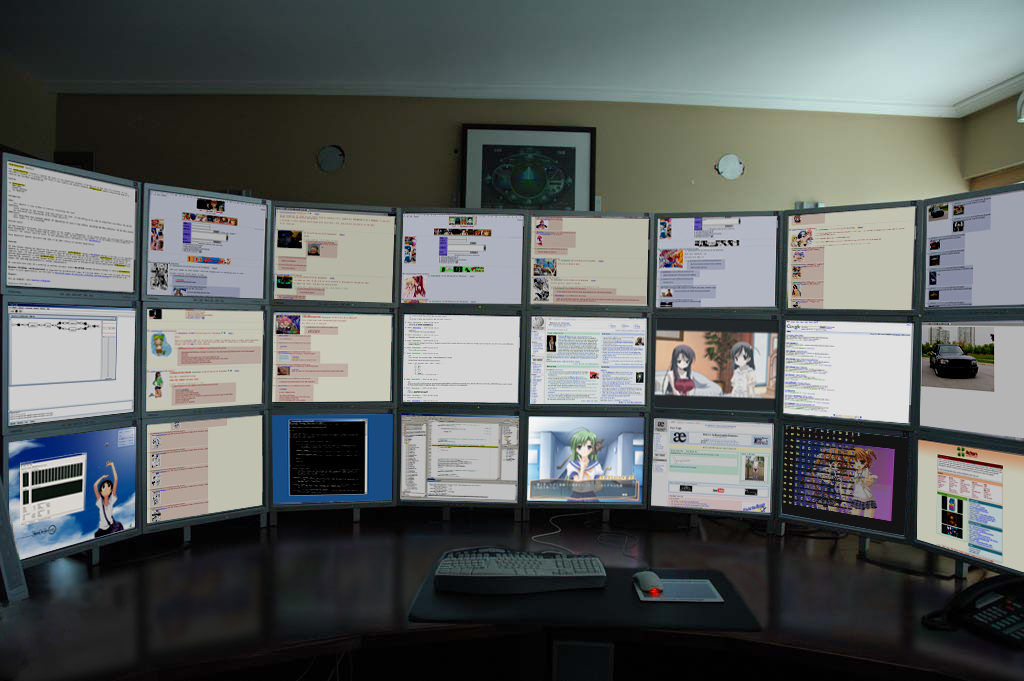
If you’re like me, you have different computers for different uses. In my case, I have a laptop that I use in a pinch, and for some dedicated audio work. I also have a desktop that I use as my main work machine.
So how do you keep access to both computers, without having to flip back and forth between two keyboards? I use Synergy.
Synergy is an open source, keyboard/video/mouse switch that runs over your local network. Instead of having a physical switch, all I have to do is move my mouse cursor to the edge of one screen, and it will show up on the other. Where ever the cursor sits, that’s where the keyboard works.
After suggesting Synergy to TNW’s @Alex, he noted having some confusion with setting up the app. I found out, after asking around, that he’s far from the only one. So here’s a step-by-step to help you make the most out of running multiple computers.

The 💜 of EU tech
The latest rumblings from the EU tech scene, a story from our wise ol' founder Boris, and some questionable AI art. It's free, every week, in your inbox. Sign up now!
First, you’ll need to grab yourself a copy of Synergy from the repository at SourceForge. It’s available for all major operating systems (yes, Mac and Unix included) and, though it is only officially supported up to Windows XP, I can verify that it works on Windows Vista and Windows 7 as well.
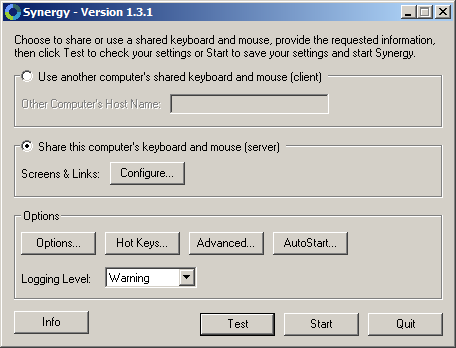
Now that you’ve downloaded and installed Synergy, you’ll need to choose which computer you want to use as your server. All other computers will be set up quite easily, simply by selecting the “Client” option. For the server, make sure to check the appropriate option, then open the Configure button.
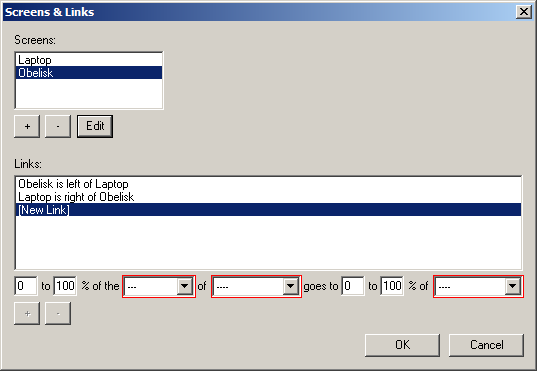
Once inside the Configure options, you’ll need to check the + button, to add a “Screen”. Screens are computers, in this case. As you can see in my example, I’m running 2 “screens”; Laptop and Obelisk. As you add screens, you’ll have some options. The only ones that are required are for you to give the screen a Name, then an Alias. Beyond that, you have some other options that might be viable to your own setup, but we’re only going to cover the basics.
And now, since you’ve set up your screens, you need to tell Synergy where they are. This is handled via the dropdown boxes on the bottom of the Screens & Links section.
As you can see here, Synergy knows that my big computer is to the left of my laptop, and vice versa. I told Synergy this by specifying the statement on the bottom with the appropriate options. Bear in mind that you’ll need to tell Synergy both directions, so once you’ve specified one, you’ll need to do a vice versa and specify the opposite:

After you’ve set your direction statement, click the + button at the bottom left, and Synergy will then tell you (using this case as an example) that Obelisk is to the left of Laptop. When you have that set, go back and reverse your statement and directions, telling Synergy where your main computer is in relation to another. That’s all it takes to set up your server, so now click Start.
As I said earlier, setting up the client screens is supremely simple. In the main options screen, you’ll want to check the radio button for “Use another computer’s shared keyboard and mouse (client)”. Select the button, type in the server computer’s name and then click Start.
Now, starting from your Server computer, move your mouse cursor off the edge of the screen and it should appear on the client computer. You’re now free to use your keyboard and mouse on that computer, without having to physically move to it. Oh, there’s also the handy feature of clipboard carryover. Whatever you have stored on the clipboard on one will be automatically transferred to the computer that you use next.
Synergy does have its bugs, and they vary from system to system. But overall it’s a great solution for using multiple computers without having to set up a true KVM switch.
Get the TNW newsletter
Get the most important tech news in your inbox each week.