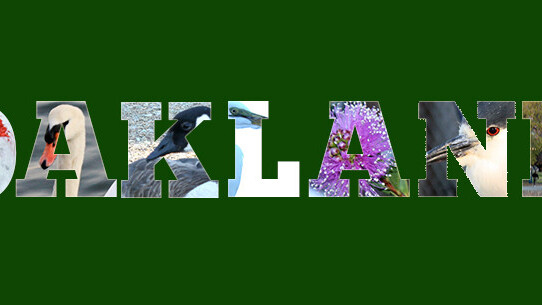
I always loved Bruce Springsteen’s Greetings from Asbury Park N.J.
Sure, I love the music, but it was the cover, with all those images stuffed inside the lettering, that first caught my eye. That style, often seen on postcards—so old fashioned, so evocative—really stirred my imagination because, of course, it can be used for anything you want.

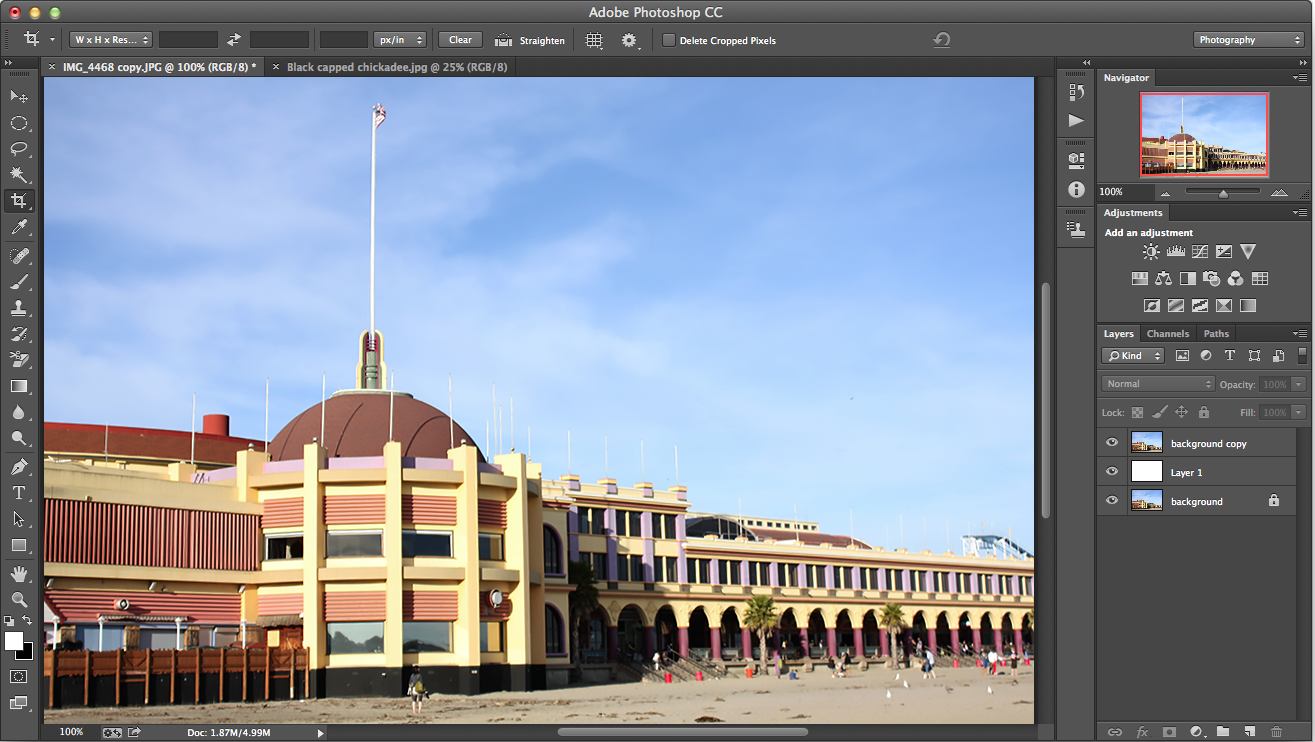
It takes a few steps to accomplish a simplified interpretation of this effect in most recent versions of Photoshop. The screenshots below are from Photoshop CC, while the steps assume a basic level of familiarity with the app.
There are actually two techniques you can use to place images into letterforms, depending on the results you want. I’ll outline both of them.
Photo from a single image
The first way to place images inside text is to use a single image. Each letter spans a unique part of the picture, showing a vista within the letters.
1. Launch Photoshop and choose the image you want to use.
2. Duplicate the Background Layer (Layer > Duplicate Layer), create a third blank layer (Layer > New Layer) positioned in between the two, and fill it in with white (Edit > Fill > Foreground color).
3. Click on the Background Copy layer and select the Text tool.
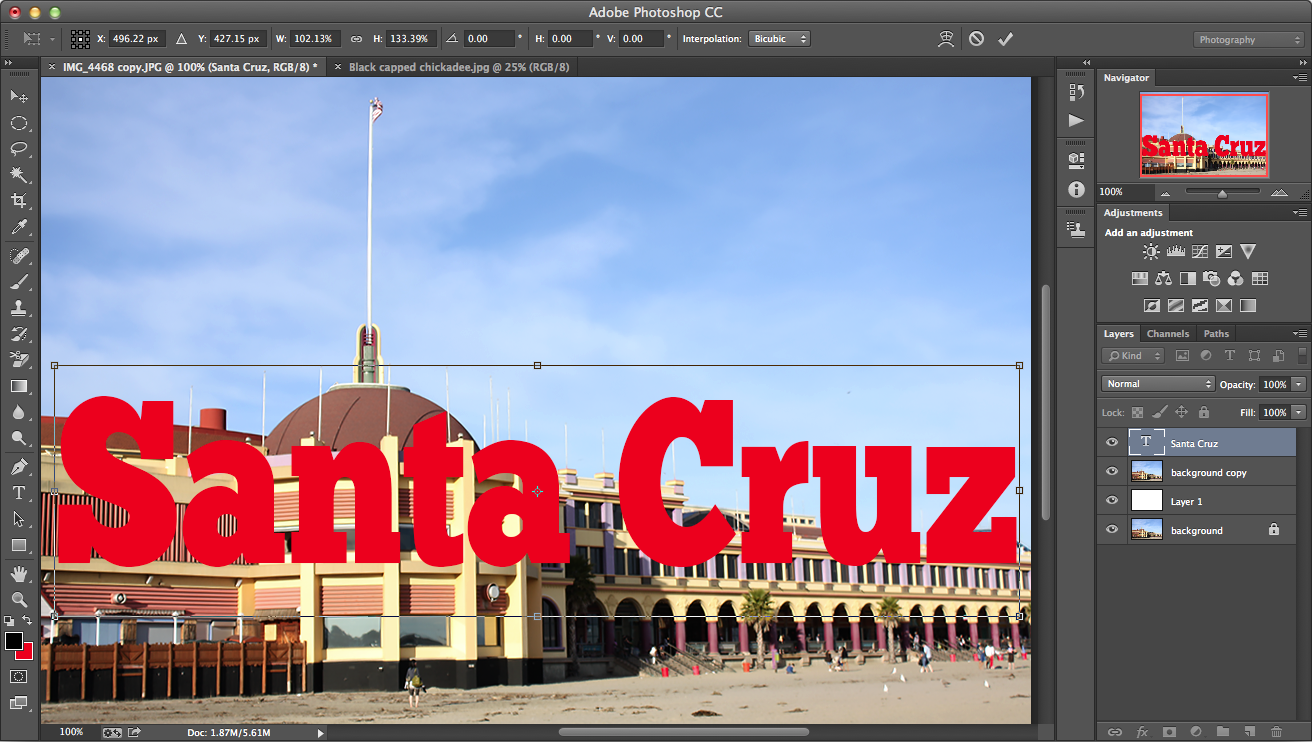
4. Choose a thick font that will let you view images inside it and set a contrasting color in the foreground. It doesn’t really matter what the text color is, but the contrast helps you to see and position the text.
5. Type in your word or words and use the Free Transform command (Edit > Free Transform) to stretch or distort the letters as you wish. To see the Transform Control outline, check the Show Transform Control box in the Options Bar which shows when you switch to the Move tool.
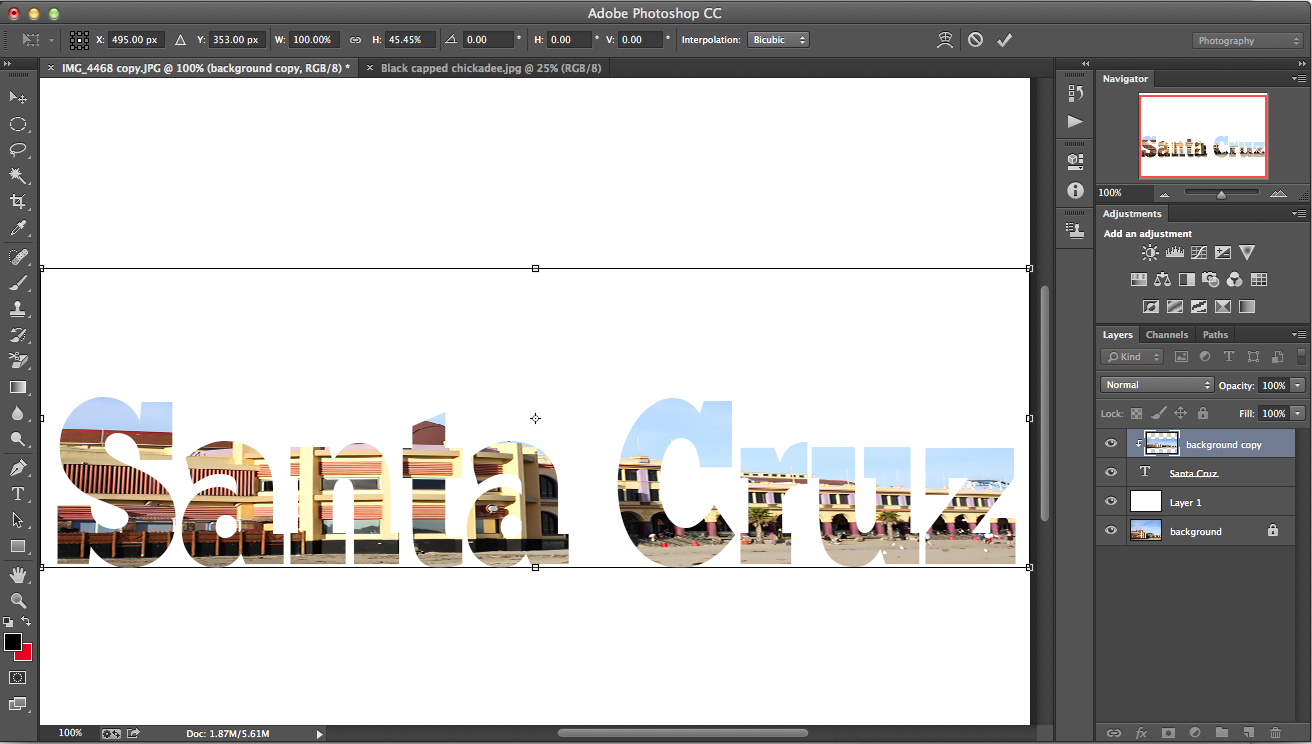
6. Drag the Text layer below the Background Copy layer in the Layers Panel so that the text and white layers are in the middle.
7. With the Background Copy layer selected, create a clipping mask (Layer > Create Clipping Mask).
8. You’ll now see the image masked inside the text. After that, you can use the Layer Style dialog (from the fx button at the bottom of the Layers Panel) to finish off your composition with a drop shadow or other special effects.
Photos from multiple images
The second technique differs from the first because you can add different images in each of the letters—like the Springsteen album cover—as opposed to superimposing type from a single image.
1. Open an image you want to use as a background or just use a blank document—I used a photo background for this example.
2. Choose the Type tool from the Tools panel and a generous font that can accommodate images, and type the first letter. Commit to the letter by clicking on the checkmark in the options bar.
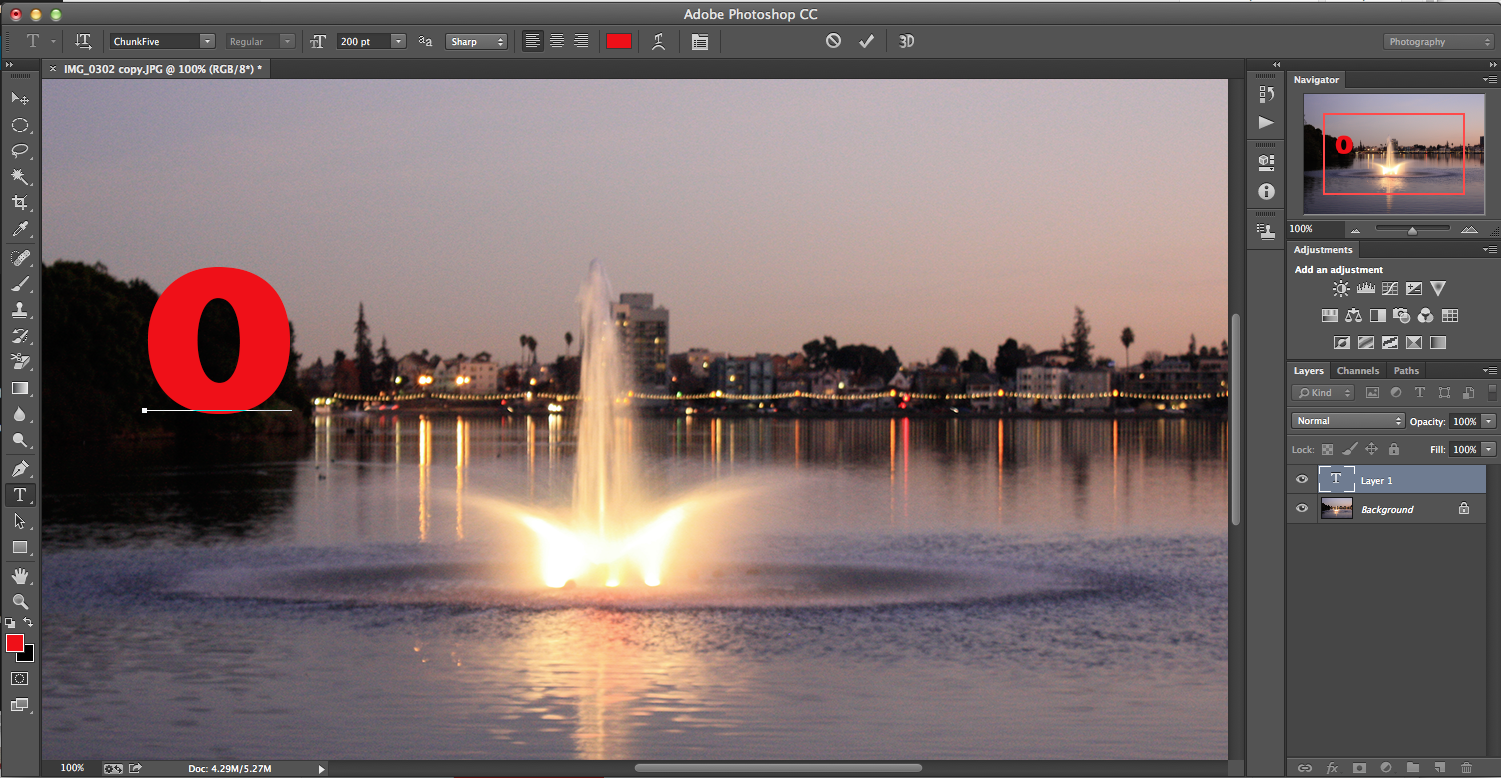
3. Use the Free Transform control to make size or positioning adjustments to the letter.
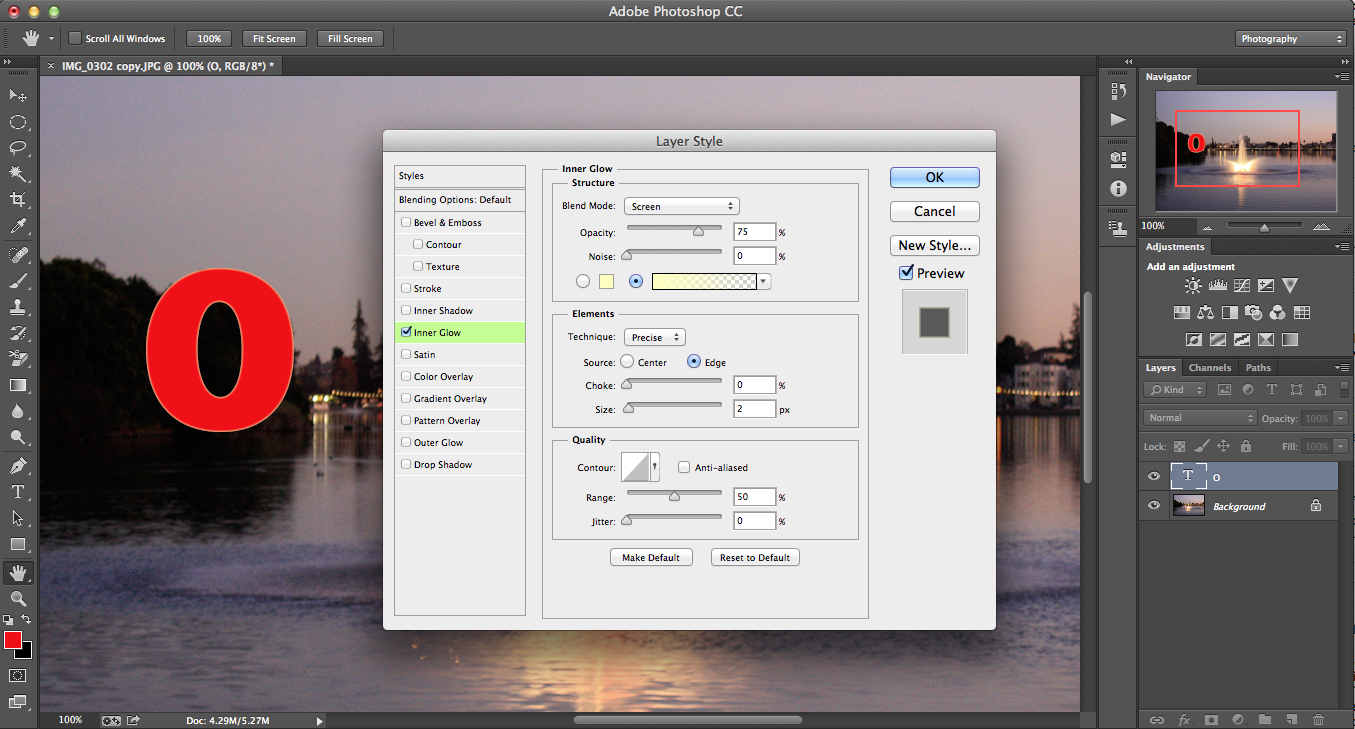
4. Add special effects like a stroke or glow with the Layer Styles control at the bottom of the Layers Panel or choose Layer > Layer Style. When you’re done with the letter, it’s time to duplicate it.
5. Select the type layer and use Control/Command J (Windows/Mac) to duplicate it. Then, with the Move tool, reposition the duplicate letter—which was placed directly on top of the original one—right beside it. You now have two of the same letters. Go ahead and create the proper number of letters for your word. Each letter will reside on its own layer and you can move it by selecting the proper layer.
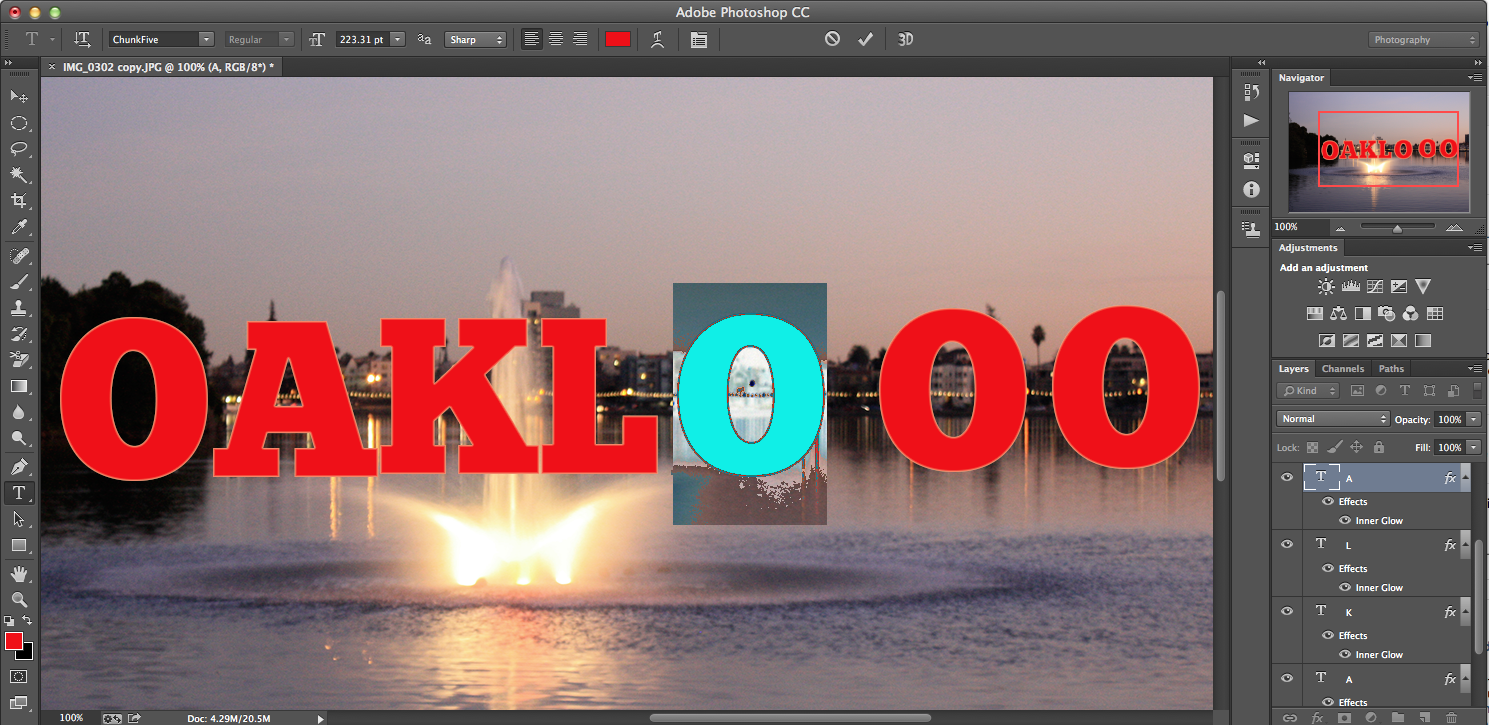
6. Now change the letters by selecting and typing the correct keystroke. With each change, accept the type with the checkmark in the options bar.
7. When you have all the letters displayed as a proper word, it’s time to set the images inside them. Select a letter layer and drag an image into the document. The image appears in its own layer directly above the letter. Hit the return key to accept the new image.

8. To get the image inside the letter, use the Clipping Mask (Layer > Create Clipping Mask). You can adjust the position of the image after you place it by using the Free Transform control, which is visible in outline form when you choose the Move tool. If you don’t like how the image fits into the letter you chose, move it by dragging its layer to a different letter, and create a new clipping mask.
Note: You’ll likely want to prepare the component images ahead of time so they are cropped and sharpened to fit the small letter size.
9.Optional tweak: Choose all the letter layers and link them together with the Link Layers button at the bottom of the Layers panel, and then use the align tools in the options bar to complete the composition. Unlink the layers if you want to further tweak the position of the letters.
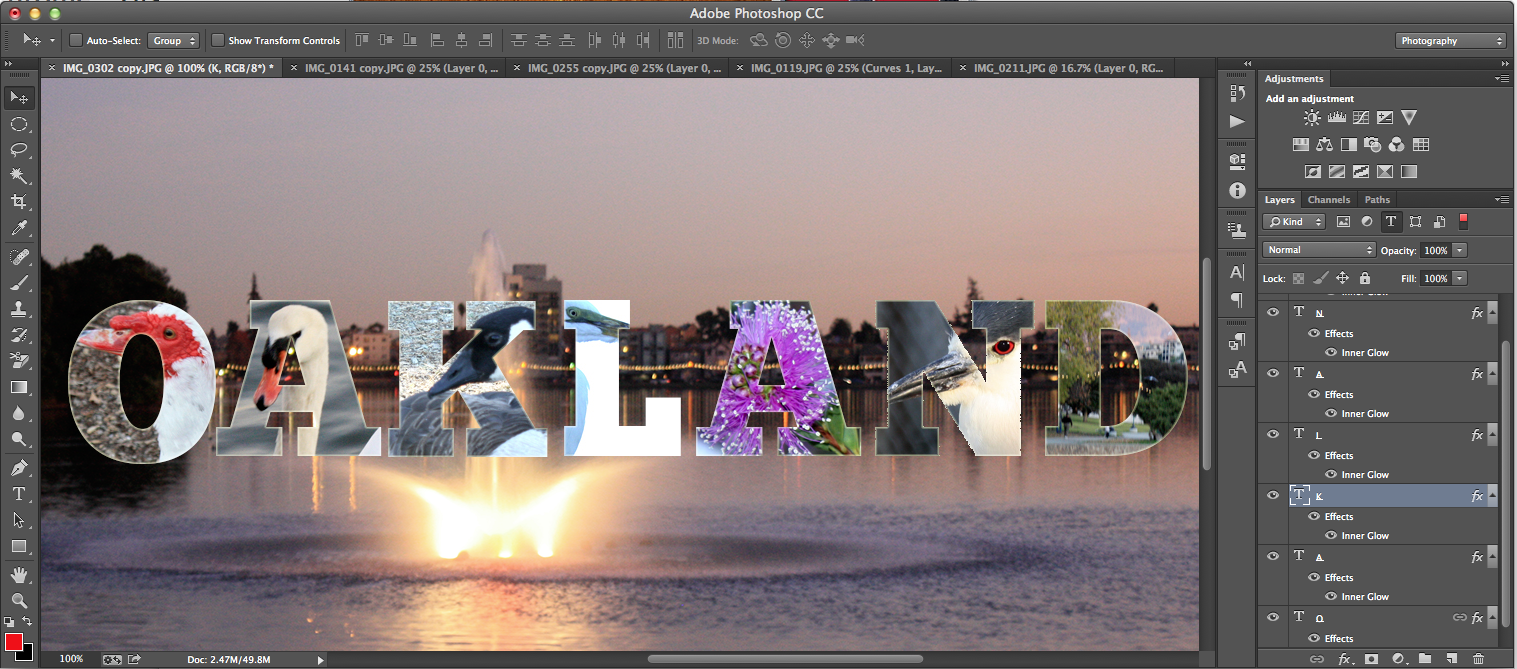
These are two quick ways to place images in text with Photoshop, and both rely on the Clipping Mask control. You can save the results as is, or make them the basis of a larger composition.
Get the TNW newsletter
Get the most important tech news in your inbox each week.